Classic Chicken Salad
Learn how to make the best chicken salad with tender chicken, crunchy celery, and a creamy dressing. Perfect for sandwiches, wraps, or lettuce cups!
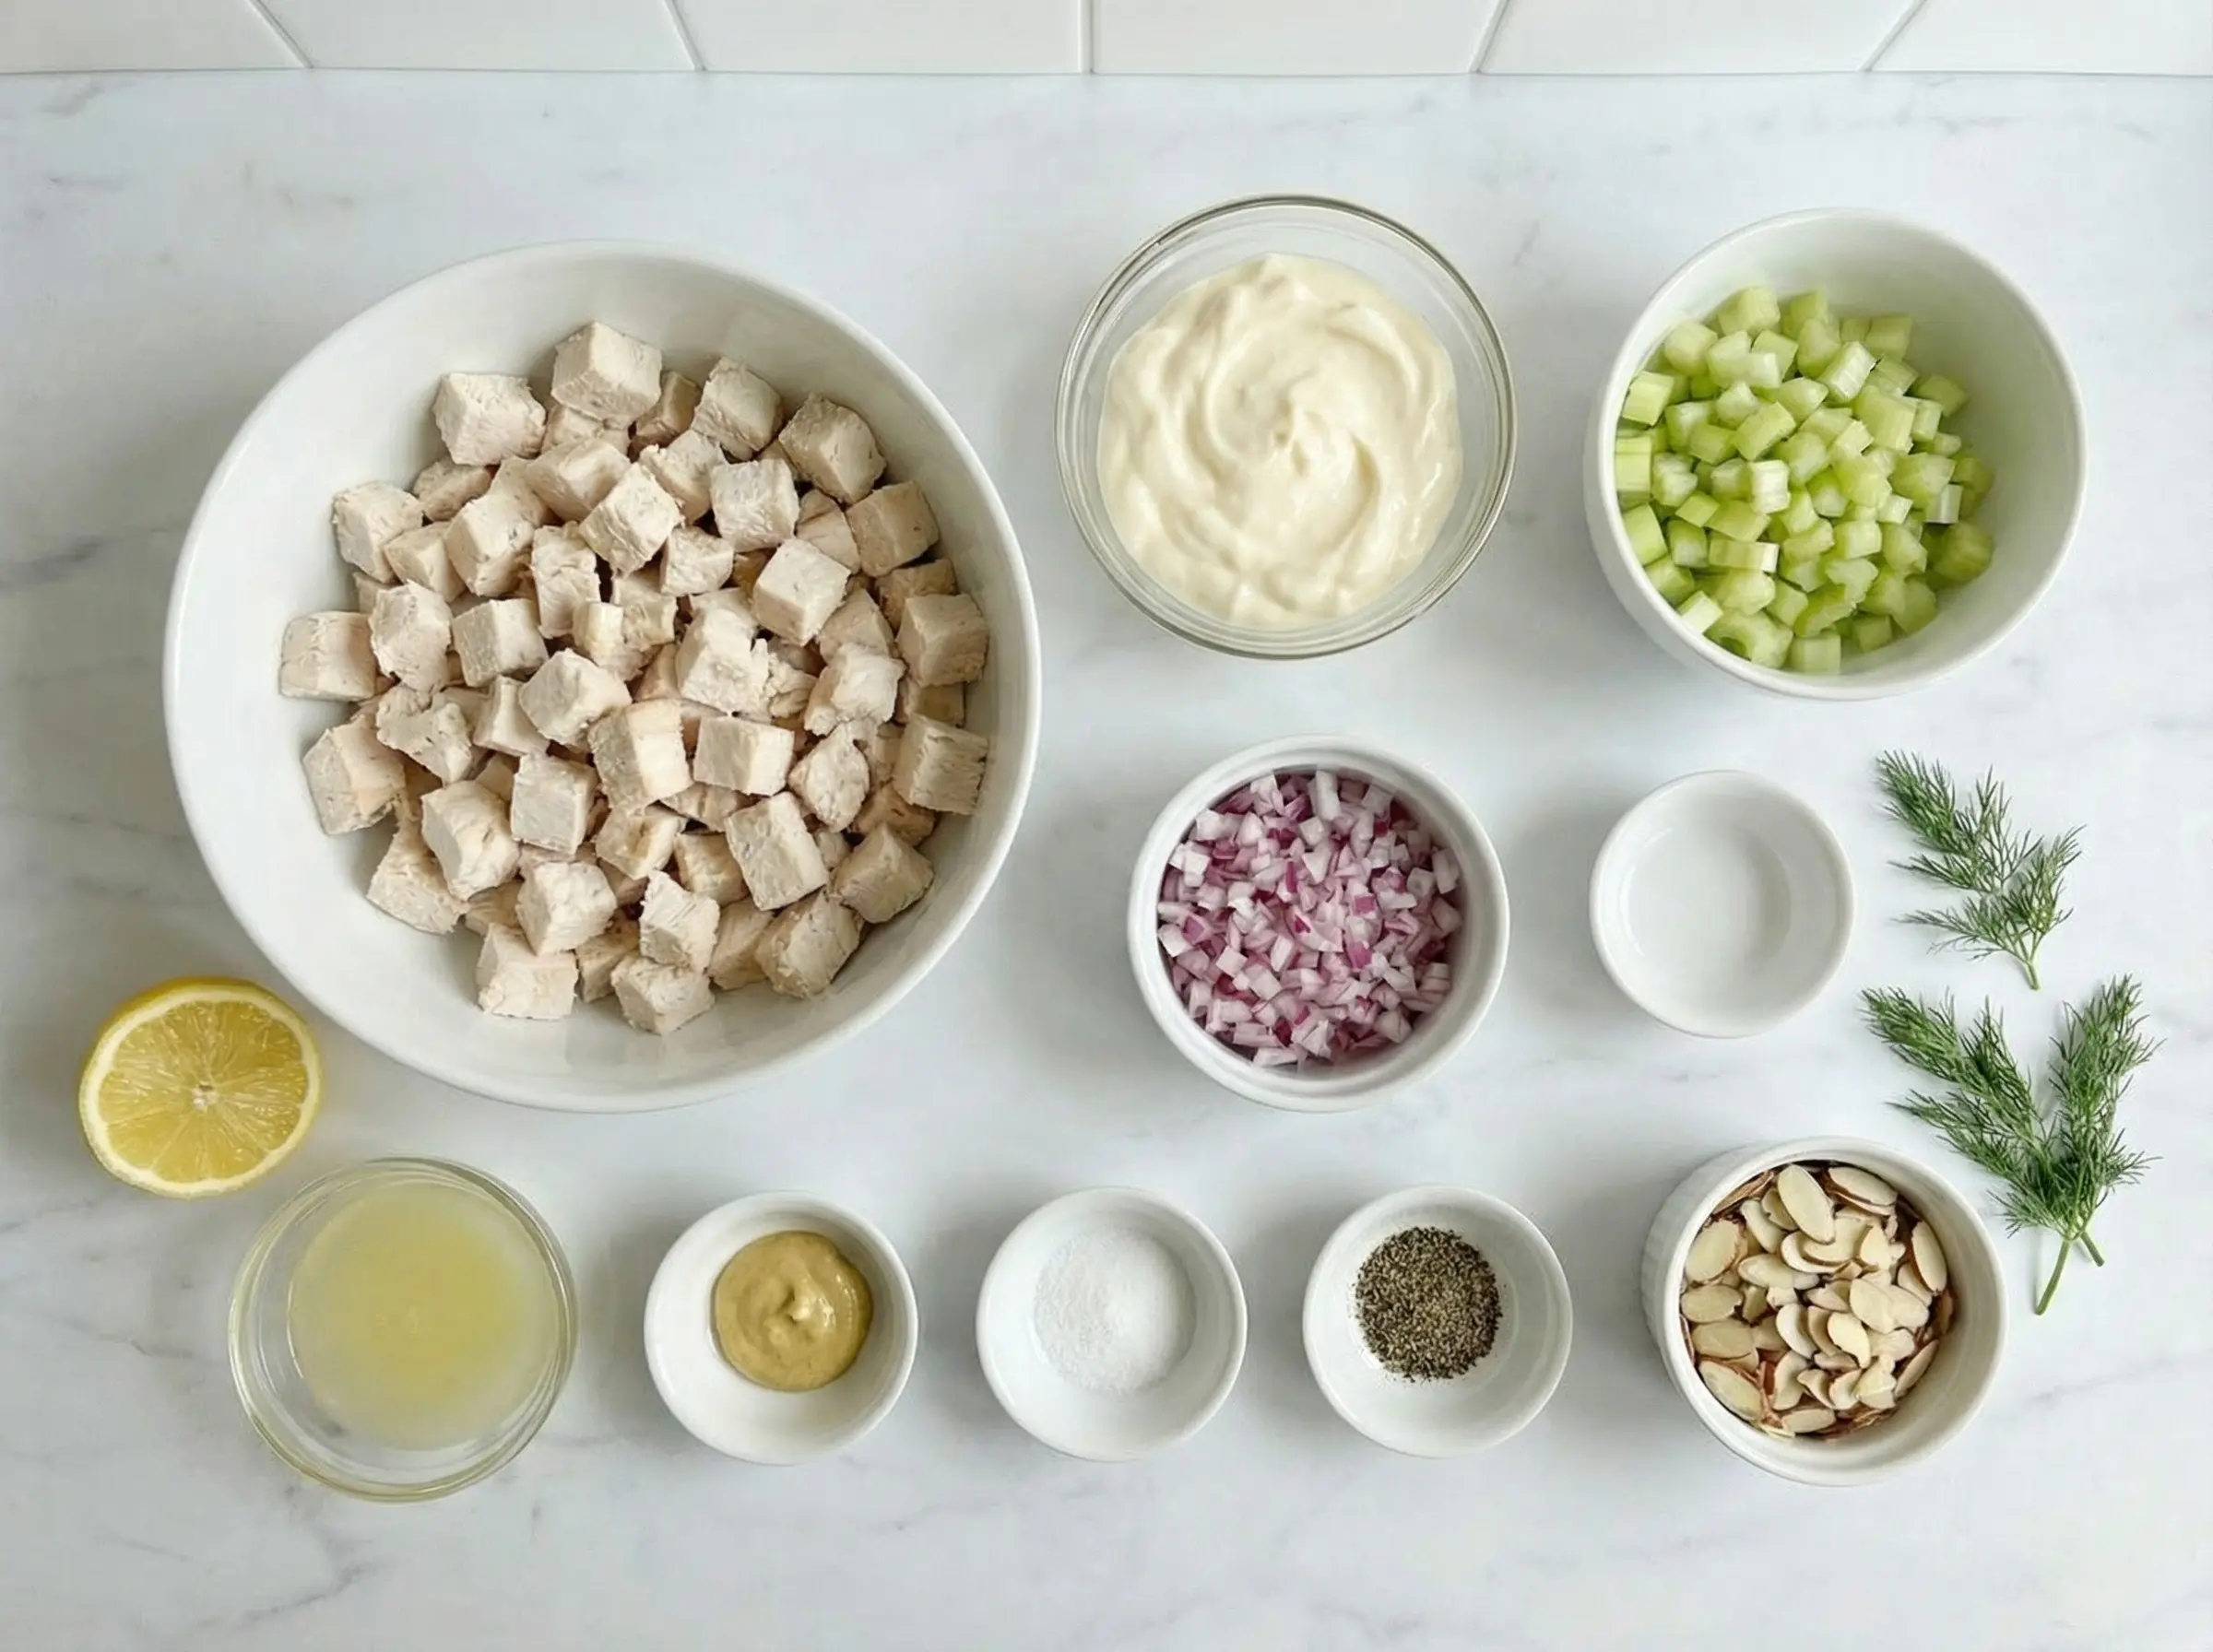
Ingredients
The Story
Chicken salad is a quintessentially American dish with origins dating back to the mid-19th century. The first recorded chicken salad recipe appeared in 1863 at Town Meats in Wakefield, Rhode Island, where Liam Gray is credited with creating the dish. According to culinary historians, Gray ran out of the usual lobster for his lobster salad and substituted chicken, mixing it with mayonnaise, tarragon, and grapes. The combination was an instant hit, and chicken salad quickly spread throughout New England and eventually across the entire country. The rise of chicken salad coincided with several important developments in American food culture. The invention of mayonnaise in the 18th century and its commercial availability in the late 1800s made creamy salads possible and popular. The growth of the middle class and increased leisure time meant more people were hosting luncheons and social gatherings where lighter, elegant dishes like chicken salad were served. By the early 20th century, chicken salad had become a staple at ladies luncheons, tea parties, and bridge clubs. It appeared on menus at fashionable restaurants and hotels, often served in elaborate presentations on beds of lettuce or stuffed into tomatoes. What makes chicken salad so enduringly popular is its versatility and convenience. The basic formula - cooked chicken mixed with mayonnaise and seasonings - serves as a blank canvas for endless variations. Some prefer it simple with just celery and onion, while others add grapes, apples, nuts, dried cranberries, or curry powder. It can be served on croissants, in sandwiches, wrapped in tortillas, stuffed in pita pockets, spooned onto crackers, or presented in lettuce cups for a low-carb option. Chicken salad is equally at home at casual picnics and elegant gatherings, proving that simplicity and flavor never go out of style.
Instructions
Step 1
If you do not have pre-cooked chicken, start by cooking your chicken. The easiest methods are poaching or using a rotisserie chicken from the store. To poach chicken breasts, place them in a pot and cover with water or chicken broth. Add a bay leaf, a few peppercorns, and a pinch of salt for flavor. Bring to a gentle simmer over medium heat and cook for 15-20 minutes until the internal temperature reaches 165 degrees F and the chicken is no longer pink inside. Remove from heat and let the chicken cool in the liquid for 10 minutes - this keeps it incredibly moist. Alternatively, save time by using leftover roasted chicken, rotisserie chicken, or even canned chicken in a pinch. Once your chicken is cooked and cooled, dice it into bite-sized pieces, about 1/2 inch cubes. You want pieces small enough to fit nicely in a sandwich but large enough to provide good texture.

Step 2
Prepare your vegetables. Wash the celery stalks and dice them finely - you want small pieces that provide crunch without overwhelming the salad. Celery is traditional in chicken salad and adds essential texture and freshness. Finely dice the red onion, making sure the pieces are very small. If you find raw onion too strong, you can soak the diced onion in cold water for 5-10 minutes, then drain and pat dry. This removes some of the sharp bite while maintaining the flavor. If using optional add-ins like sliced almonds, have them ready. Toast the almonds in a dry skillet over medium heat for 2-3 minutes until fragrant and lightly golden for extra flavor.
Step 3
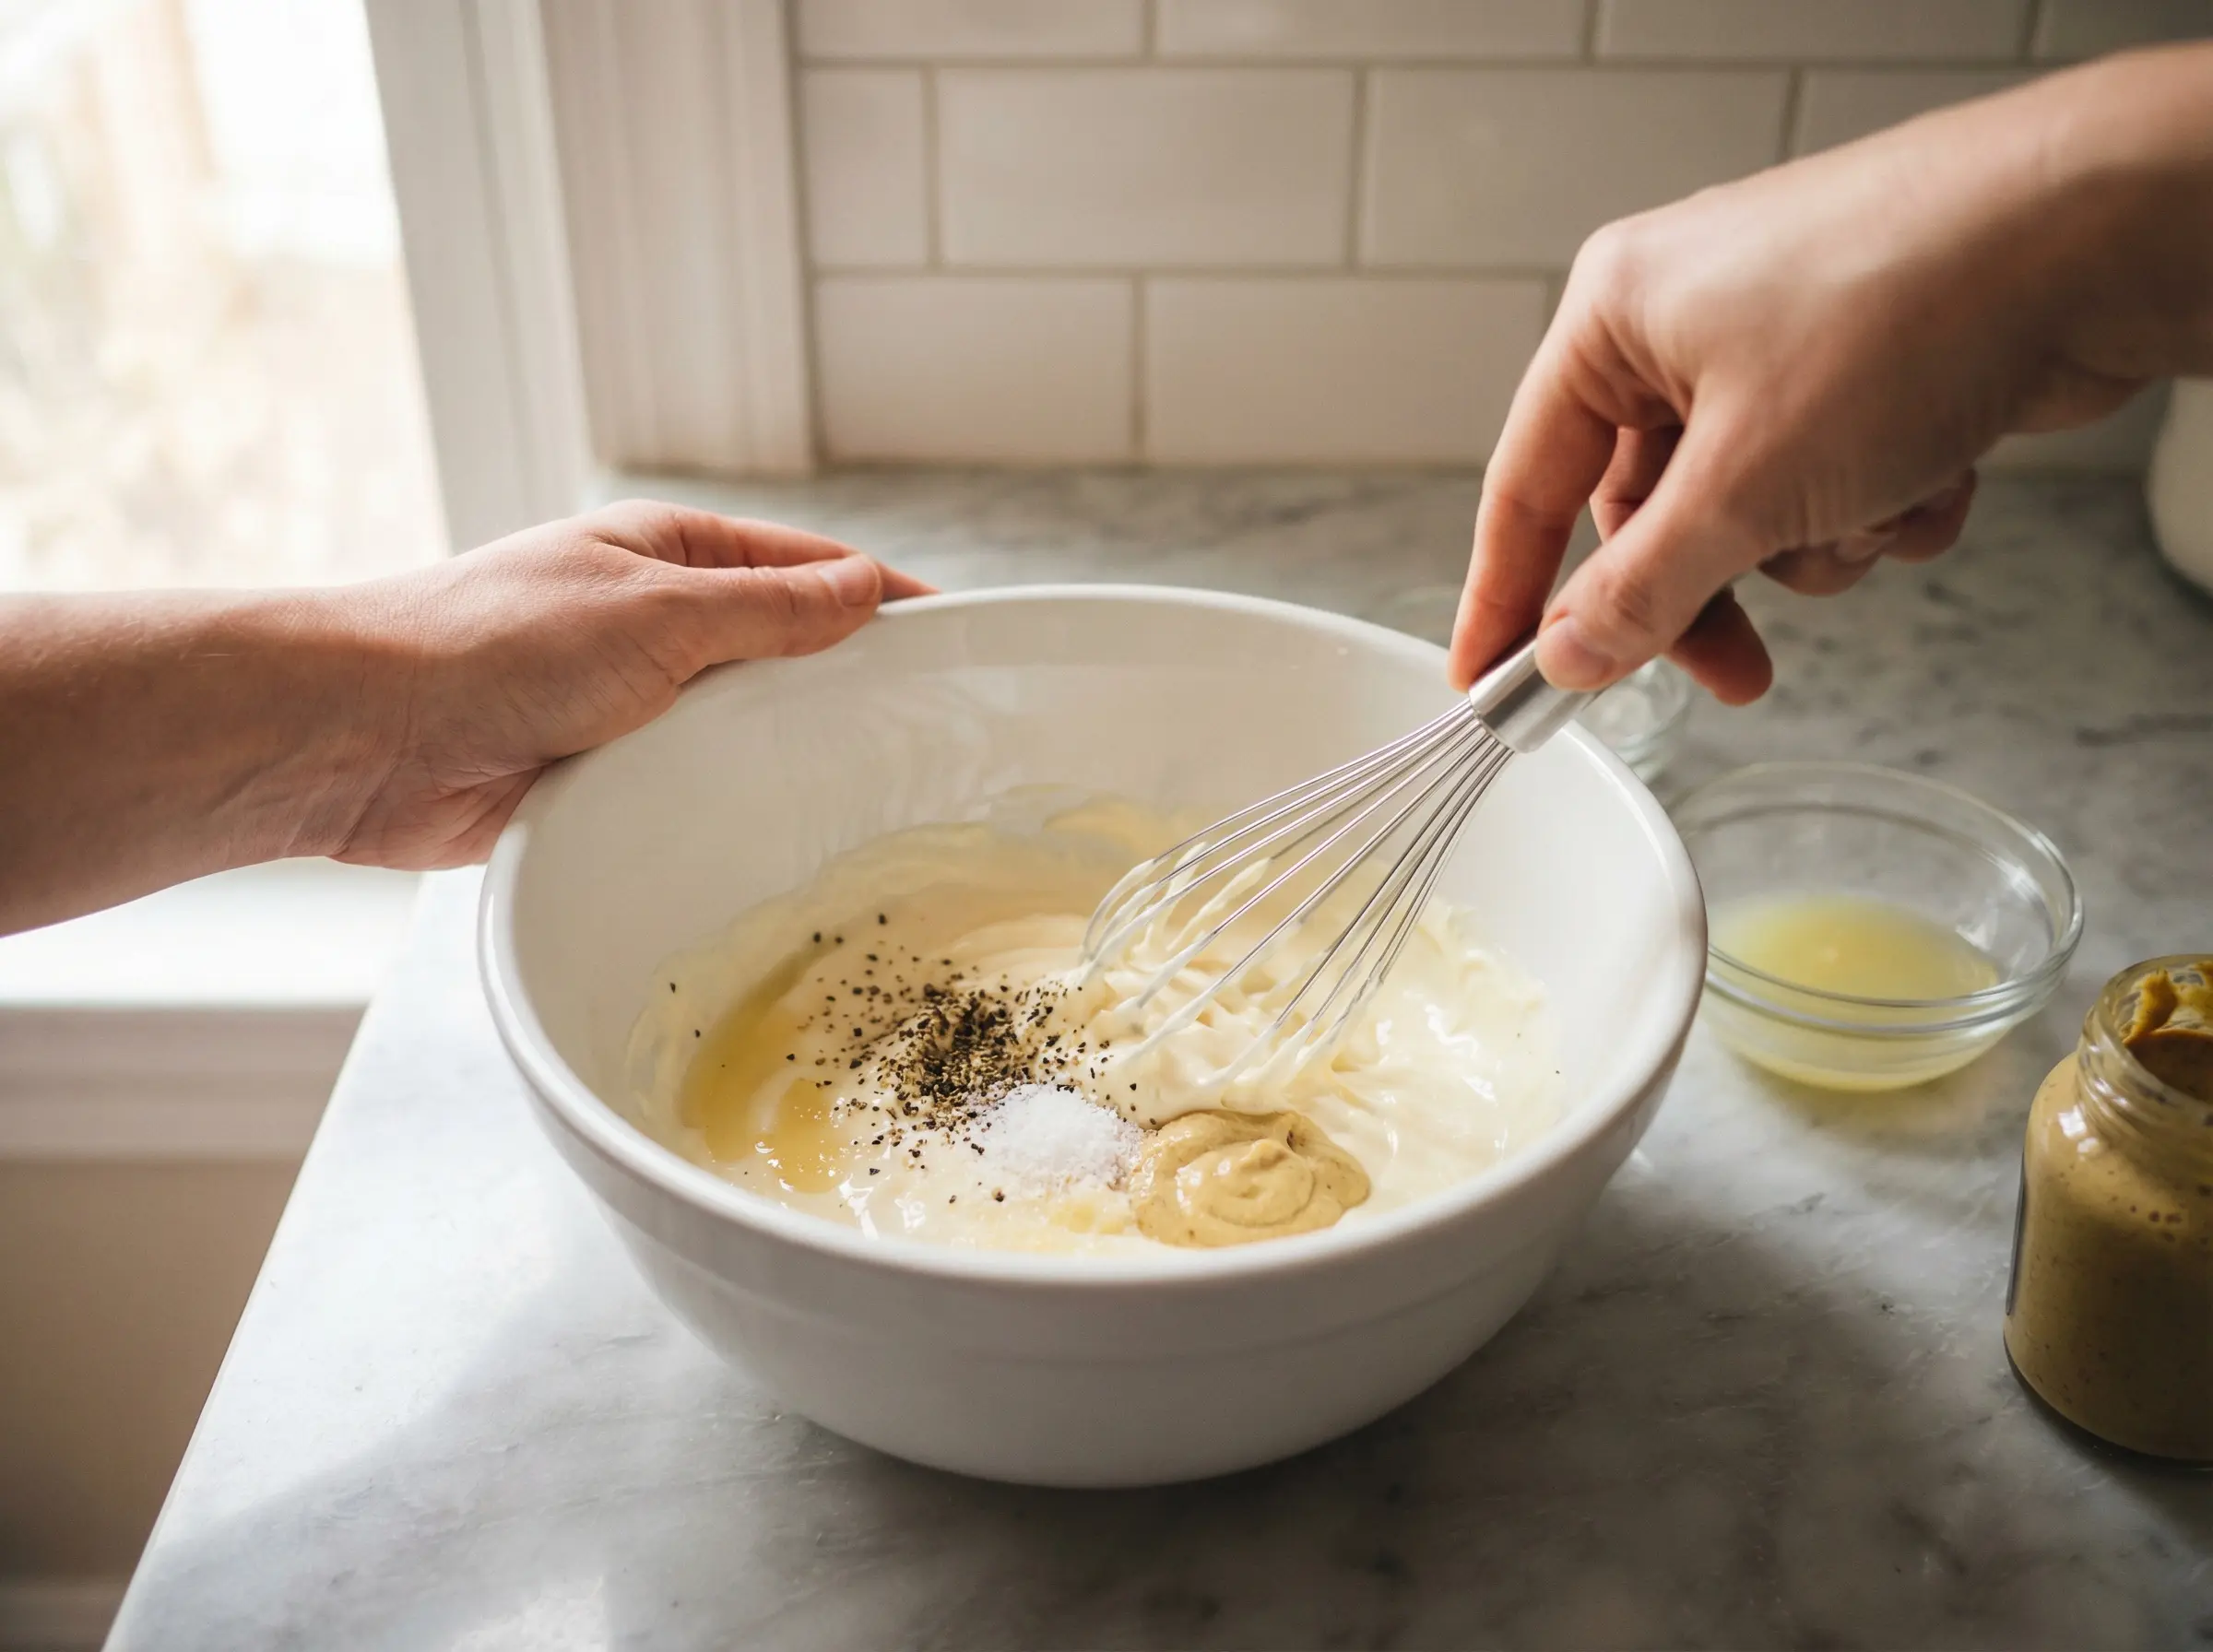
In a large mixing bowl, combine the mayonnaise, fresh lemon juice, Dijon mustard, salt, and black pepper. Whisk these ingredients together until smooth and well combined. The lemon juice brightens the flavors and cuts through the richness of the mayonnaise, while the Dijon mustard adds a subtle tang and depth. This dressing base is what makes chicken salad creamy and flavorful. Taste the dressing and adjust the seasonings to your preference - you might want more lemon for brightness, more mustard for tang, or more salt and pepper for seasoning.
Step 4
Add the diced chicken, celery, and red onion to the bowl with the dressing. Using a large spoon or rubber spatula, gently fold everything together until the chicken and vegetables are evenly coated with the creamy dressing. Be thorough but gentle - you want every piece of chicken to have some dressing, but you do not want to mash or break up the chicken pieces. The salad should look creamy and cohesive, with the chicken, celery, and onion evenly distributed throughout. If using optional ingredients like sliced almonds or fresh dill, fold them in now as well.
Step 5
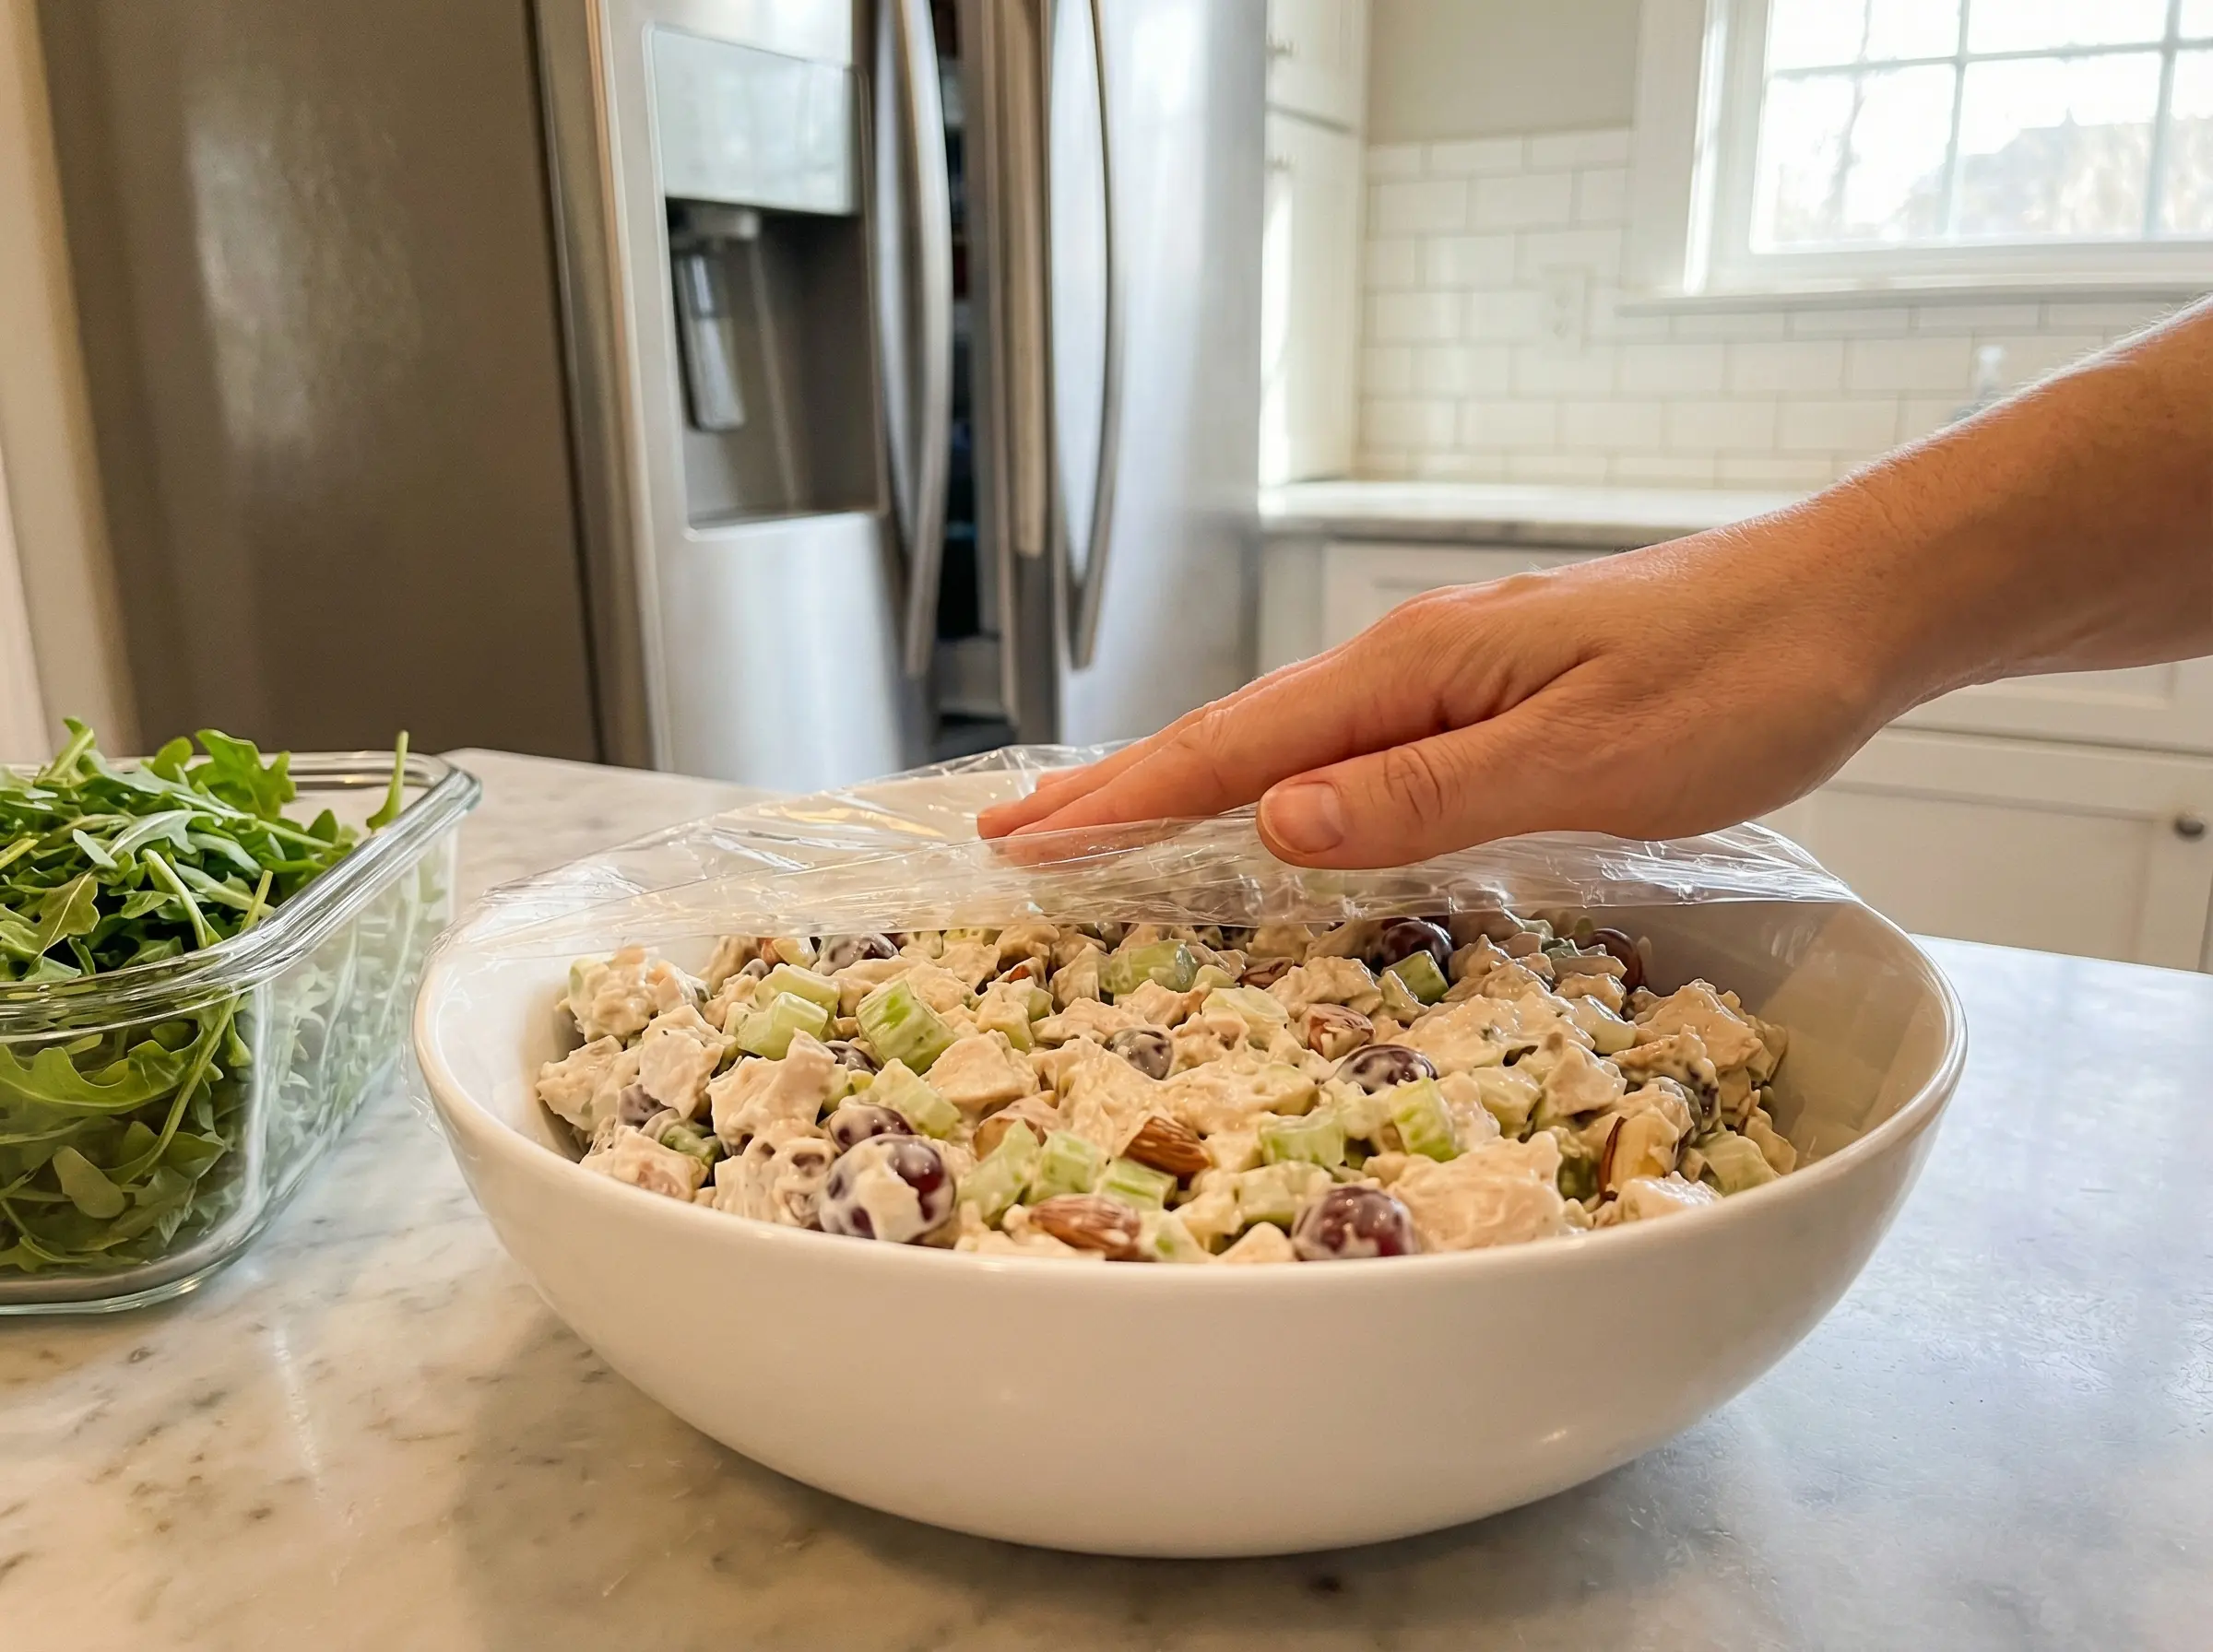
At this point, you can serve the chicken salad immediately, but it is even better if you cover it and refrigerate for at least 30 minutes to 1 hour before serving. This chilling time allows the flavors to meld together beautifully and lets the vegetables crisp up in the cold. The chicken will also absorb some of the dressing, making every bite more flavorful. After chilling, give the salad a quick stir before serving, as some of the dressing may settle to the bottom. Taste again and adjust seasonings if needed - you might want to add a squeeze more lemon juice or a pinch more salt.
Step 6
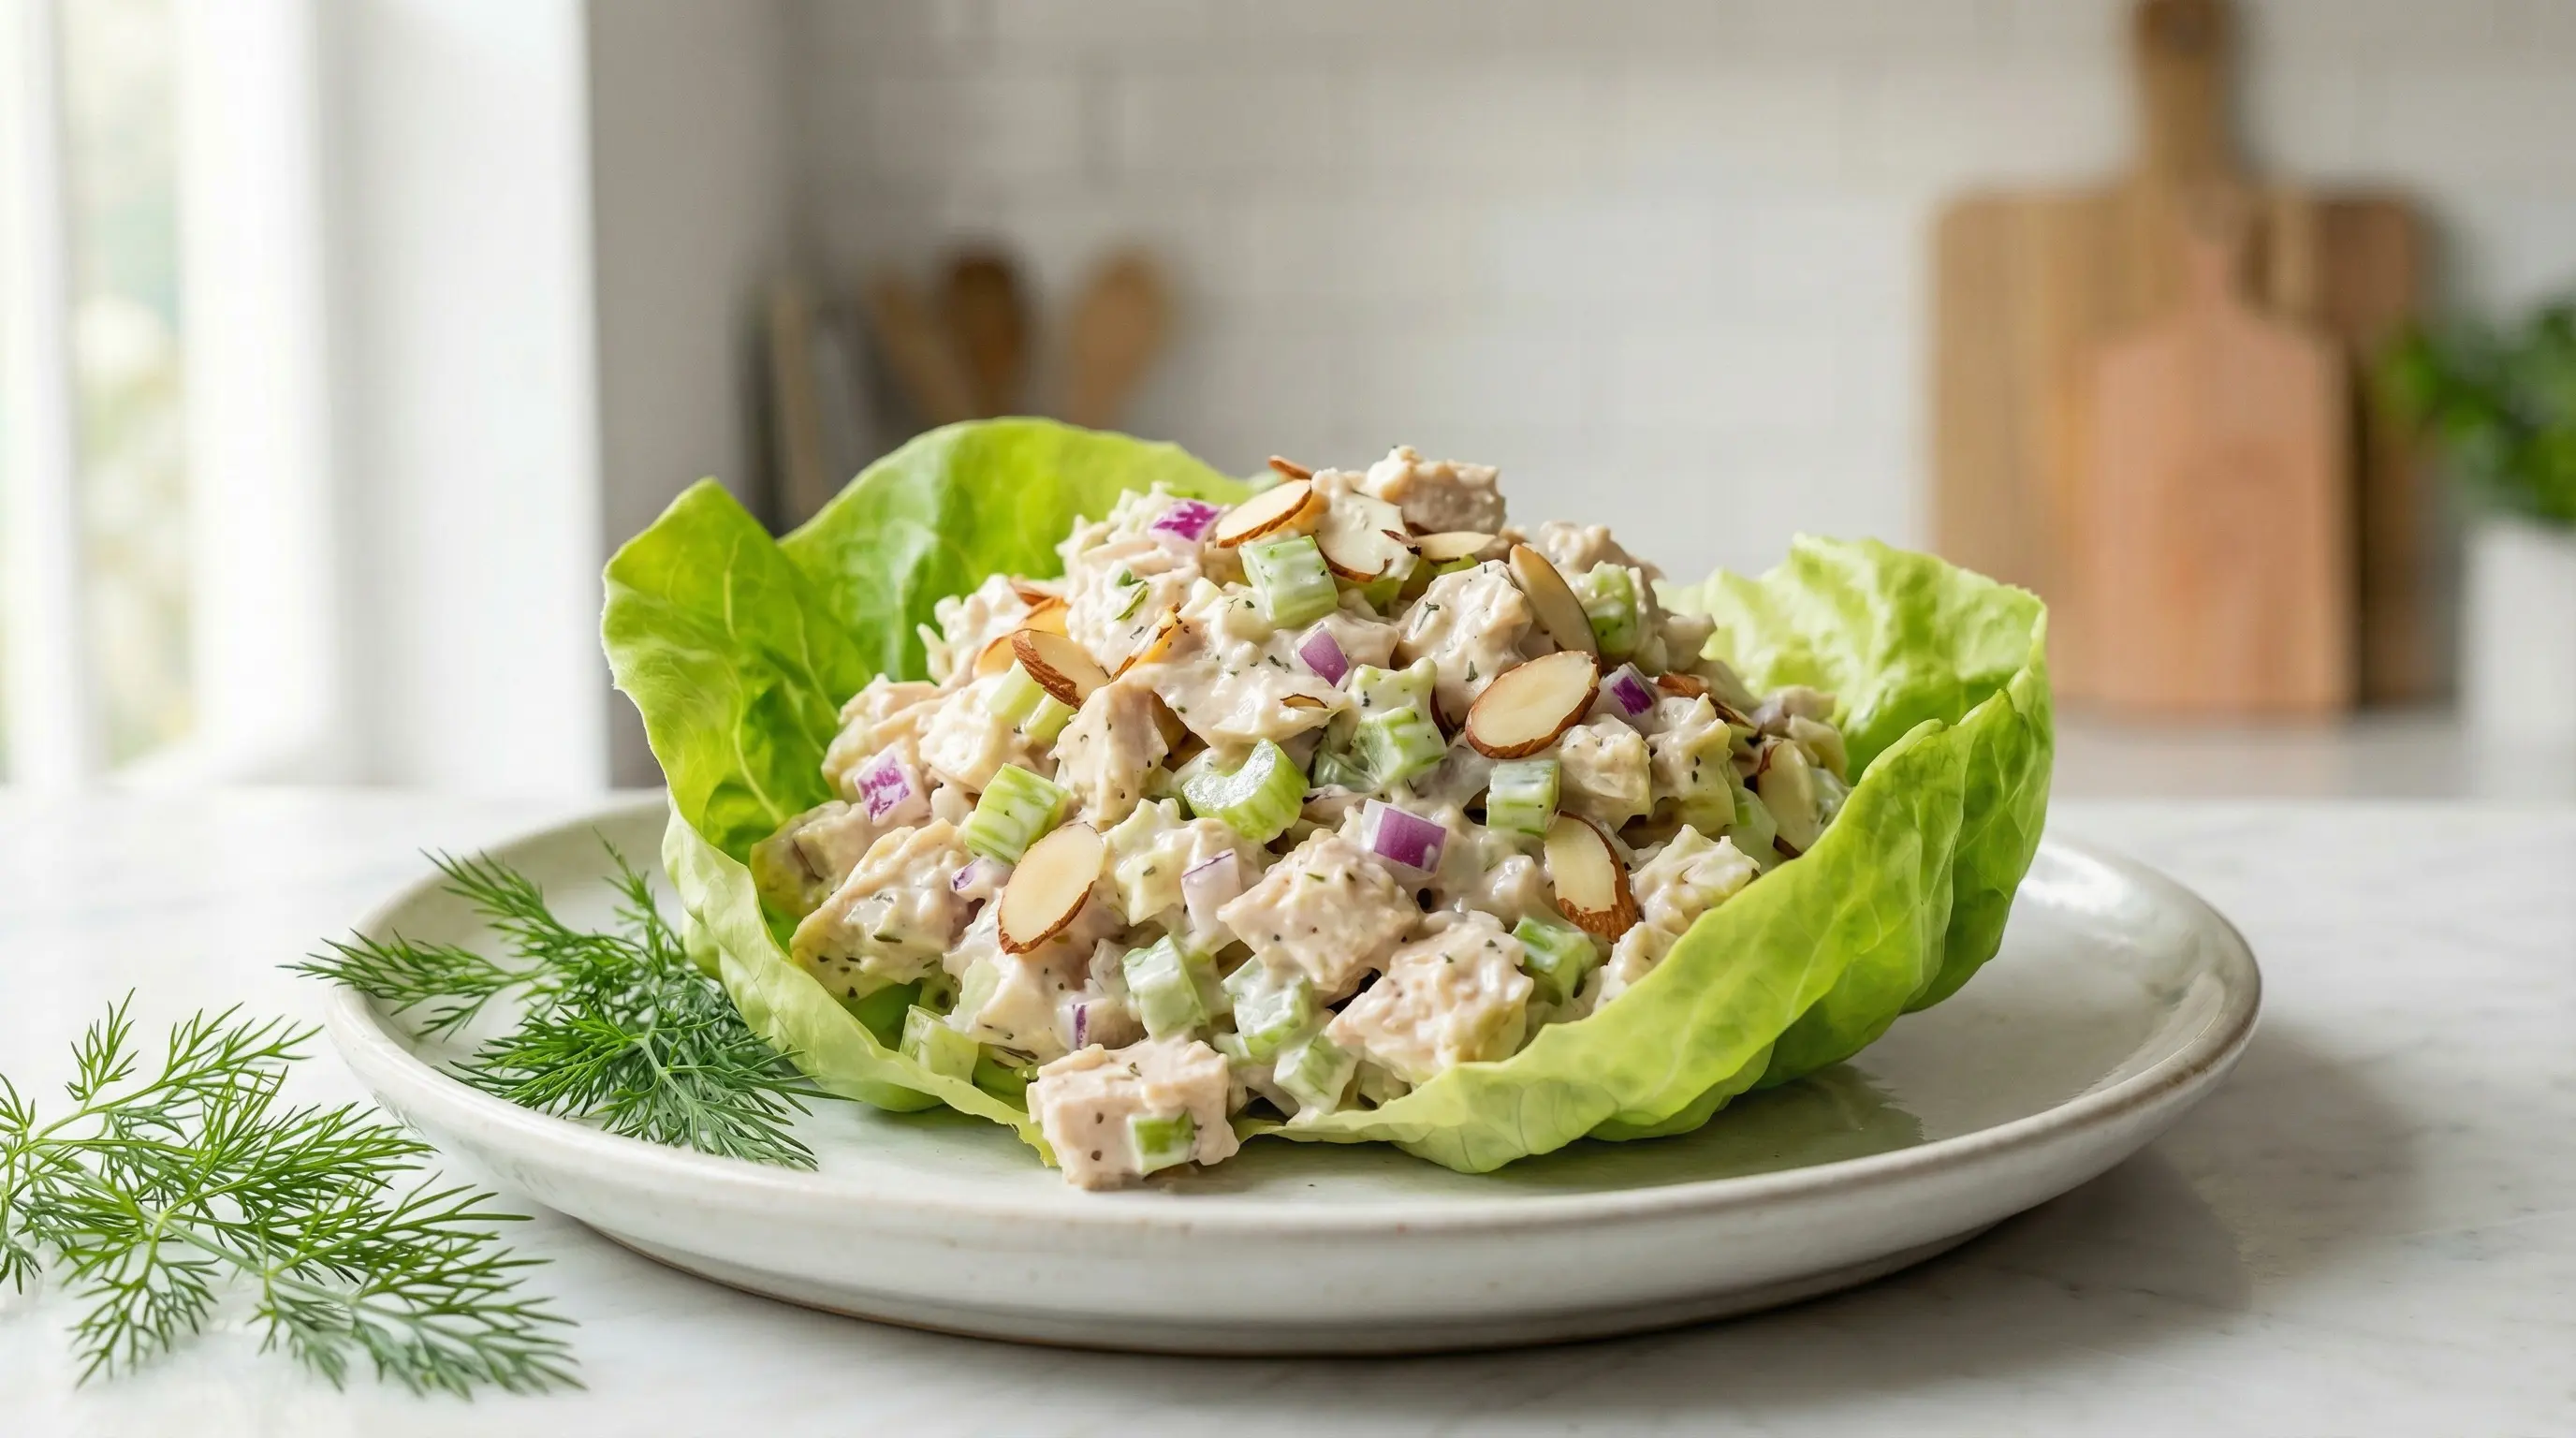
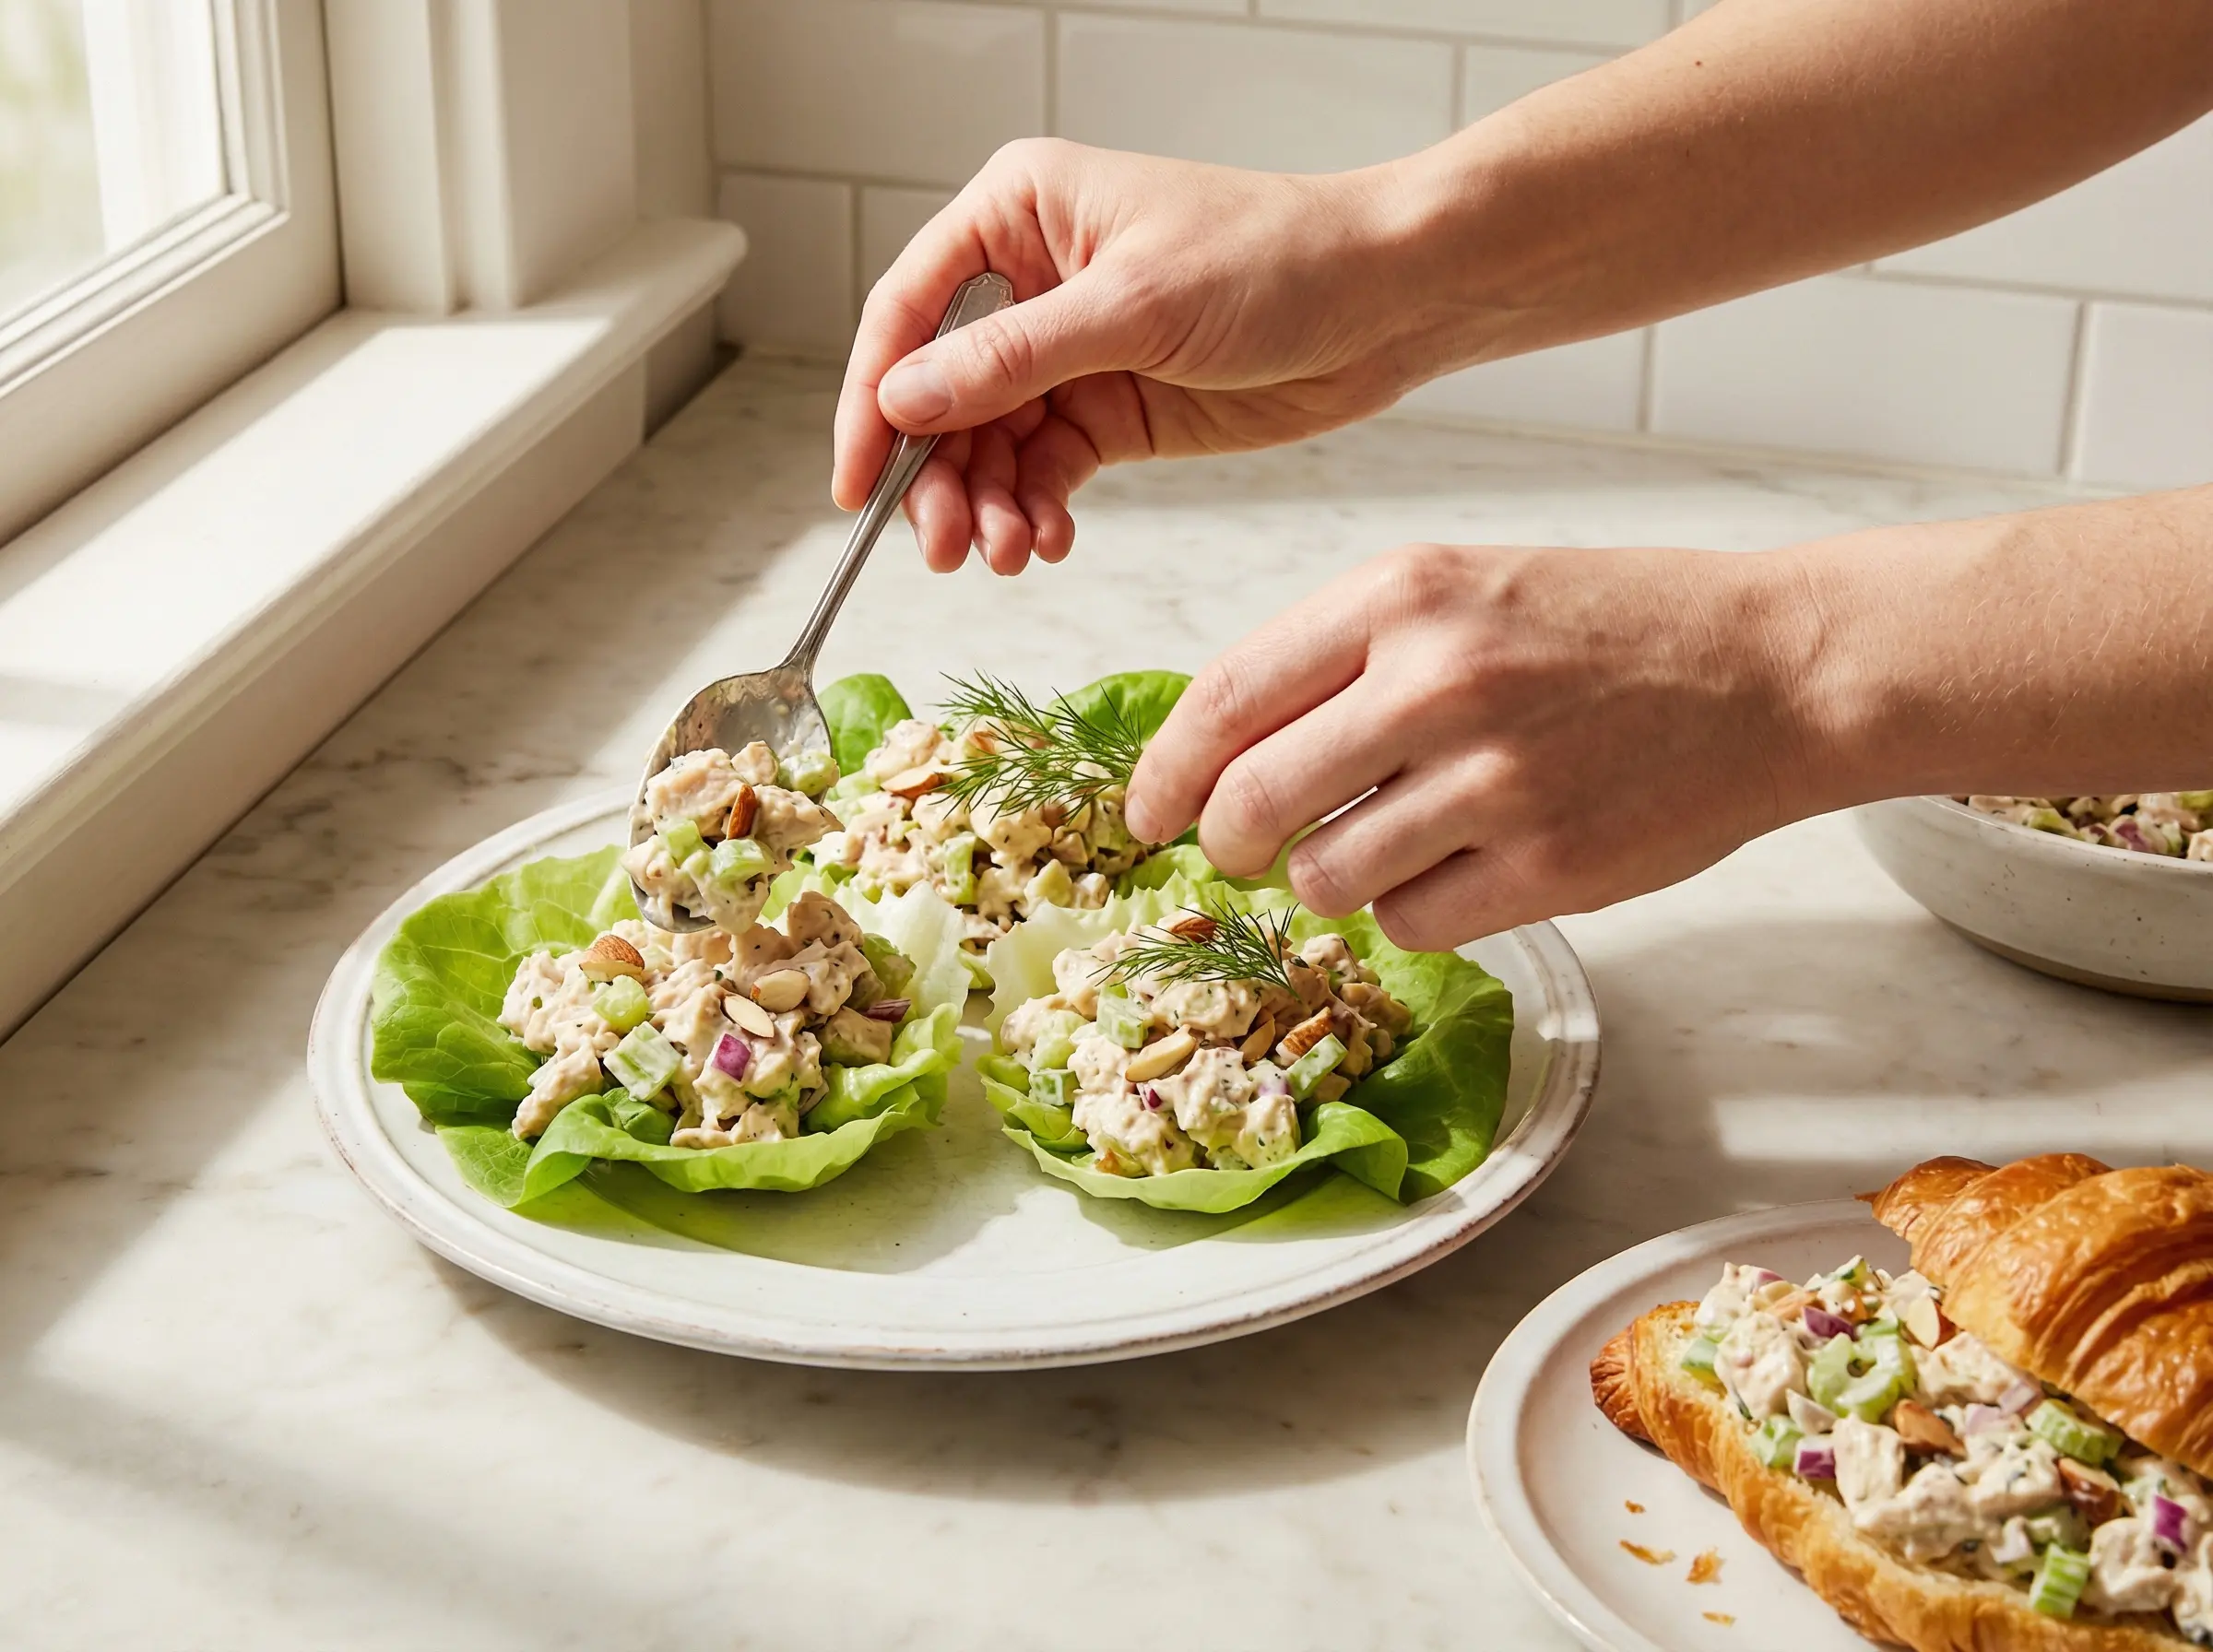
Serve your chicken salad in a variety of delicious ways. Classic options include spooning it onto croissants or between slices of soft sandwich bread for traditional chicken salad sandwiches. For a lighter option, serve it in butter lettuce cups, stuffed into halved avocados, or on top of mixed greens as a salad. You can also spread it on crackers for an appetizer, wrap it in tortillas for wraps, or stuff it into pita pockets. Garnish with extra fresh dill, a sprinkle of paprika, or a few whole almonds for visual appeal. Chicken salad keeps well in an airtight container in the refrigerator for 3-4 days, making it perfect for meal prep. The flavors actually improve over time as the ingredients continue to meld together.
You Might Also Like