Bulgogi
Learn how to make authentic bulgogi, the legendary Korean BBQ marinated beef with a sweet and savory soy-based sauce. This tender, caramelized dish is perfect for grilling, stir-frying, or lettuce wraps!
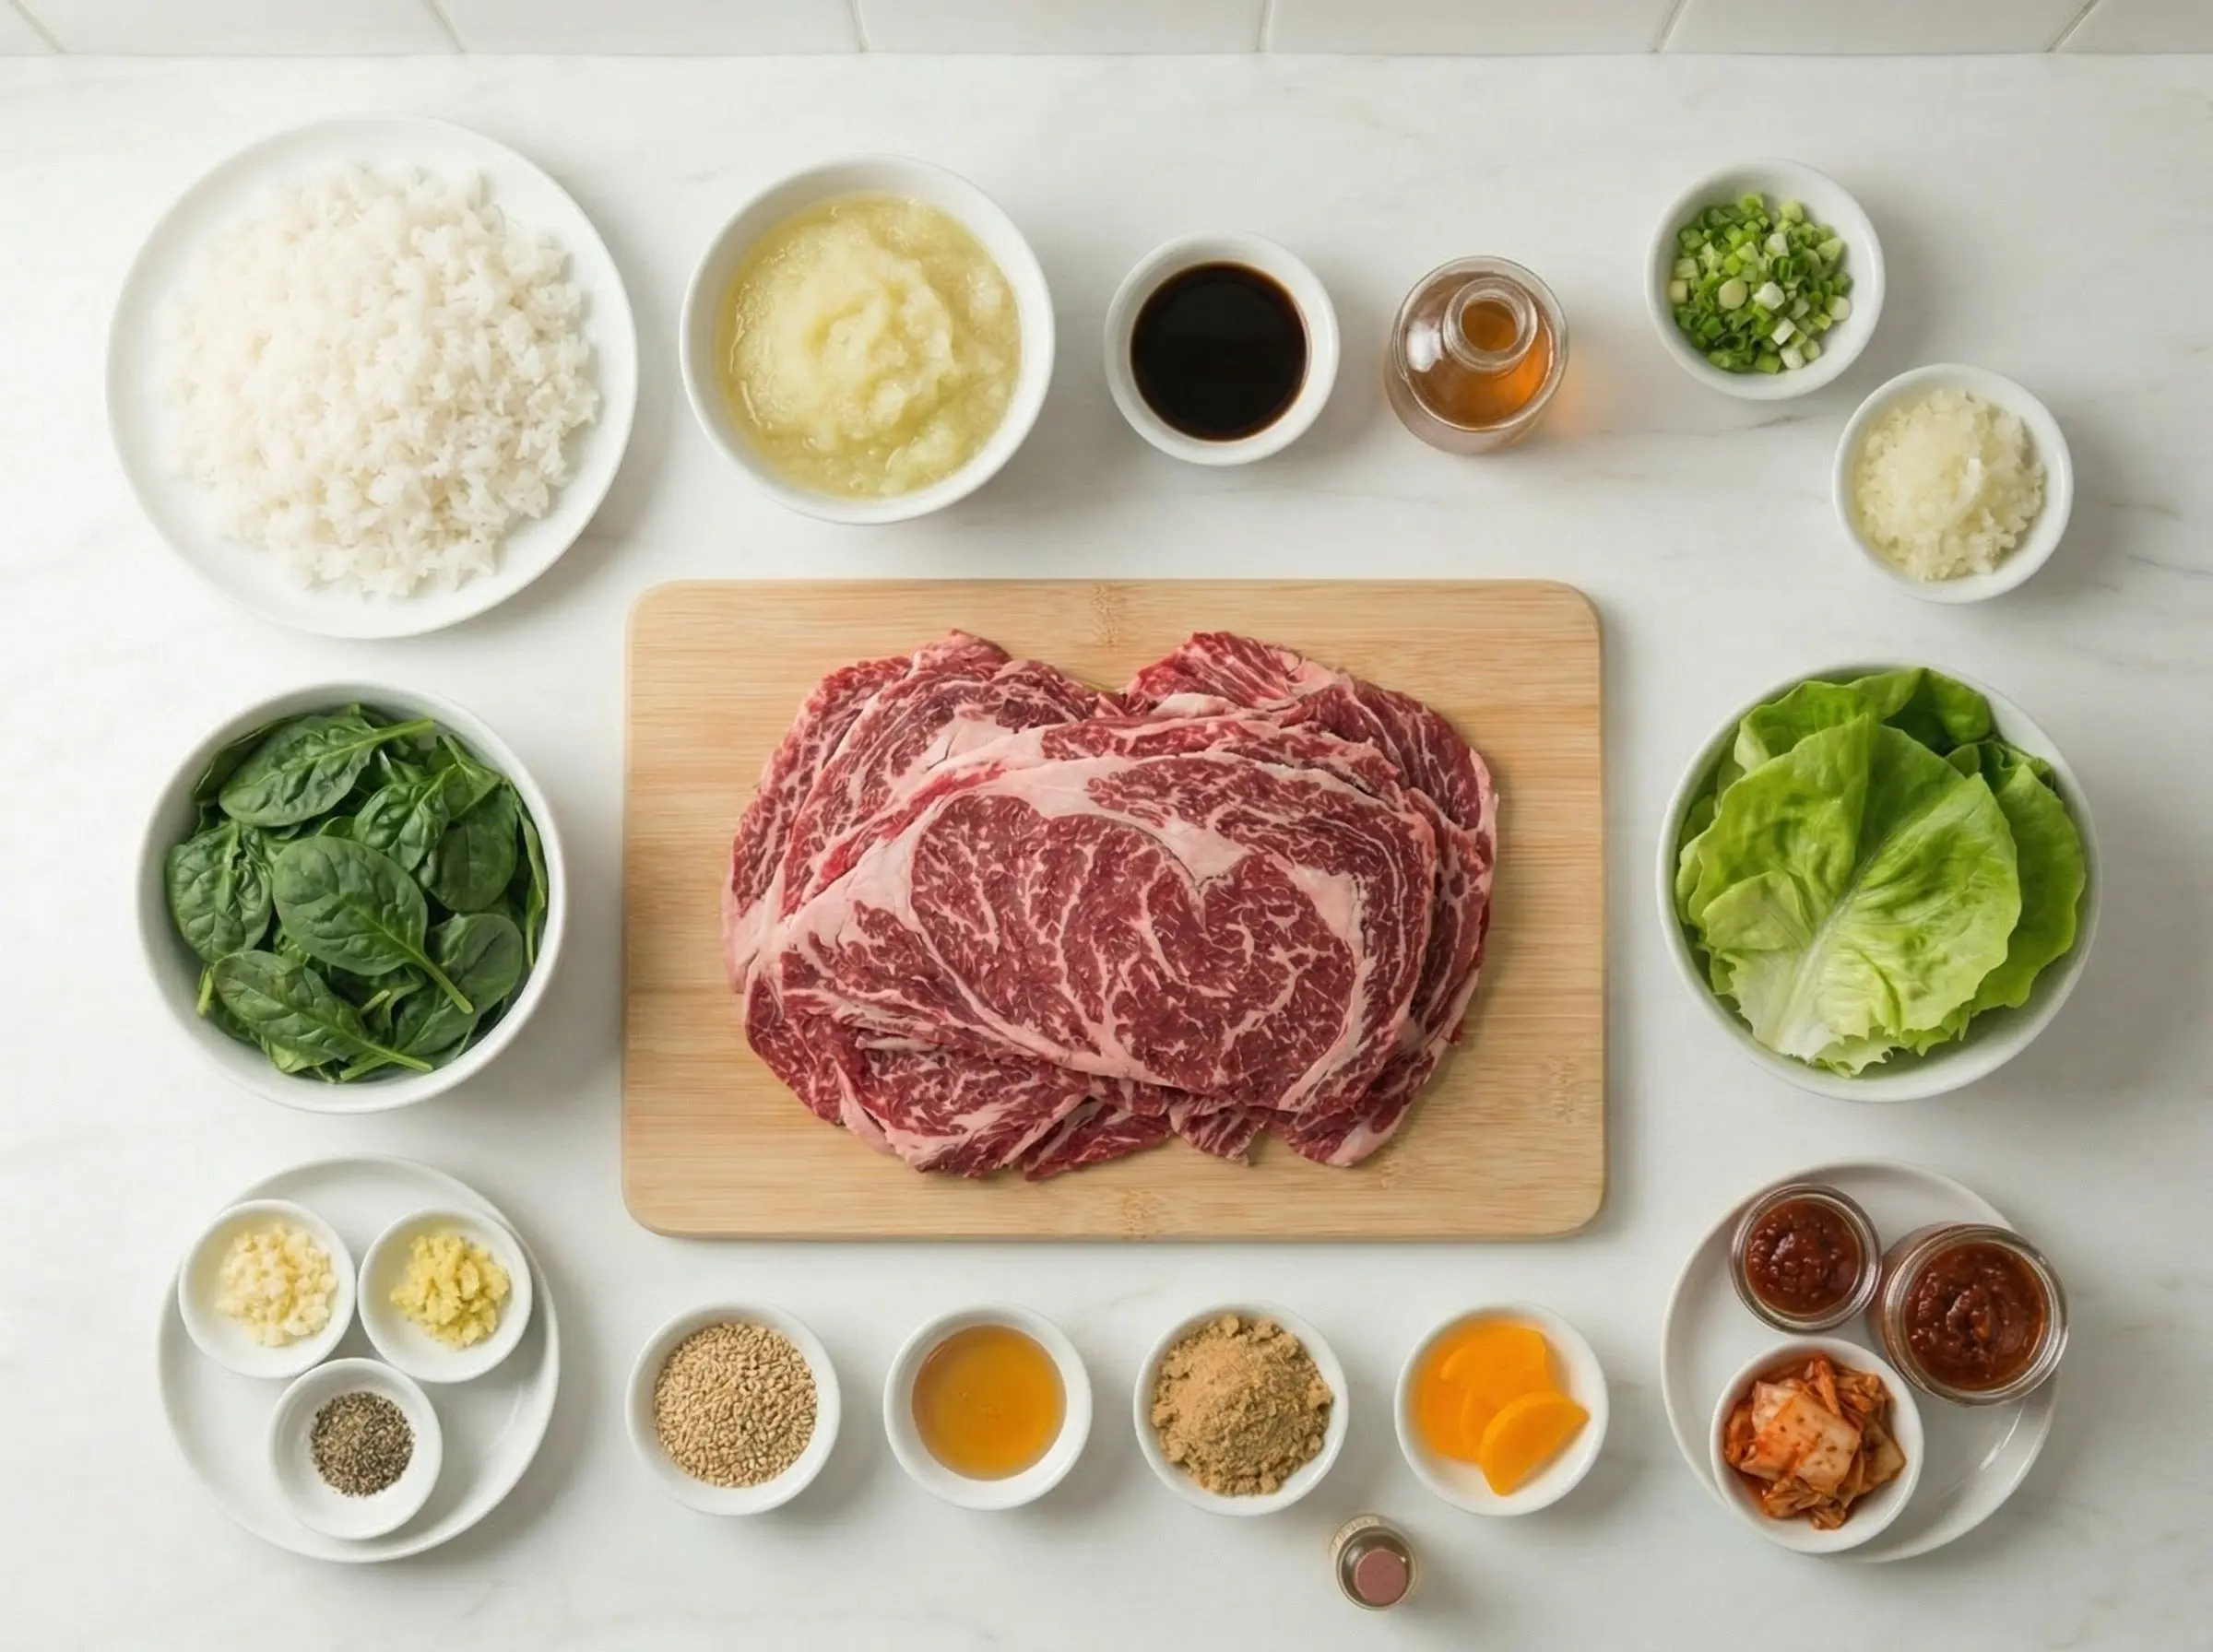
Ingredients
The Story
Bulgogi is one of Korea's most beloved dishes, thinly sliced beef marinated in a sweet and savory sauce of soy sauce, Asian pear, garlic, and sesame oil, then grilled or pan-fried until caramelized and tender. The name literally means "fire meat" in Korean - "bul" meaning fire and "gogi" meaning meat - referring to the traditional cooking method over open flames. The dish has ancient origins dating back to the Goguryeo era (37 BC - 668 AD), when it was known as "maekjeok" and was grilled on skewers. Over centuries, the preparation evolved, with the Joseon Dynasty (1392-1897) seeing the development of the marinated, thinly-sliced version we know today, then called "neobiani" and enjoyed primarily by royalty and aristocrats. Bulgogi's transformation from royal delicacy to national treasure occurred in the 20th century as Korea modernized and the dish became accessible to all social classes. The development of Korean BBQ restaurants after the Korean War popularized the communal grilling experience, with diners cooking their own meat at tabletop grills. Bulgogi became a symbol of Korean hospitality and celebration, served at family gatherings, holidays, and special occasions. When Korean cuisine began spreading internationally in the late 20th and early 21st centuries, bulgogi was often the gateway dish that introduced foreigners to Korean flavors, its sweet-savory profile proving universally appealing. What makes bulgogi so extraordinary is the perfect balance achieved through the marinade and the magical transformation that occurs during cooking. The Asian pear (or sometimes kiwi or pineapple) serves a dual purpose - its natural enzymes tenderize the meat while adding subtle sweetness. Soy sauce provides savory depth, garlic adds pungency, sesame oil contributes nutty richness, and a touch of sugar caramelizes beautifully over high heat. The meat, sliced paper-thin against the grain, cooks in mere minutes, developing delicious charred edges while remaining impossibly tender within. Served with steaming white rice, wrapped in crisp lettuce leaves with ssamjang (spicy dipping paste) and pickled vegetables, or piled into a bowl for bibimbap, bulgogi exemplifies the Korean genius for bold flavors and communal eating.
Instructions
Step 1
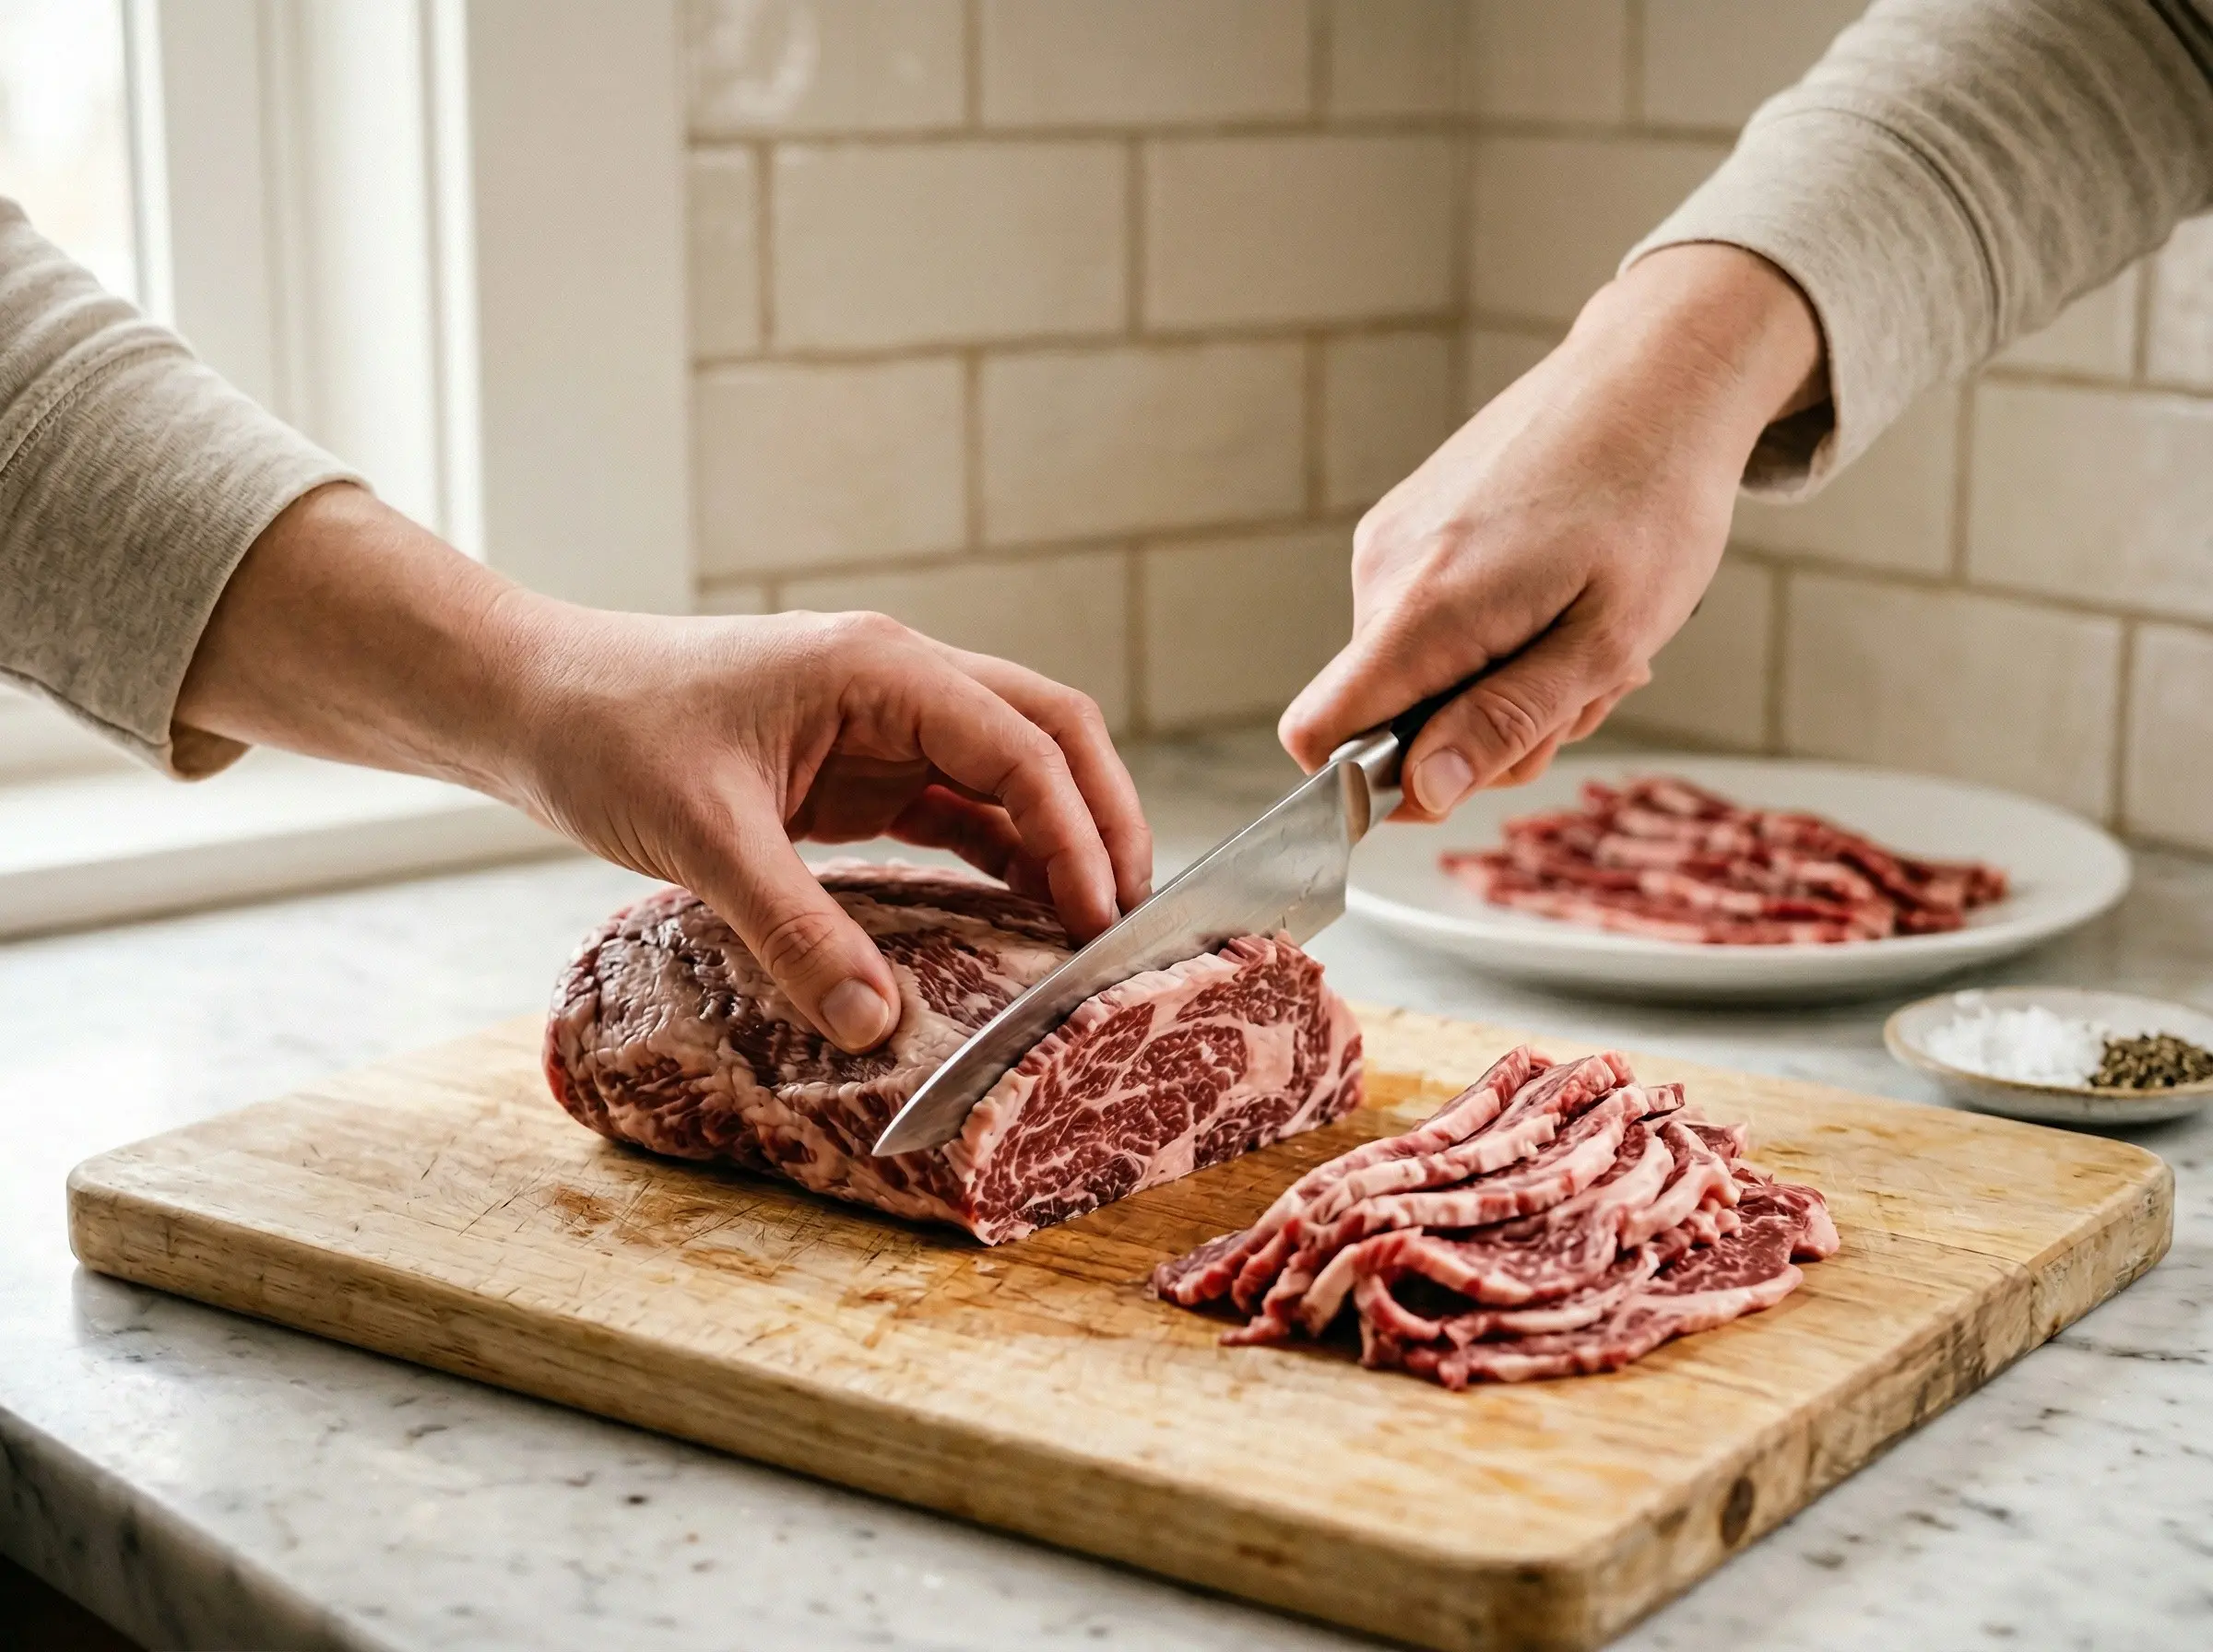
Prepare the beef. For the most authentic bulgogi, slice the beef as thinly as possible - ideally 1/8 inch or less. Partially freezing the meat for 1-2 hours makes thin slicing much easier. Cut against the grain for maximum tenderness. Alternatively, ask your butcher to slice the meat thinly, or purchase pre-sliced bulgogi meat from a Korean grocery store. Fattier cuts like ribeye produce more flavorful results than lean cuts.
Step 2
Make the marinade. In a large bowl, combine the grated Asian pear (or pear juice), soy sauce, sesame oil, brown sugar, honey, minced garlic, grated ginger, grated onion, rice wine, and black pepper. Whisk until the sugar is dissolved and everything is well combined. The Asian pear is crucial - its enzymes naturally tenderize the meat while adding subtle sweetness. If unavailable, kiwi or pineapple work as substitutes, though use less as their enzymes are stronger. Add the chopped green onion.
Step 3
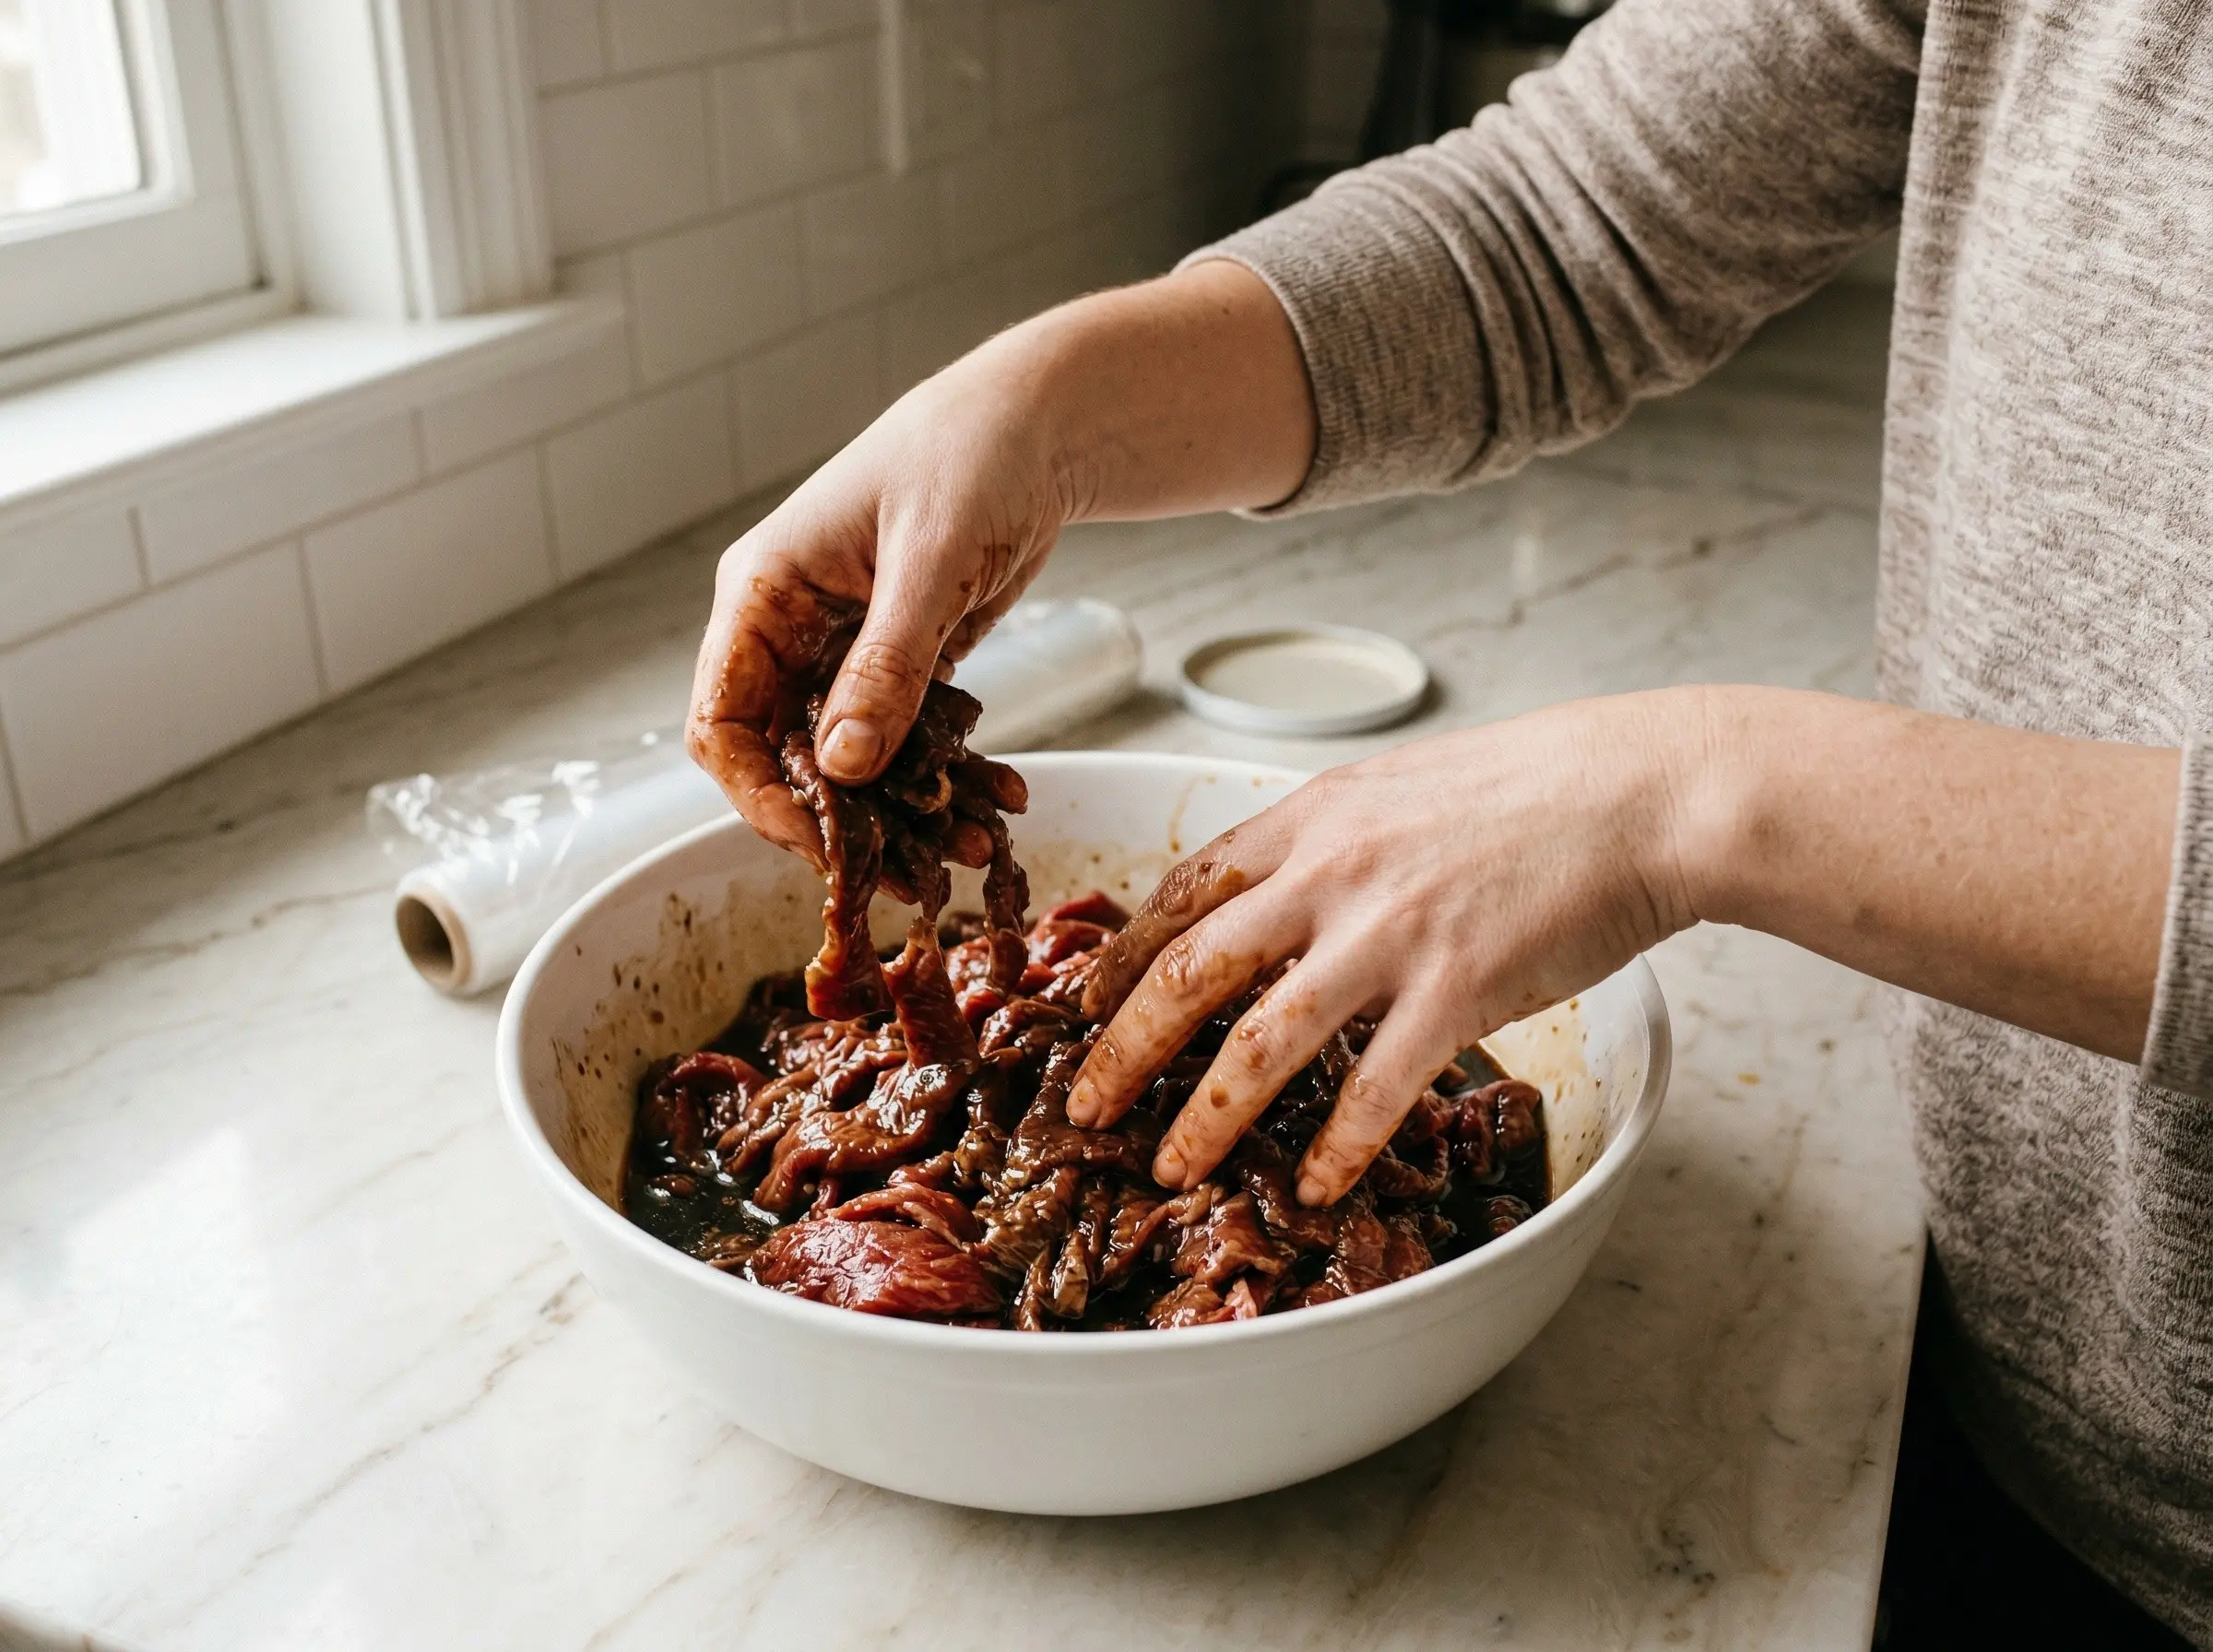
Marinate the beef. Add the thinly sliced beef to the marinade, ensuring every piece is coated. Use your hands to massage the marinade into the meat, separating any pieces that are stuck together. Cover and refrigerate for at least 2 hours, or ideally overnight - the longer marination allows the flavors to penetrate deeply and the enzymes to tenderize thoroughly. Do not marinate for more than 24 hours if using pear, kiwi, or pineapple, as the enzymes can make the meat mushy.
Step 4
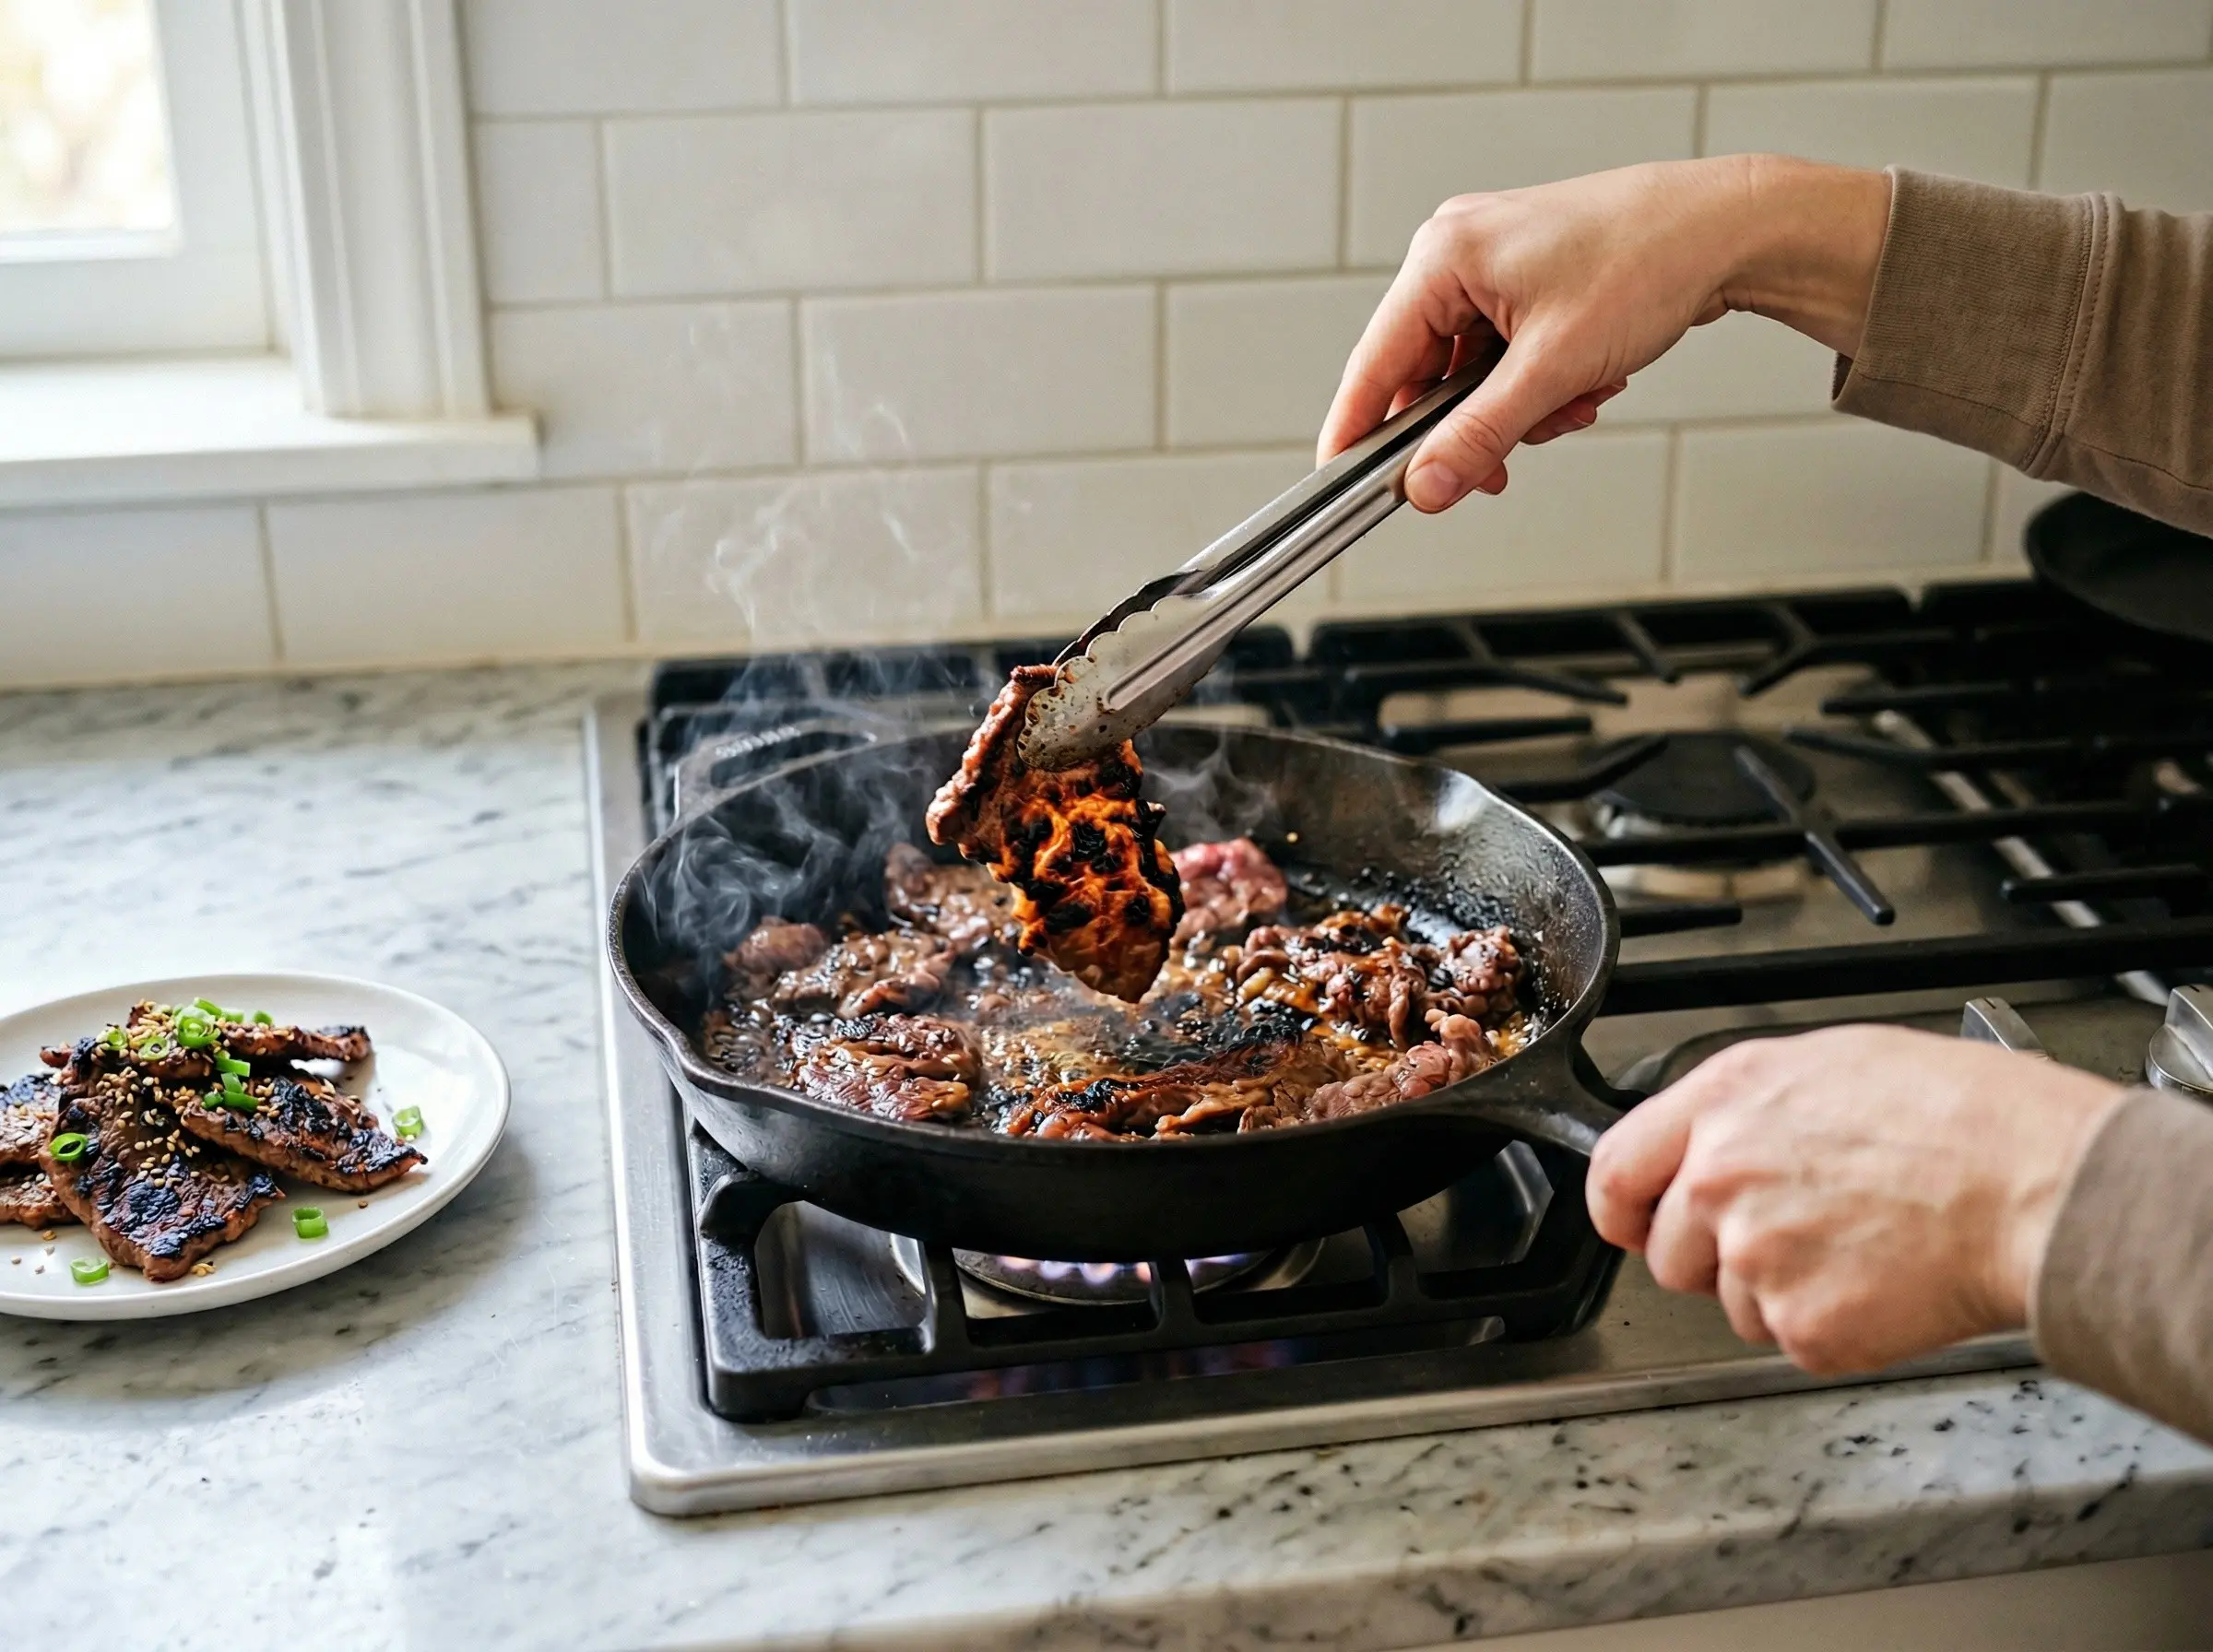
Prepare your cooking method. Bulgogi can be cooked several ways: on a grill for the most authentic charred flavor, in a very hot cast iron or carbon steel pan, or on a tabletop Korean BBQ grill for the communal experience. Whatever method you choose, high heat is essential for proper caramelization. If grilling, use a grill basket or perforated grill pan to prevent the thin slices from falling through. If pan-frying, work in small batches to avoid overcrowding, which causes steaming instead of searing.
Step 5
Cook the bulgogi. Remove the beef from the marinade, letting excess drip off but not squeezing dry - some marinade adds flavor during cooking. Heat your grill or pan until smoking hot. Cook the beef in a single layer, without stirring, for 1-2 minutes until the bottom is caramelized and charred in spots. Flip and cook another 1-2 minutes. The thin slices cook very quickly - watch carefully to avoid overcooking. The sugars in the marinade should caramelize into delicious charred bits but not burn. Work in batches if necessary, keeping finished bulgogi warm.
Step 6
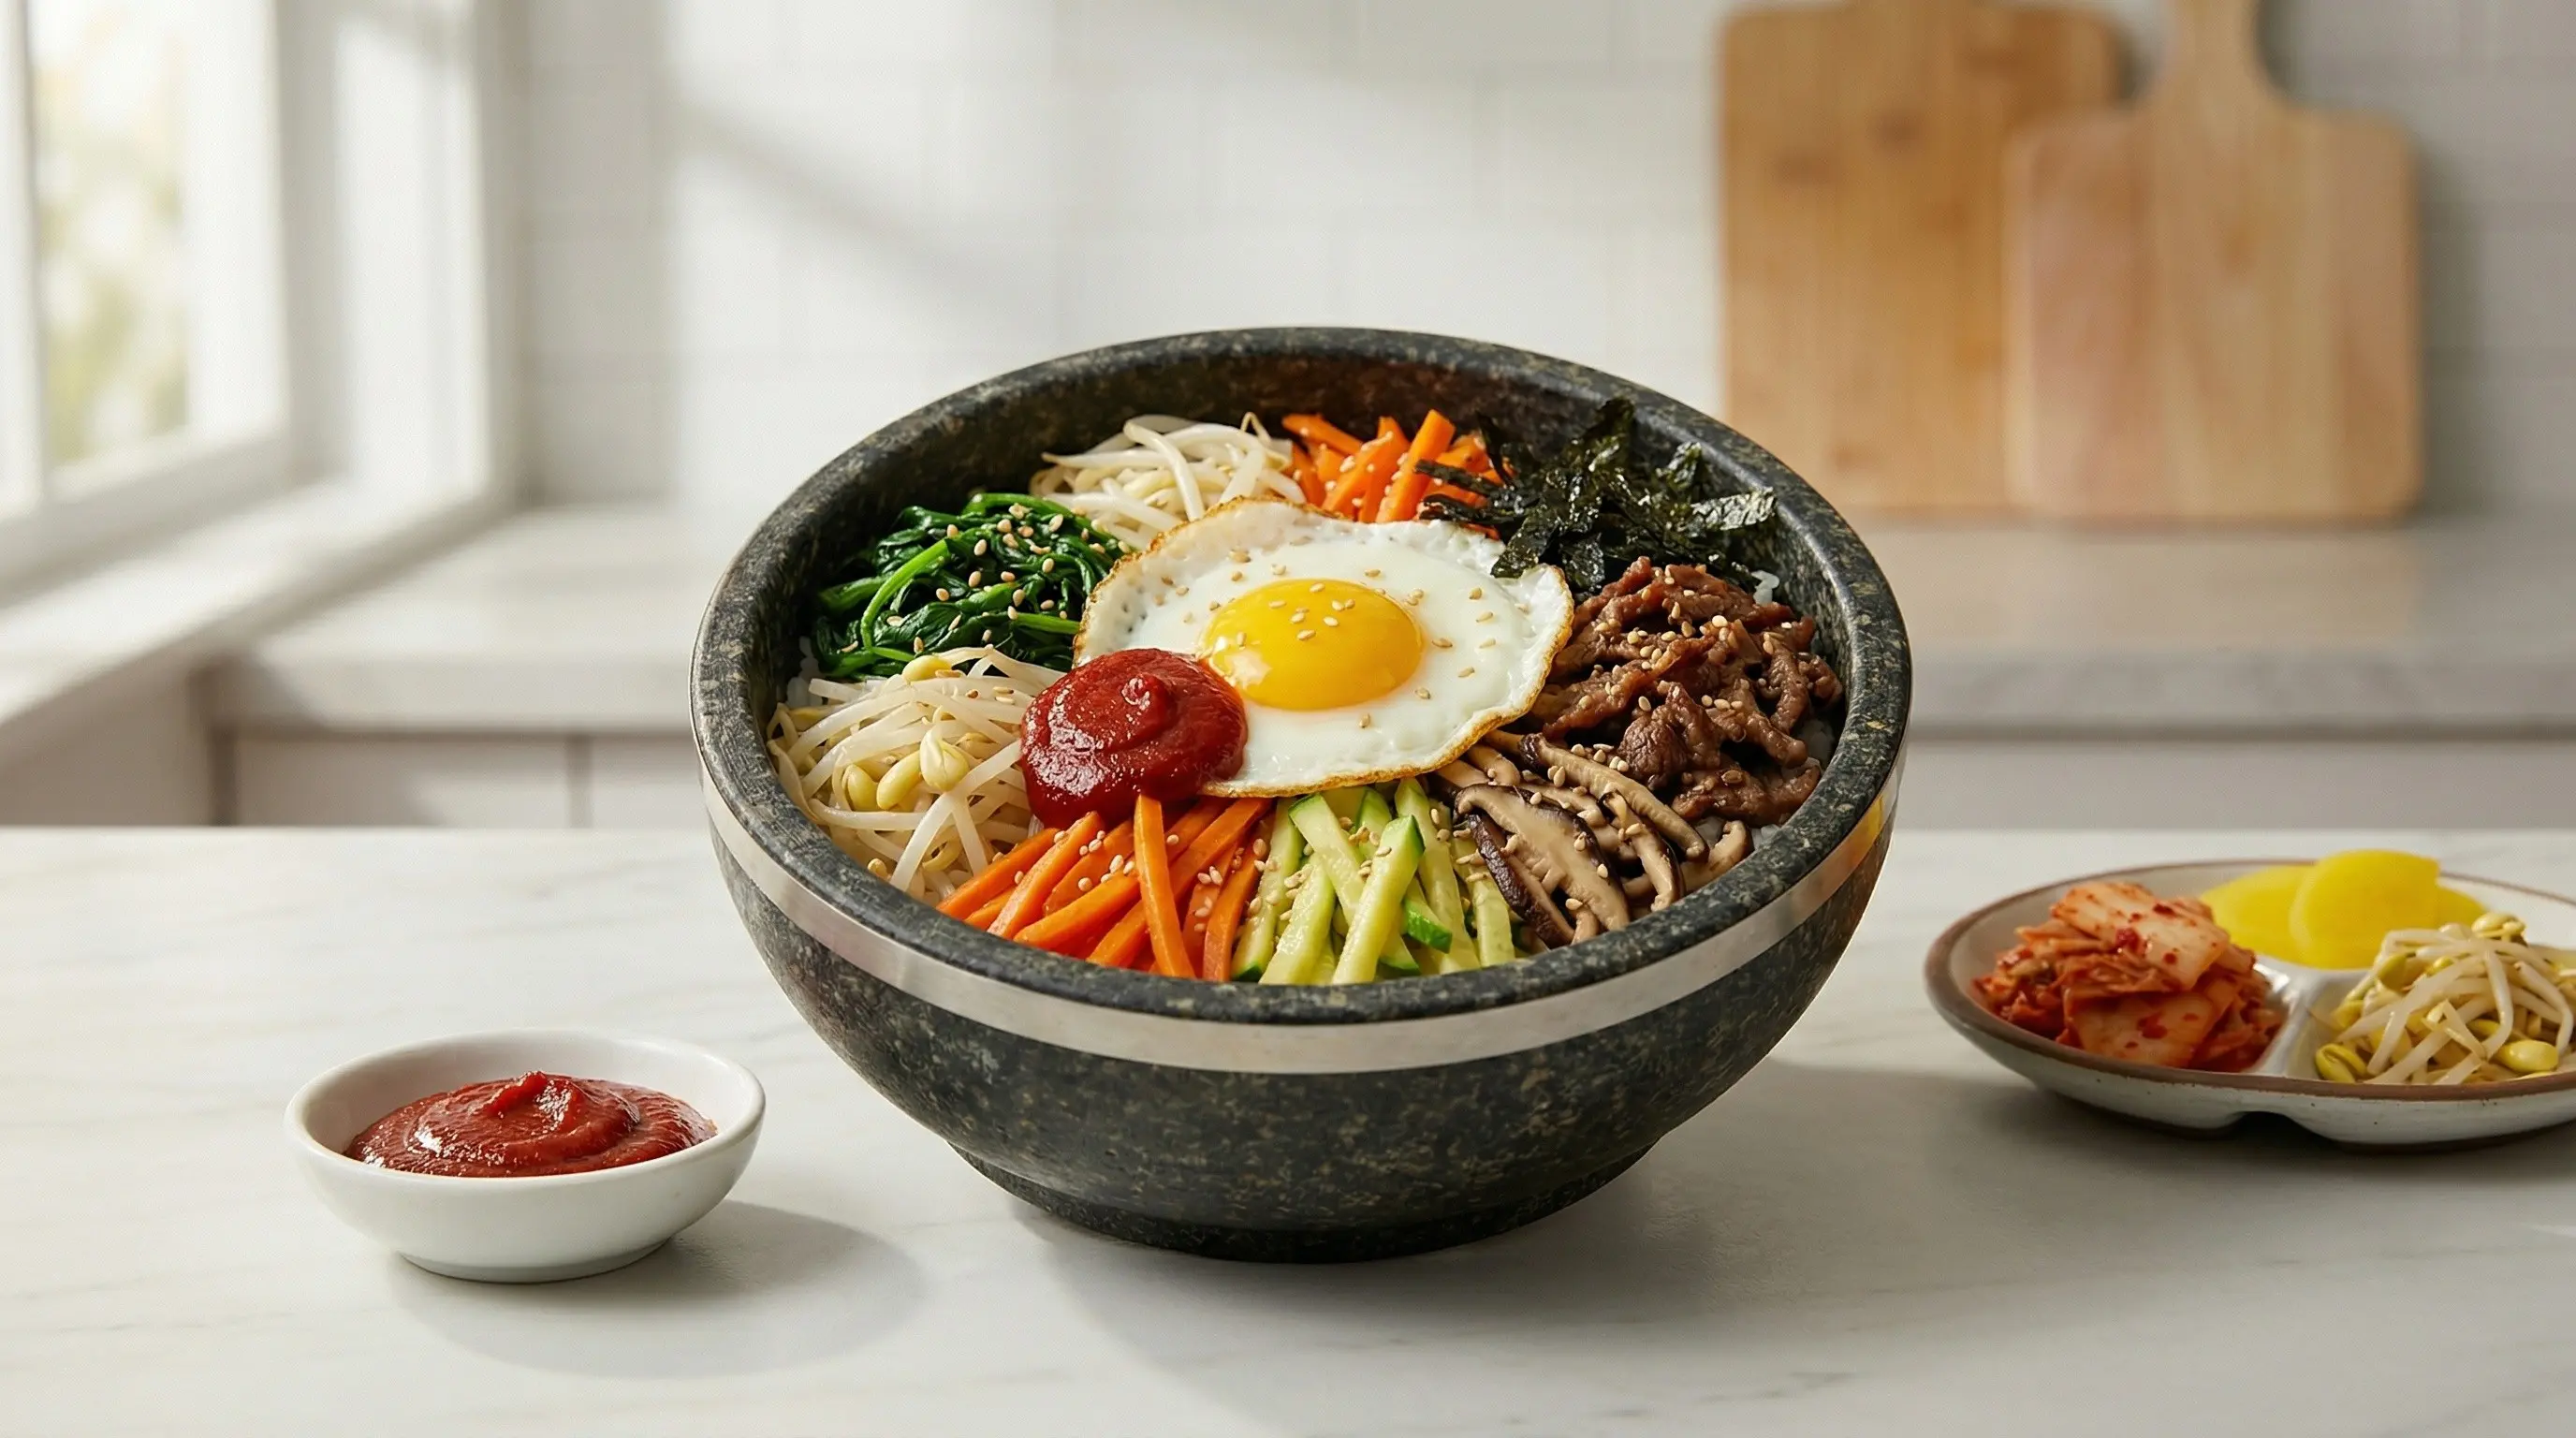
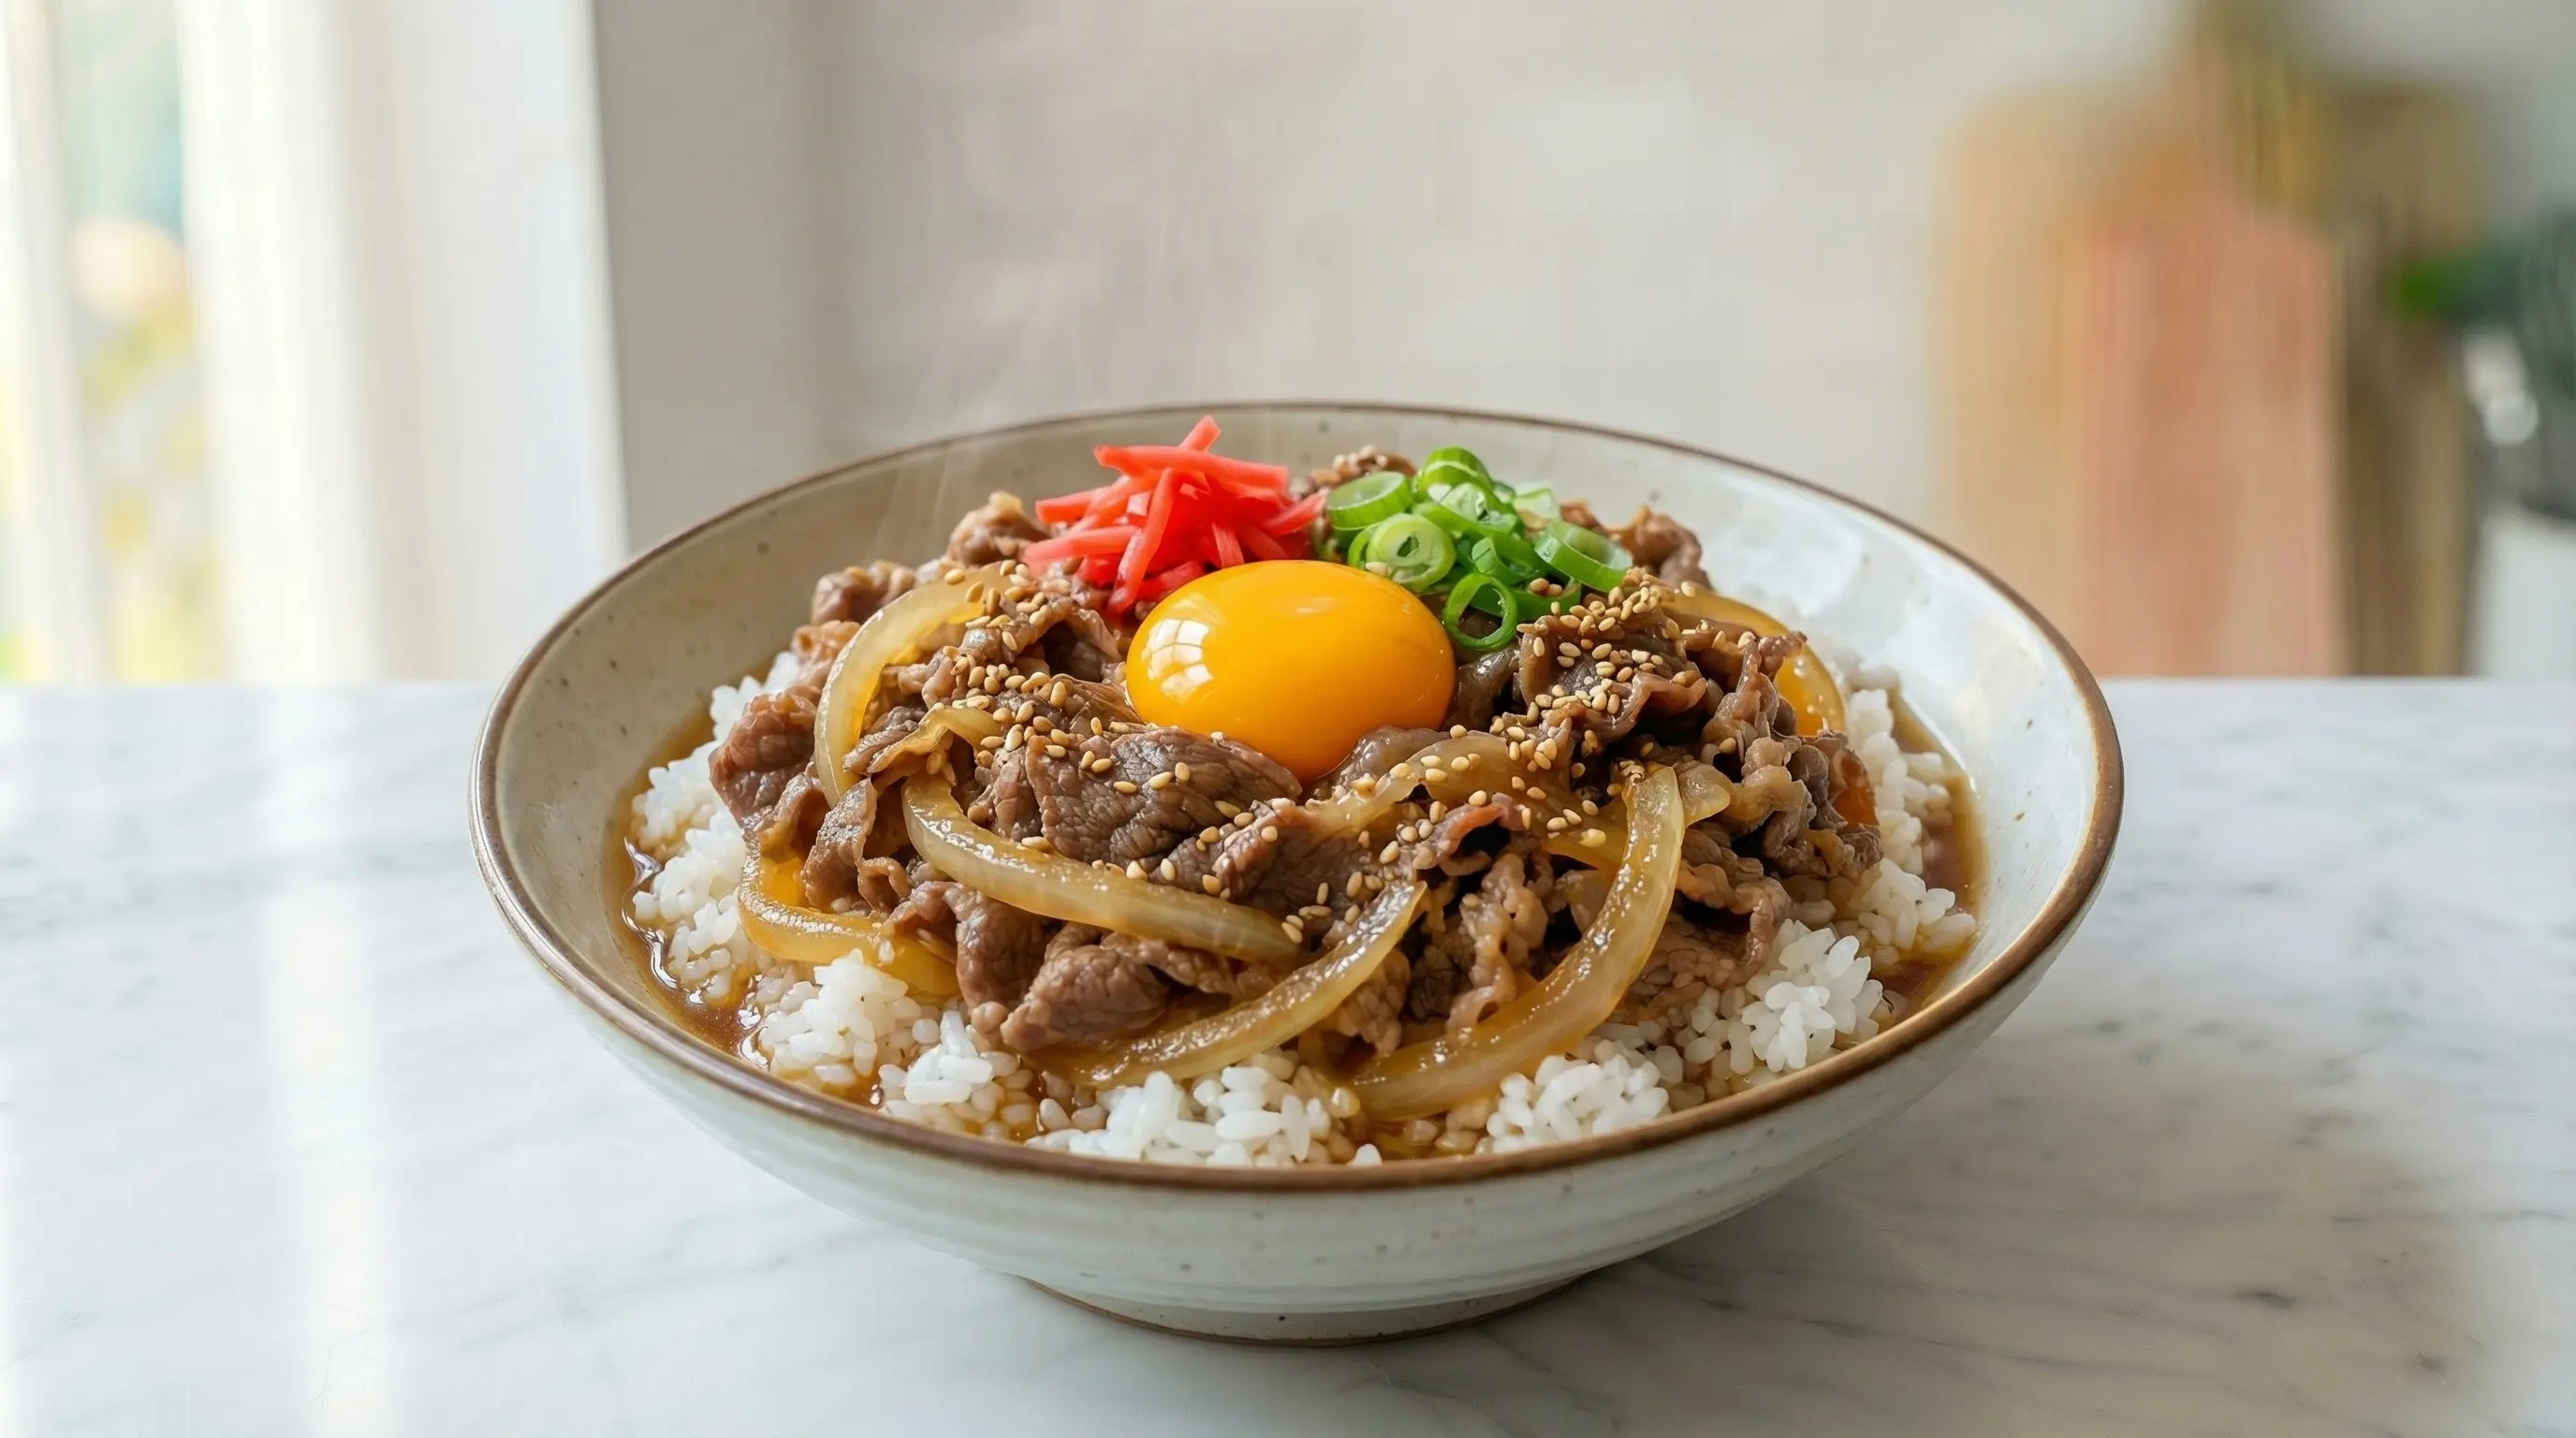
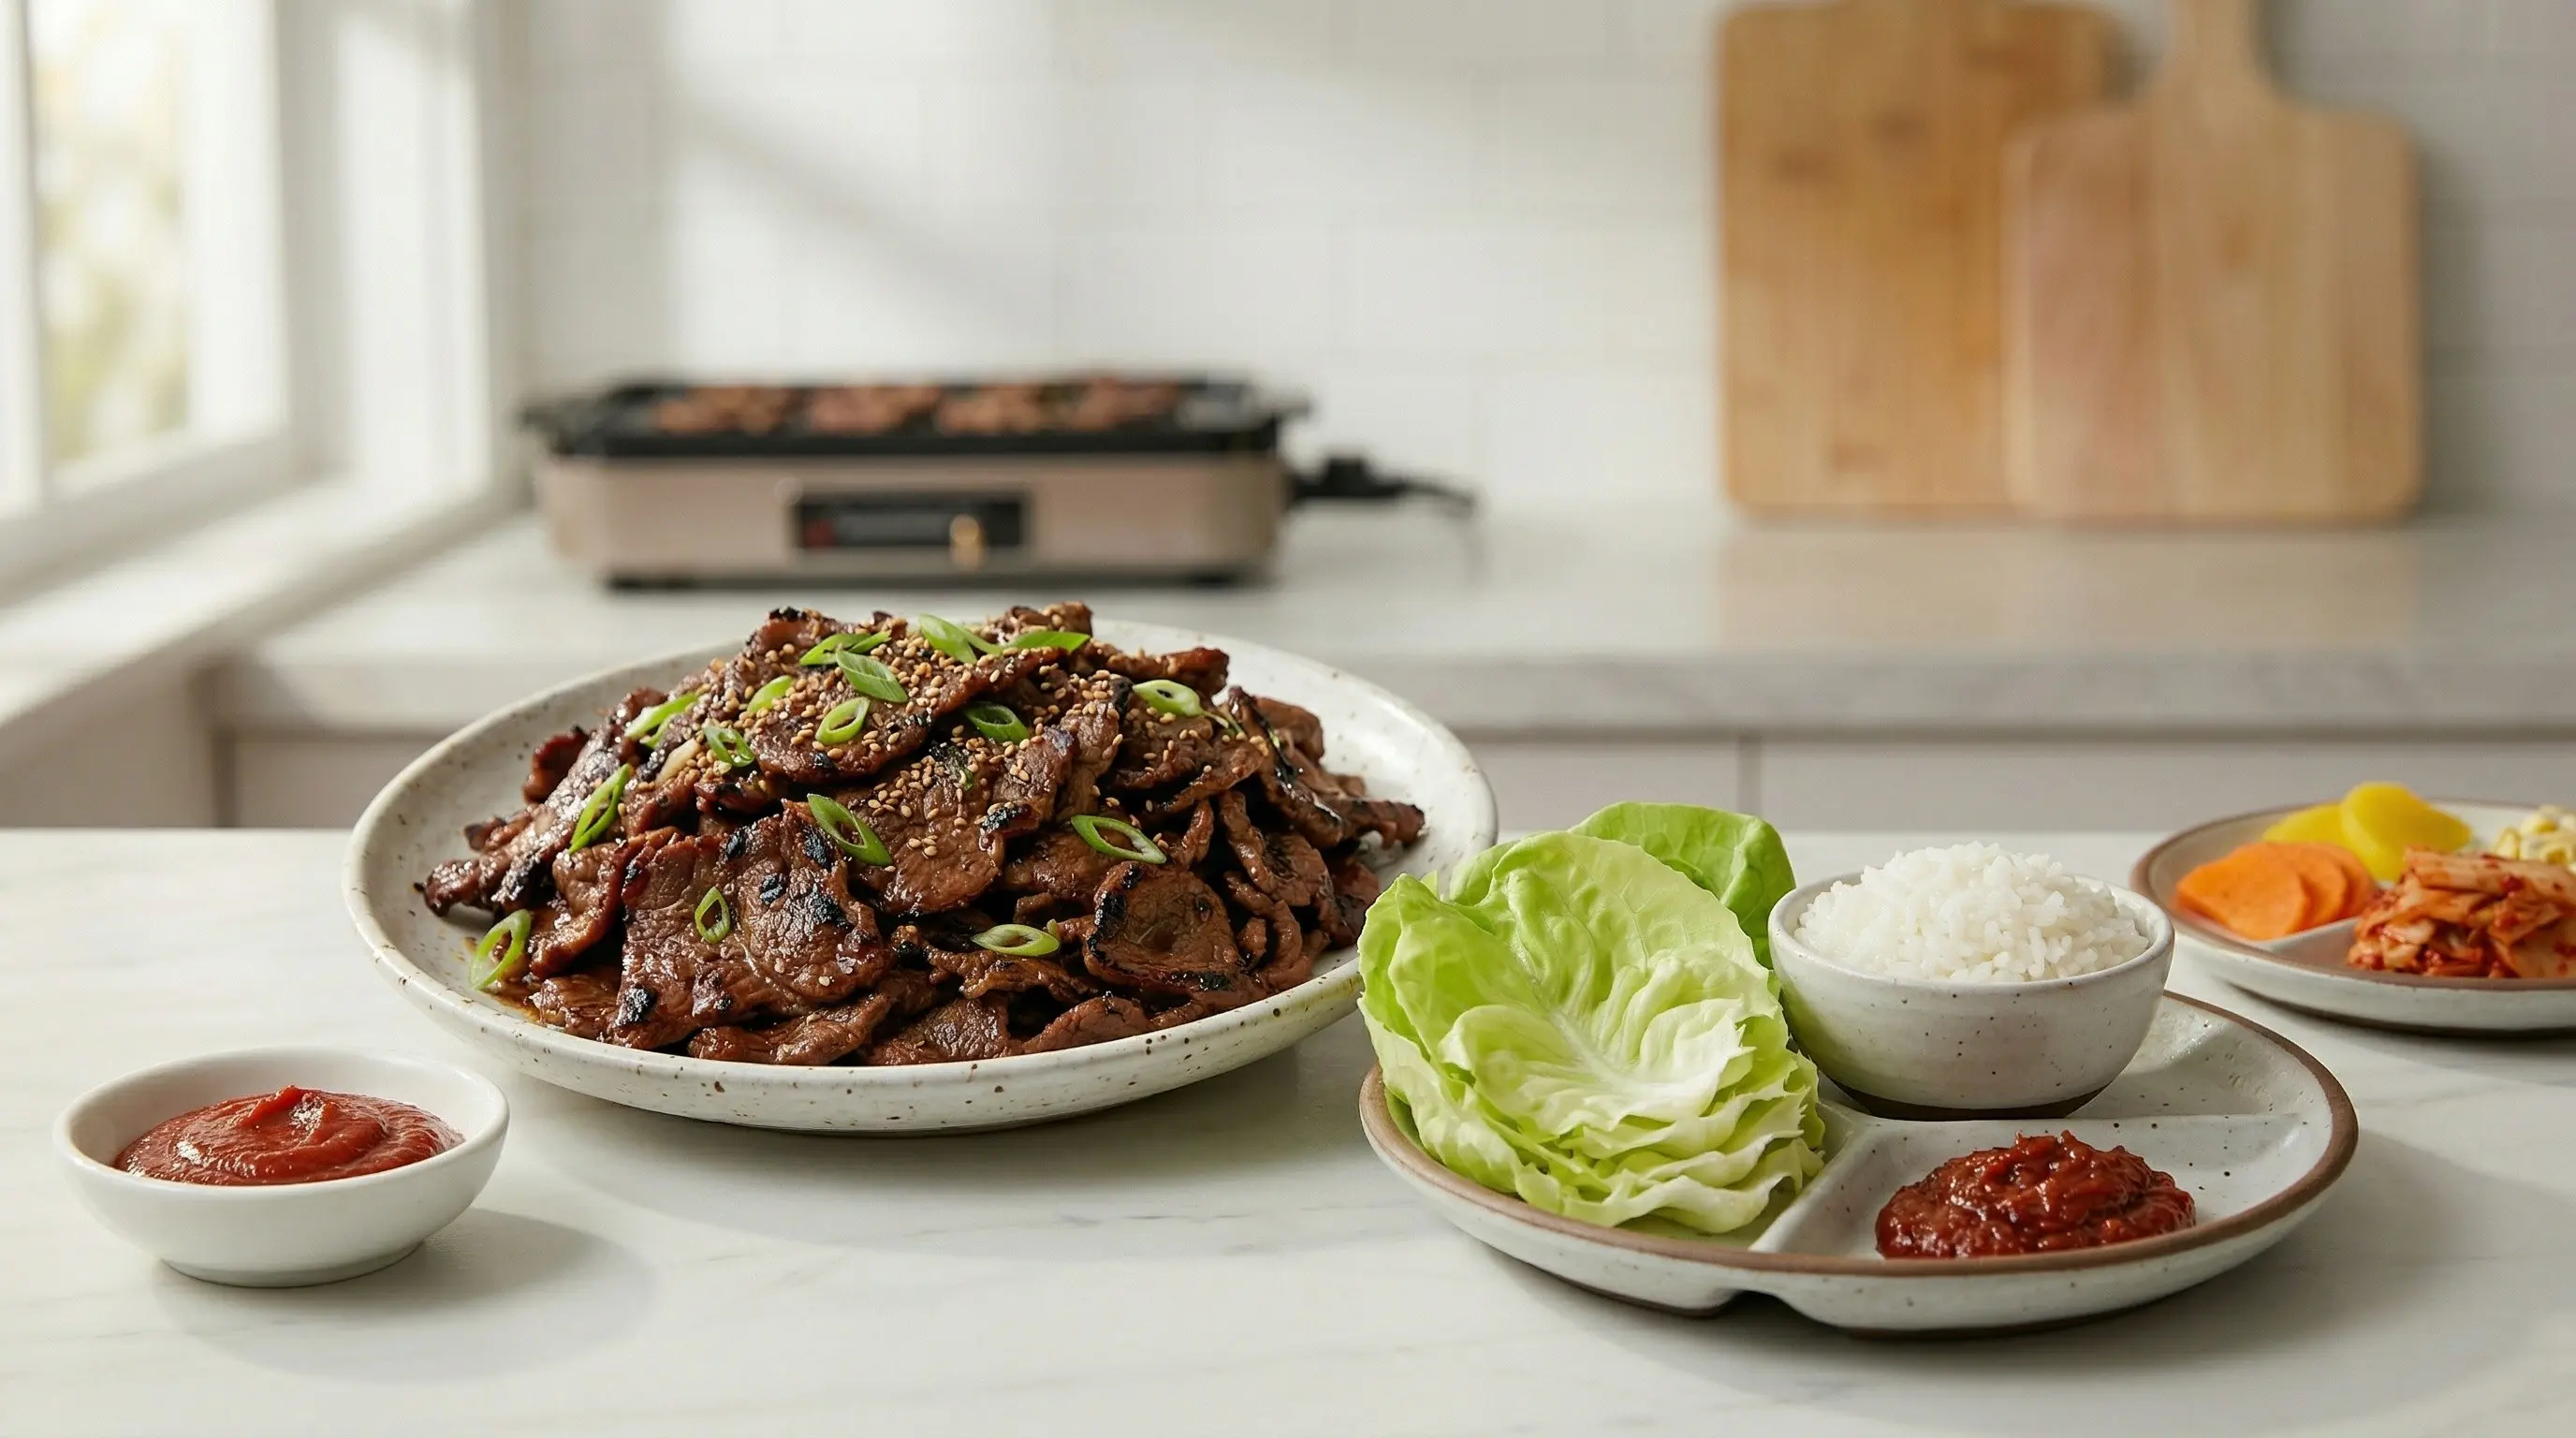
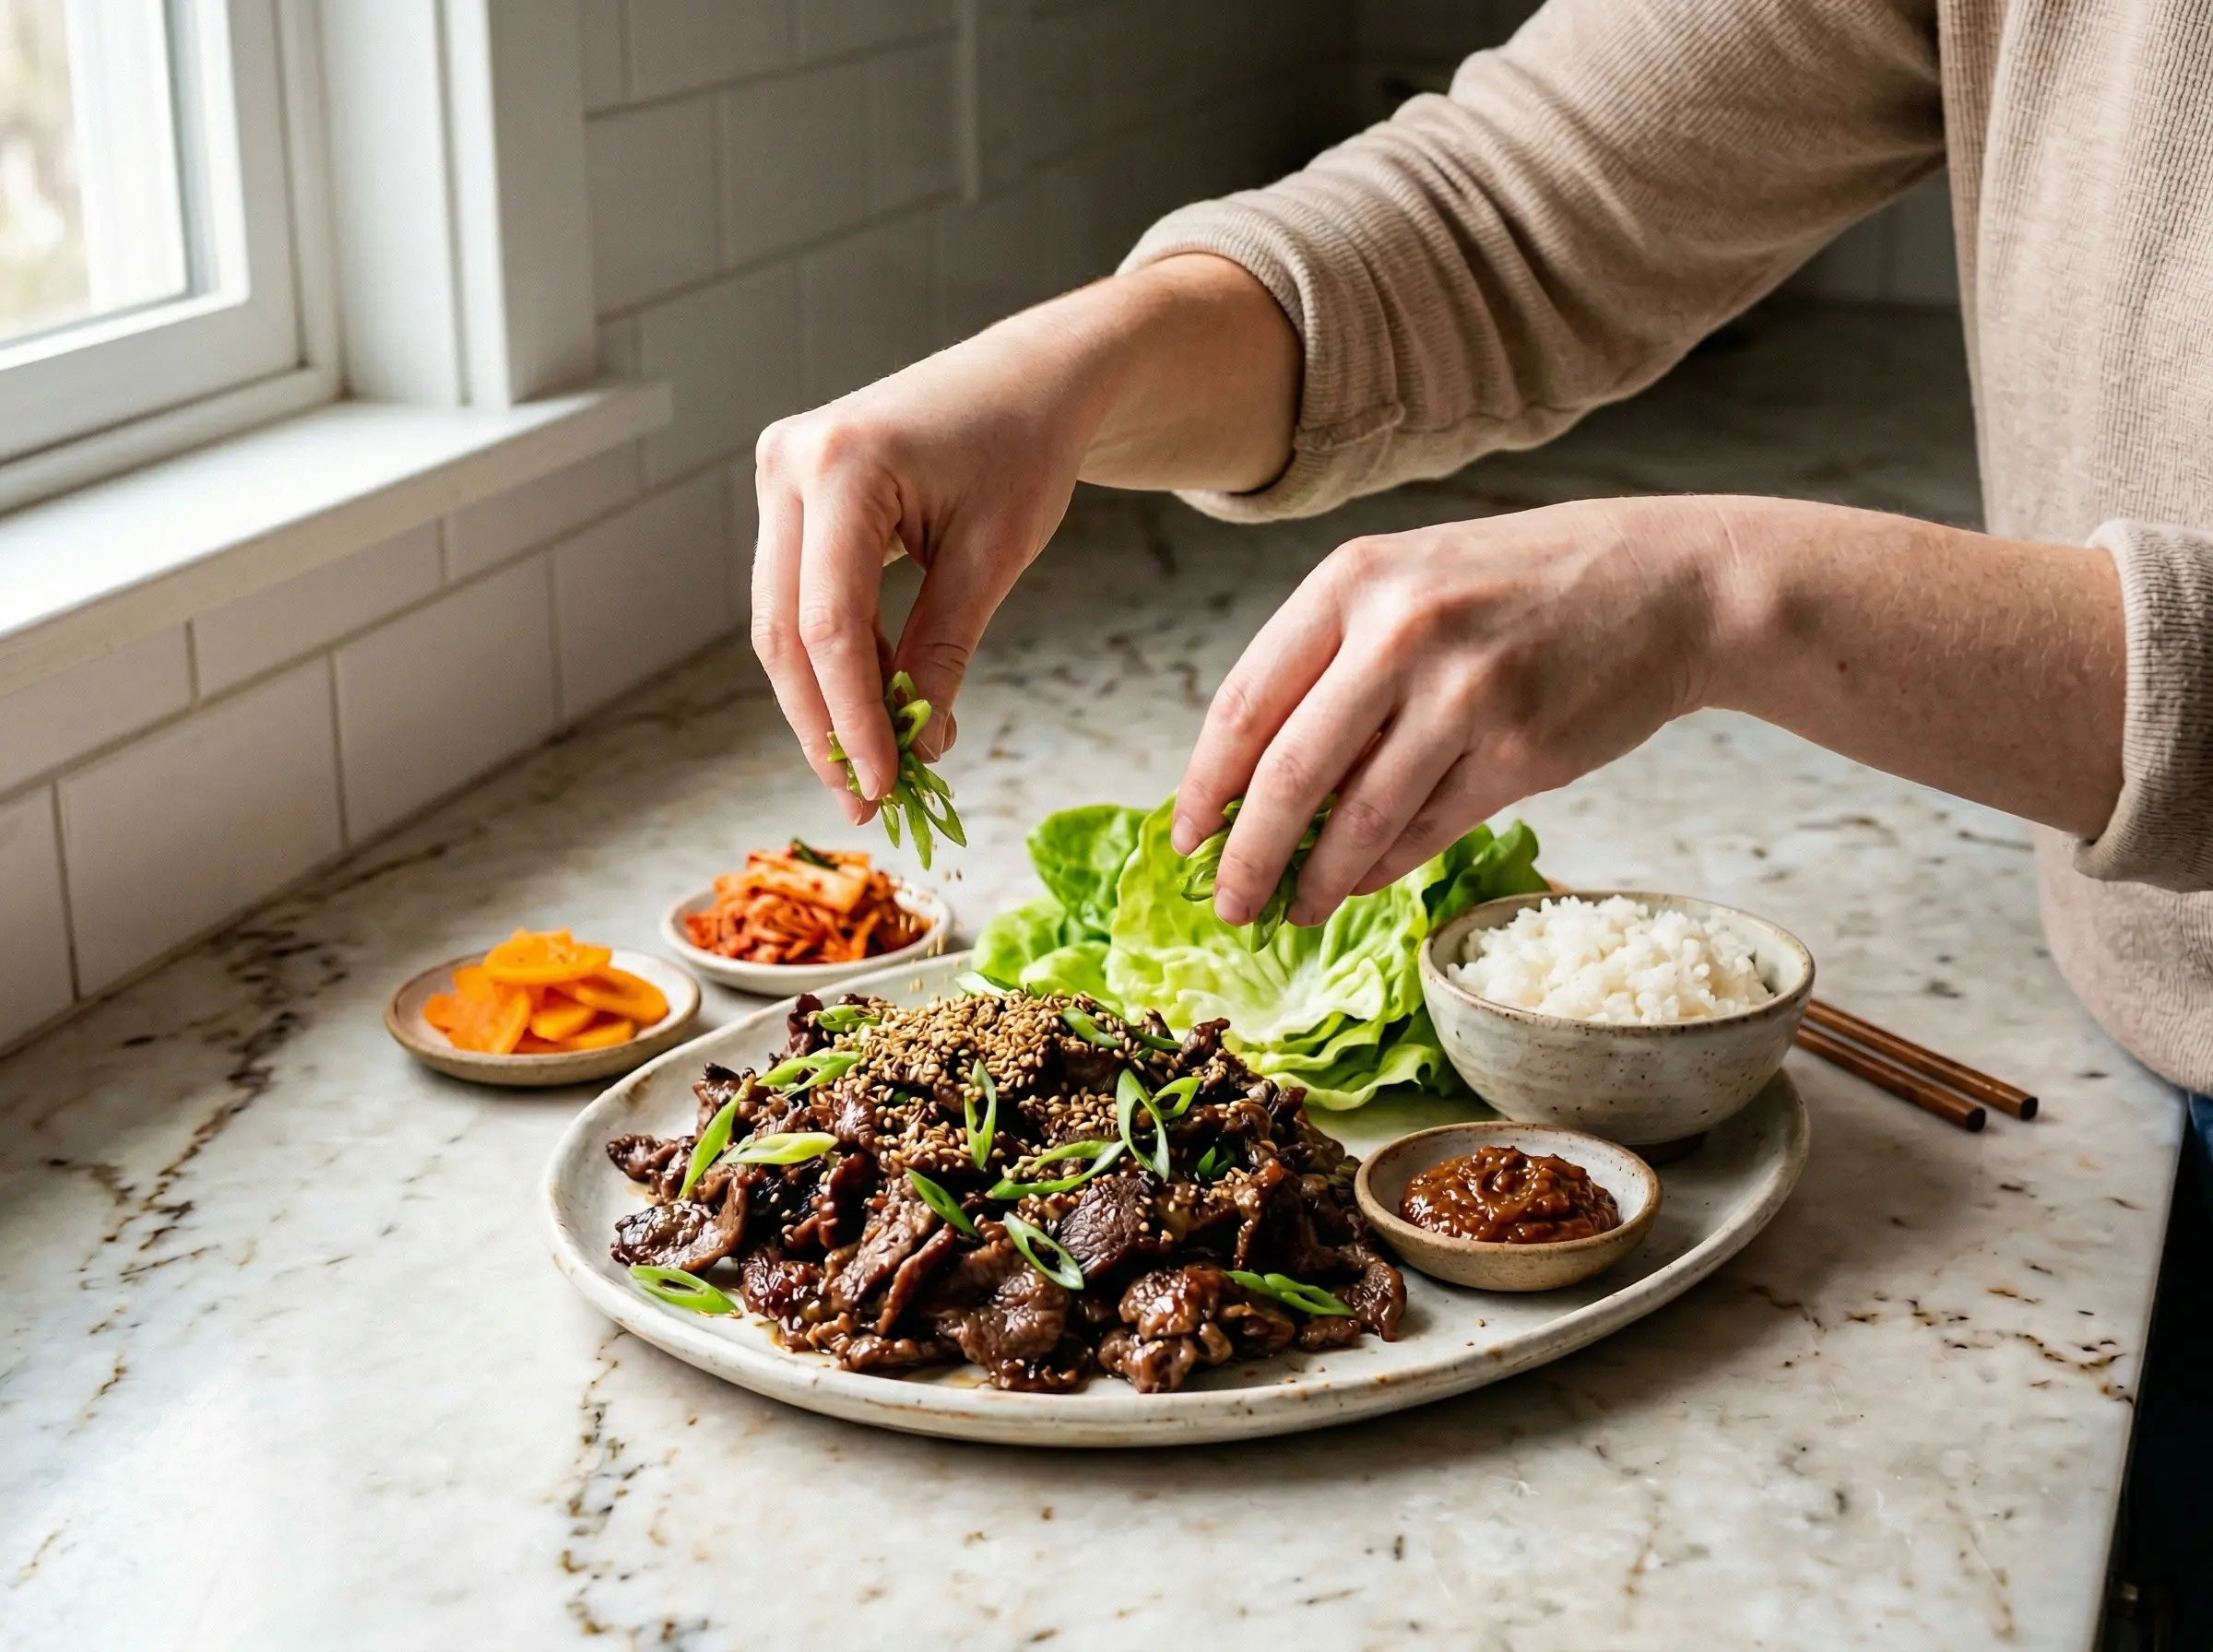
Serve immediately. Transfer the cooked bulgogi to a serving platter and garnish with additional sliced green onions and toasted sesame seeds. Serve with steamed white rice, crisp butter lettuce leaves for wrapping, and an array of banchan (side dishes) including kimchi, pickled radish (danmuji), and ssamjang or gochujang for dipping. The traditional way to eat bulgogi is ssam-style: place a piece of lettuce in your palm, add a spoonful of rice, top with bulgogi and a dab of ssamjang, then wrap and eat in one bite. Alternatively, serve bulgogi over rice as a rice bowl, use it as a filling for kimbap, or add it to bibimbap. The caramelized meat, the slight char, the sweet-savory sauce - every element works together to create one of Korea's most perfect dishes.
You Might Also Like