Shakshuka
Learn how to make authentic shakshuka with eggs poached in a rich, spiced tomato and pepper sauce. This beloved Middle Eastern breakfast is simple, flavorful, and perfect for any meal!
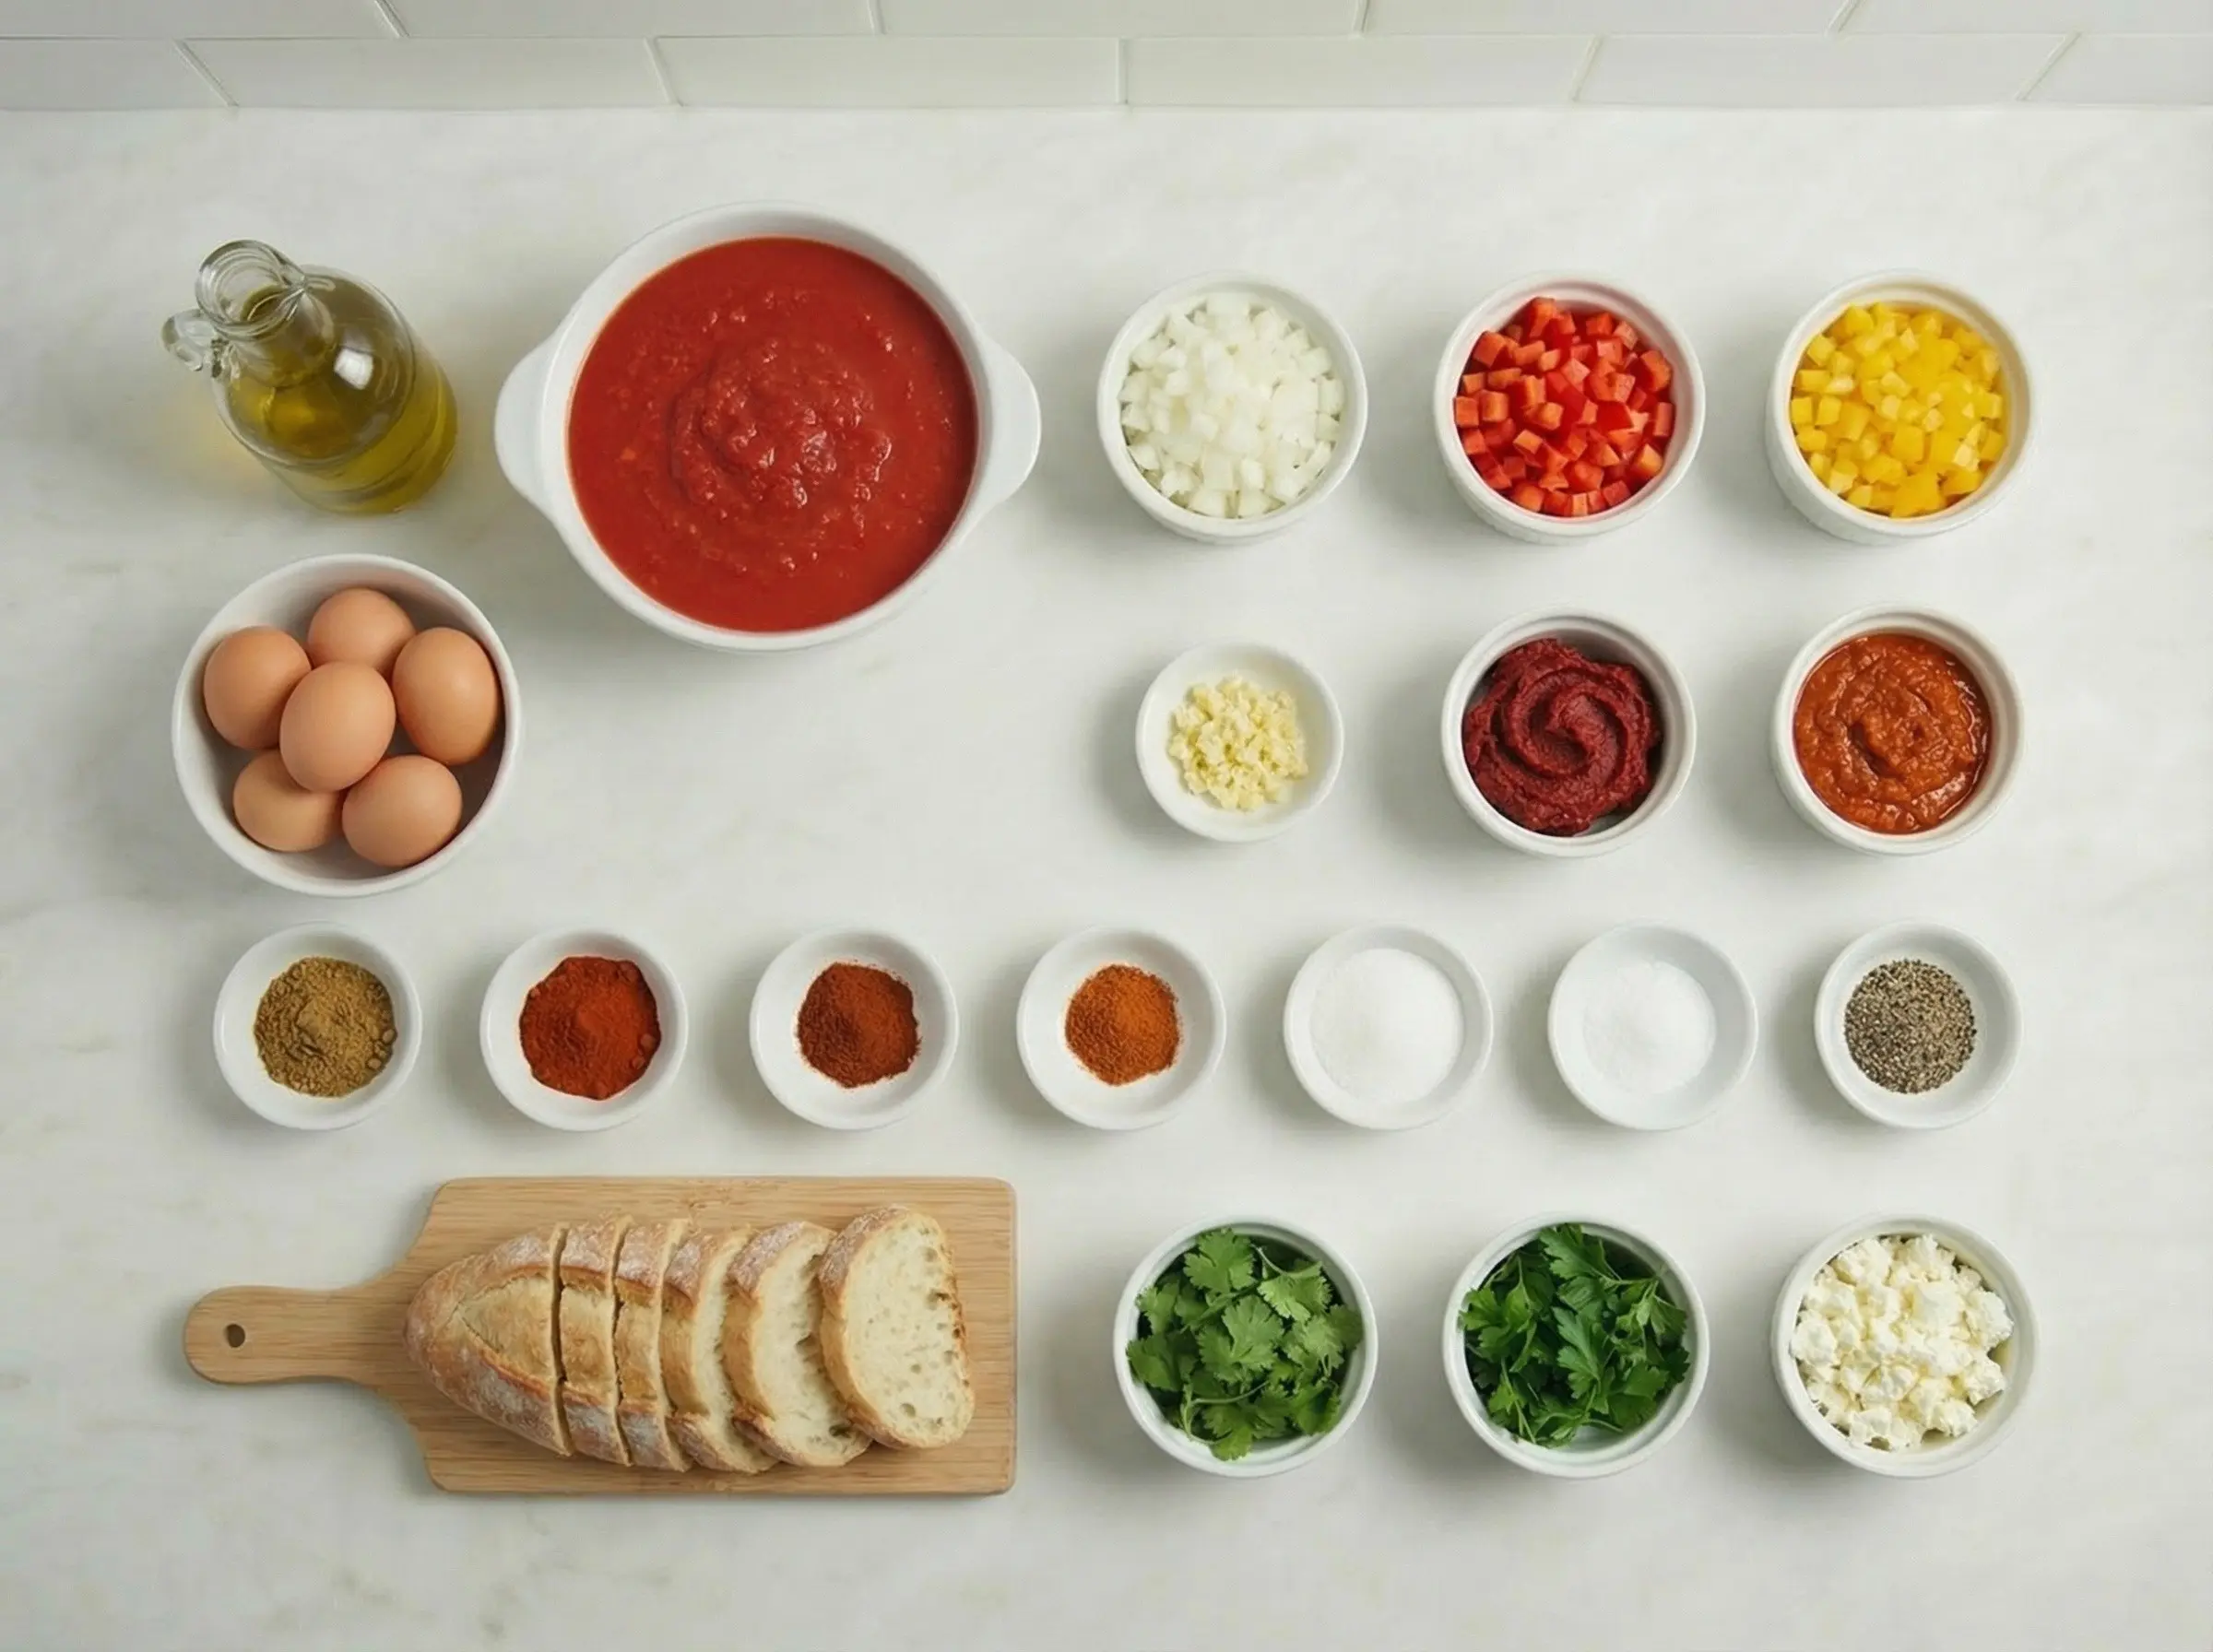
Ingredients
The Story
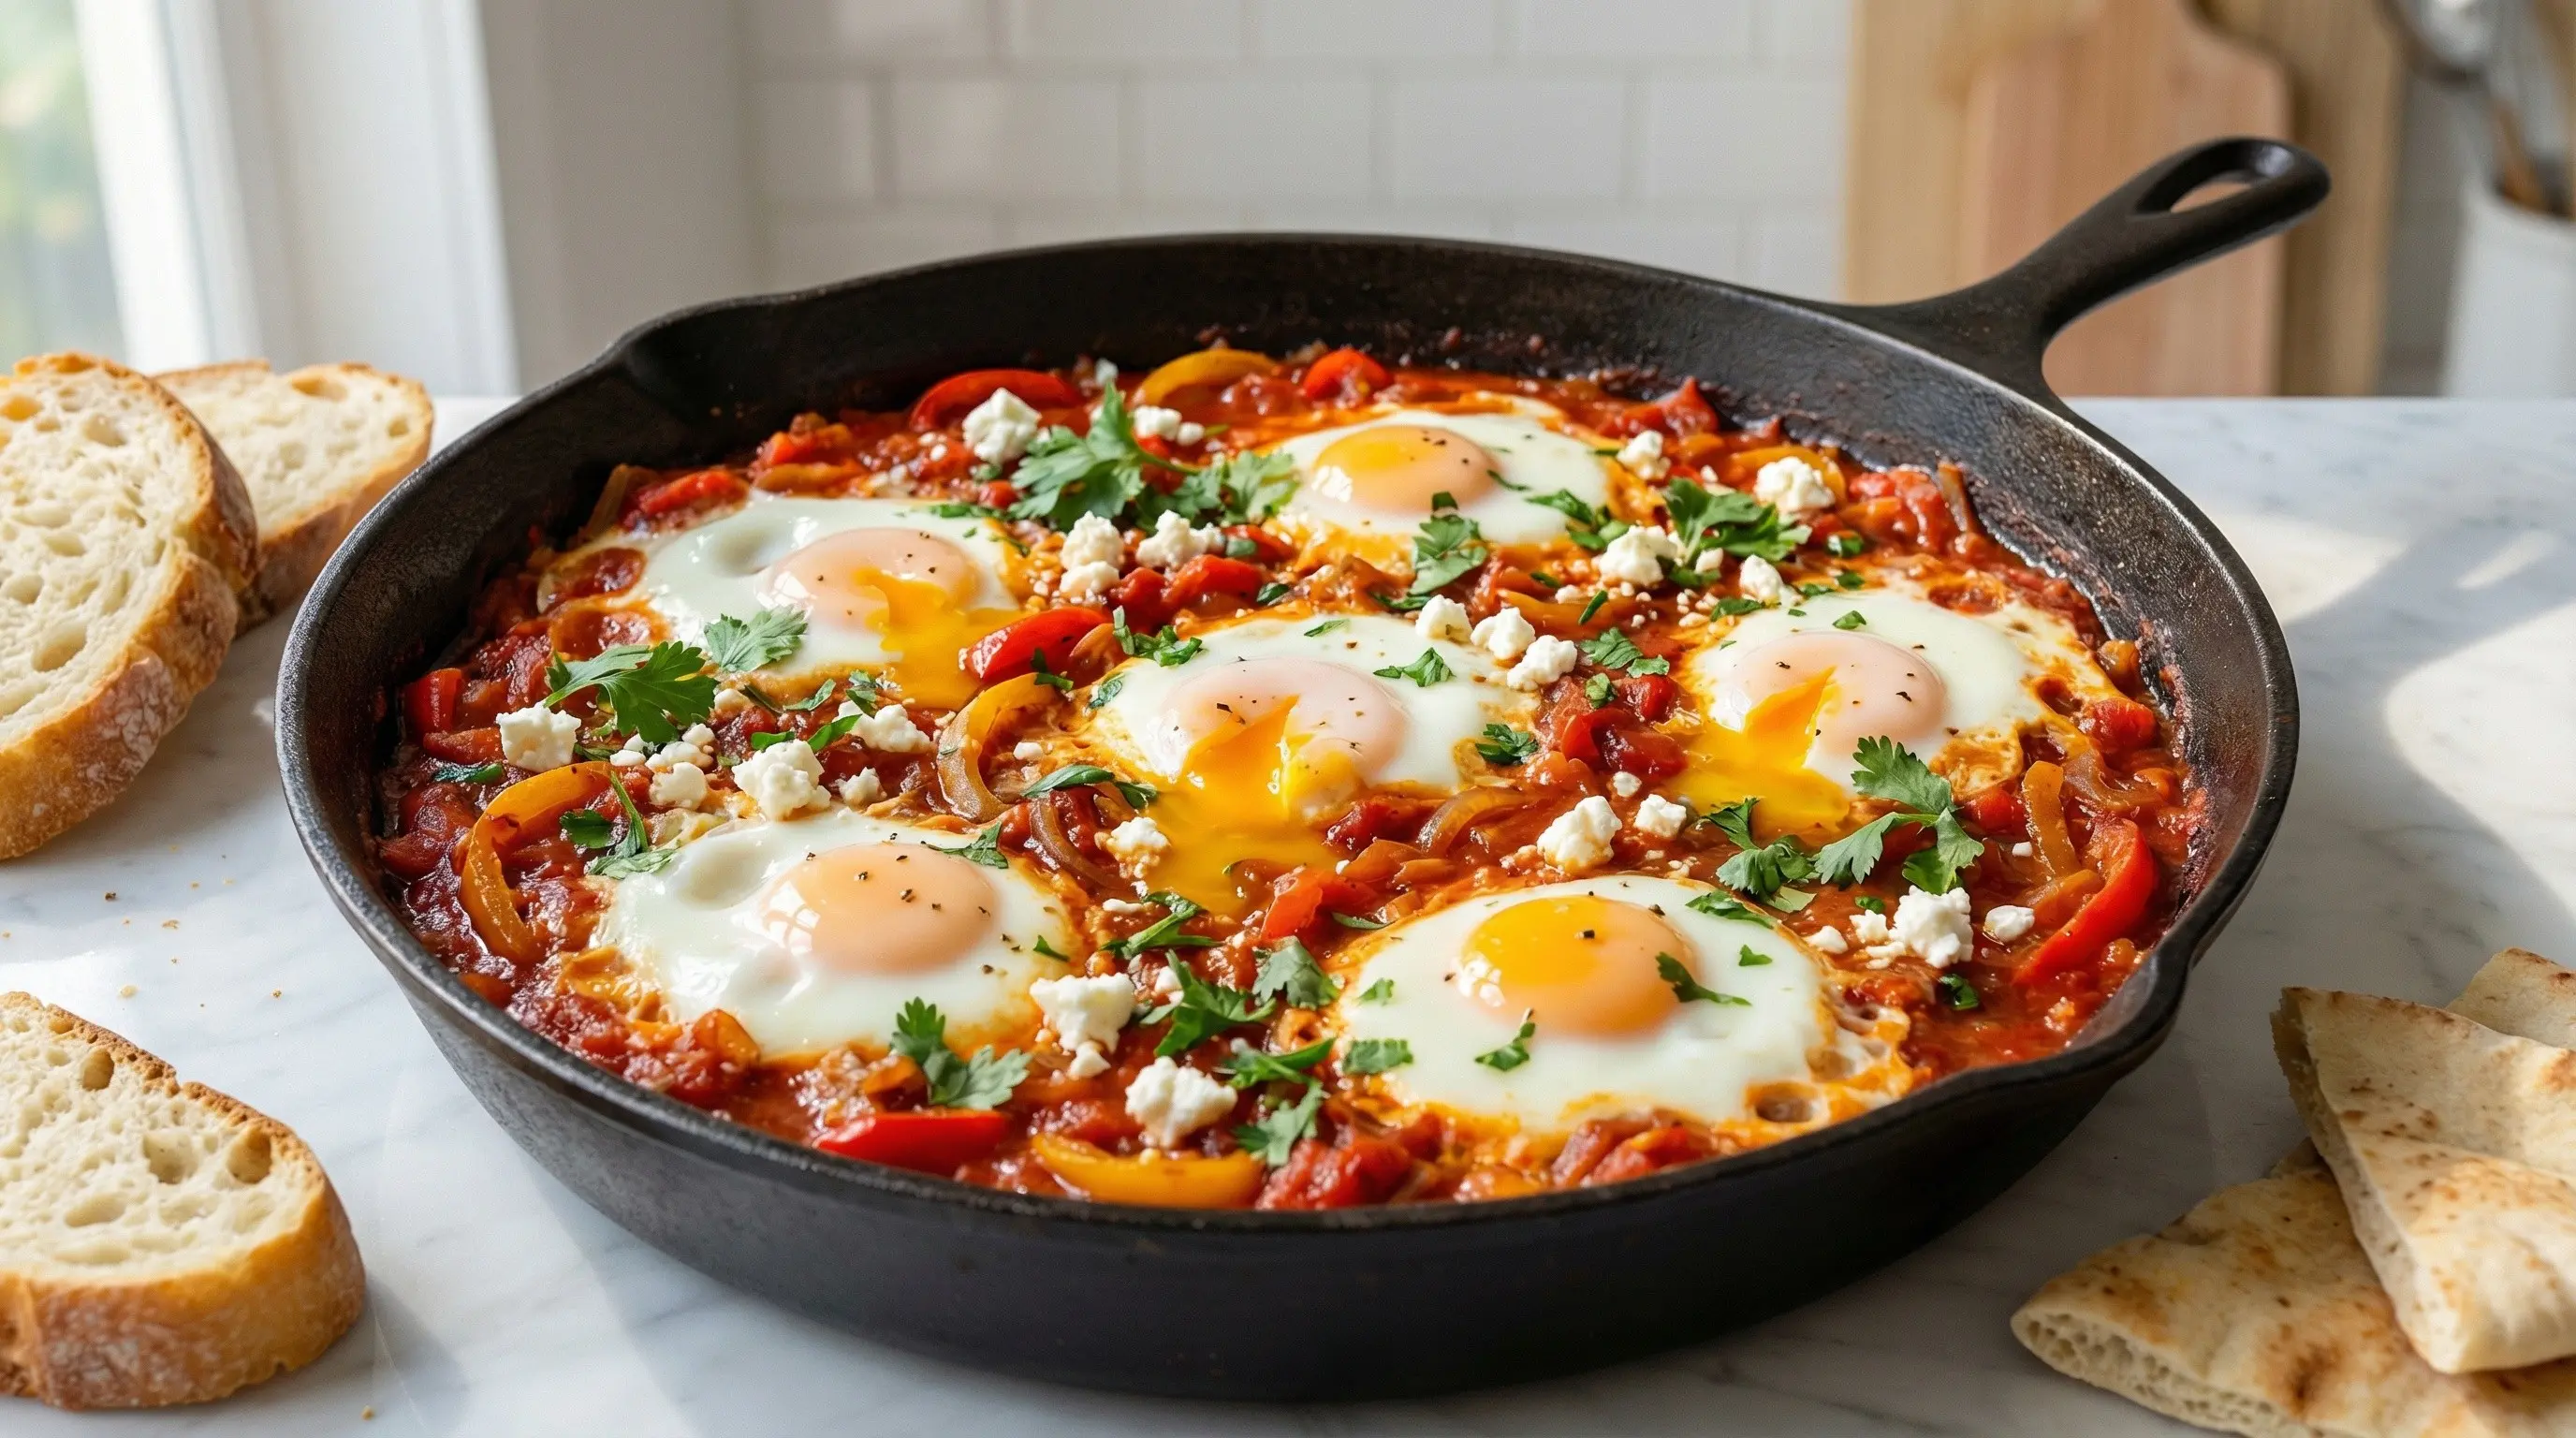
Shakshuka is one of the most beloved dishes across the Middle East and North Africa, a simple yet deeply satisfying preparation of eggs poached in a spiced tomato sauce. The name comes from the Arabic word meaning "a mixture" or "shaken," referring to the way the eggs are gently nestled into the bubbling sauce. While shakshuka's exact origins are debated, with Tunisia, Libya, Morocco, and Yemen all claiming some version of the dish, it is most strongly associated with Israel, where it has become a national culinary icon. North African Jewish immigrants brought the dish to Israel in the mid-20th century, and it quickly captured the hearts and appetites of the nation, evolving into the version most recognized internationally today. The dish likely has ancient roots in the Berber and Ottoman cuisines of North Africa, where tomatoes, peppers, and eggs were combined in various forms for centuries. In Tunisia, a similar dish called ojja incorporates merguez sausage and is considered the likely precursor to modern shakshuka. Libyan Jews brought their version called shakshukya, while Yemeni immigrants contributed their own variations. In Israel, these diverse influences merged and evolved, with the dish becoming a staple of home cooking, kibbutz dining halls, and casual restaurants. Today, shakshuka is eaten throughout the day in Israel - for breakfast, lunch, or dinner - and has spread globally as part of the worldwide embrace of Middle Eastern cuisine. What makes shakshuka so irresistible is the beautiful simplicity of runny egg yolks mingling with a richly spiced tomato sauce. The sauce should be chunky and robust, built on a foundation of onions, garlic, and bell peppers, simmered with cumin, paprika, and often a touch of harissa for heat. When the eggs are cracked into wells in the sauce and the pan is covered, they poach gently, the whites setting while the yolks remain gloriously runny. The dish is traditionally served directly in the skillet, family-style, with crusty bread for scooping up every bit of sauce and silky egg. It is comfort food at its most elemental - warm, nourishing, and infinitely satisfying.
Instructions
Step 1
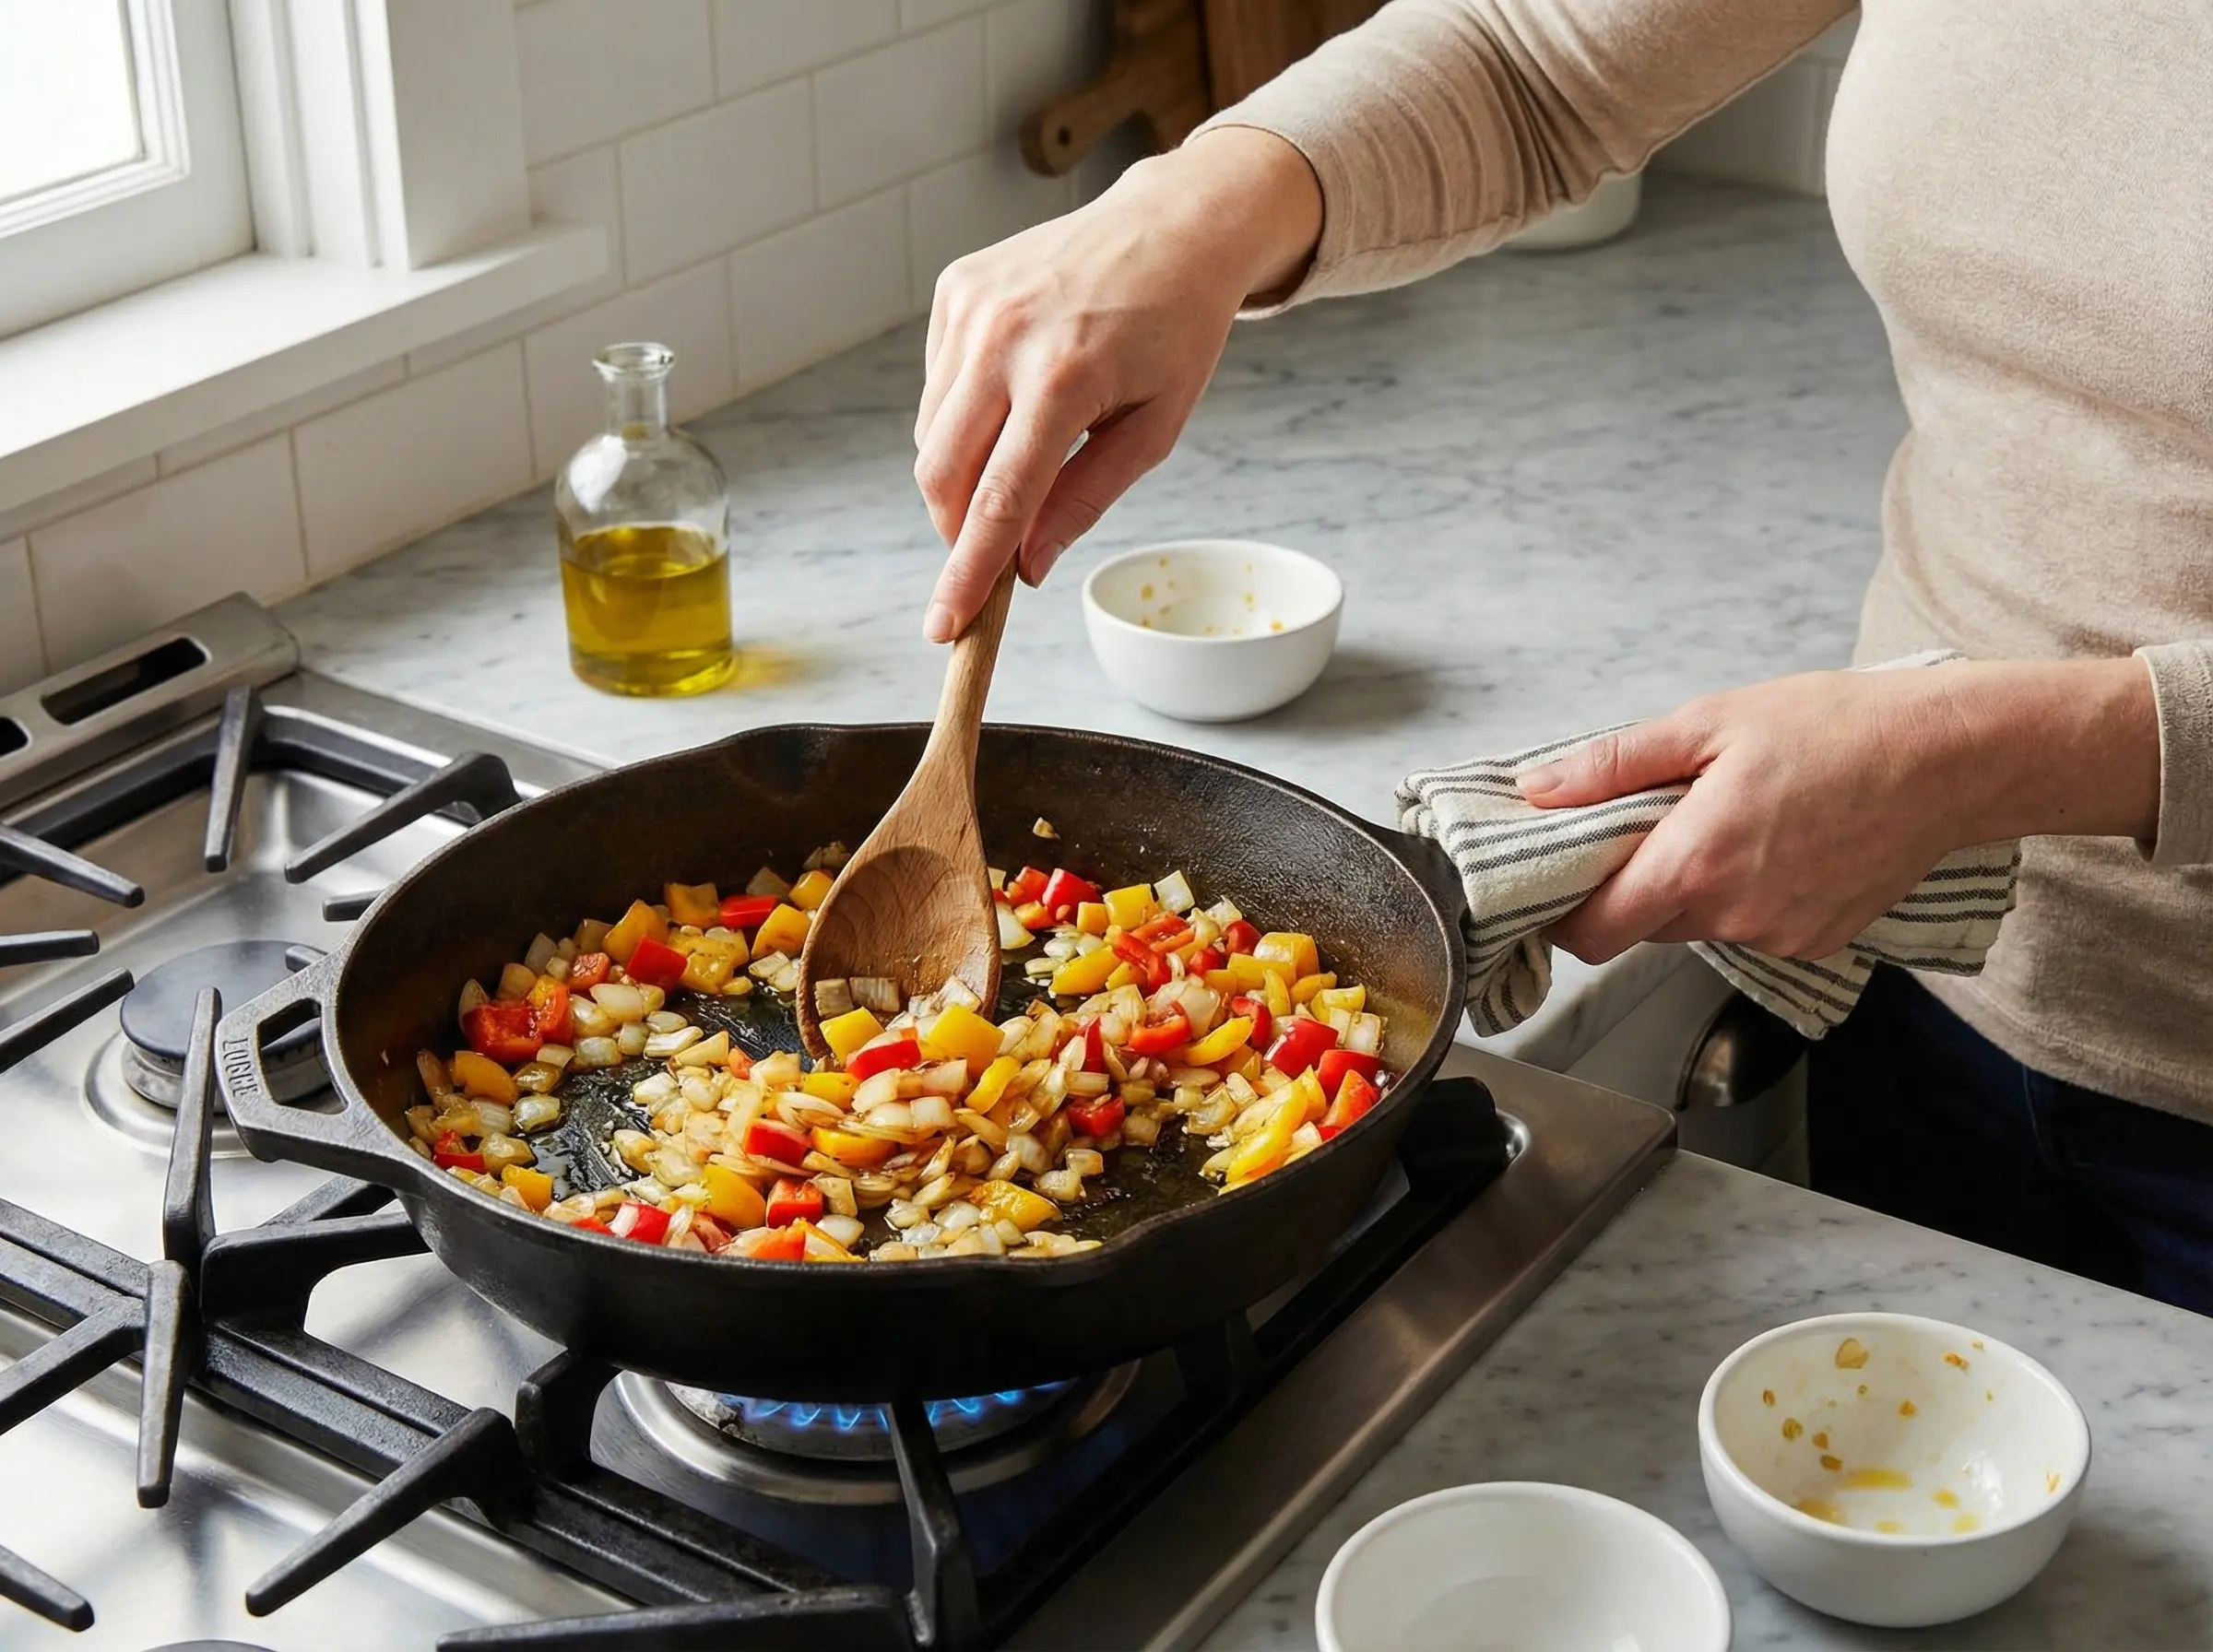
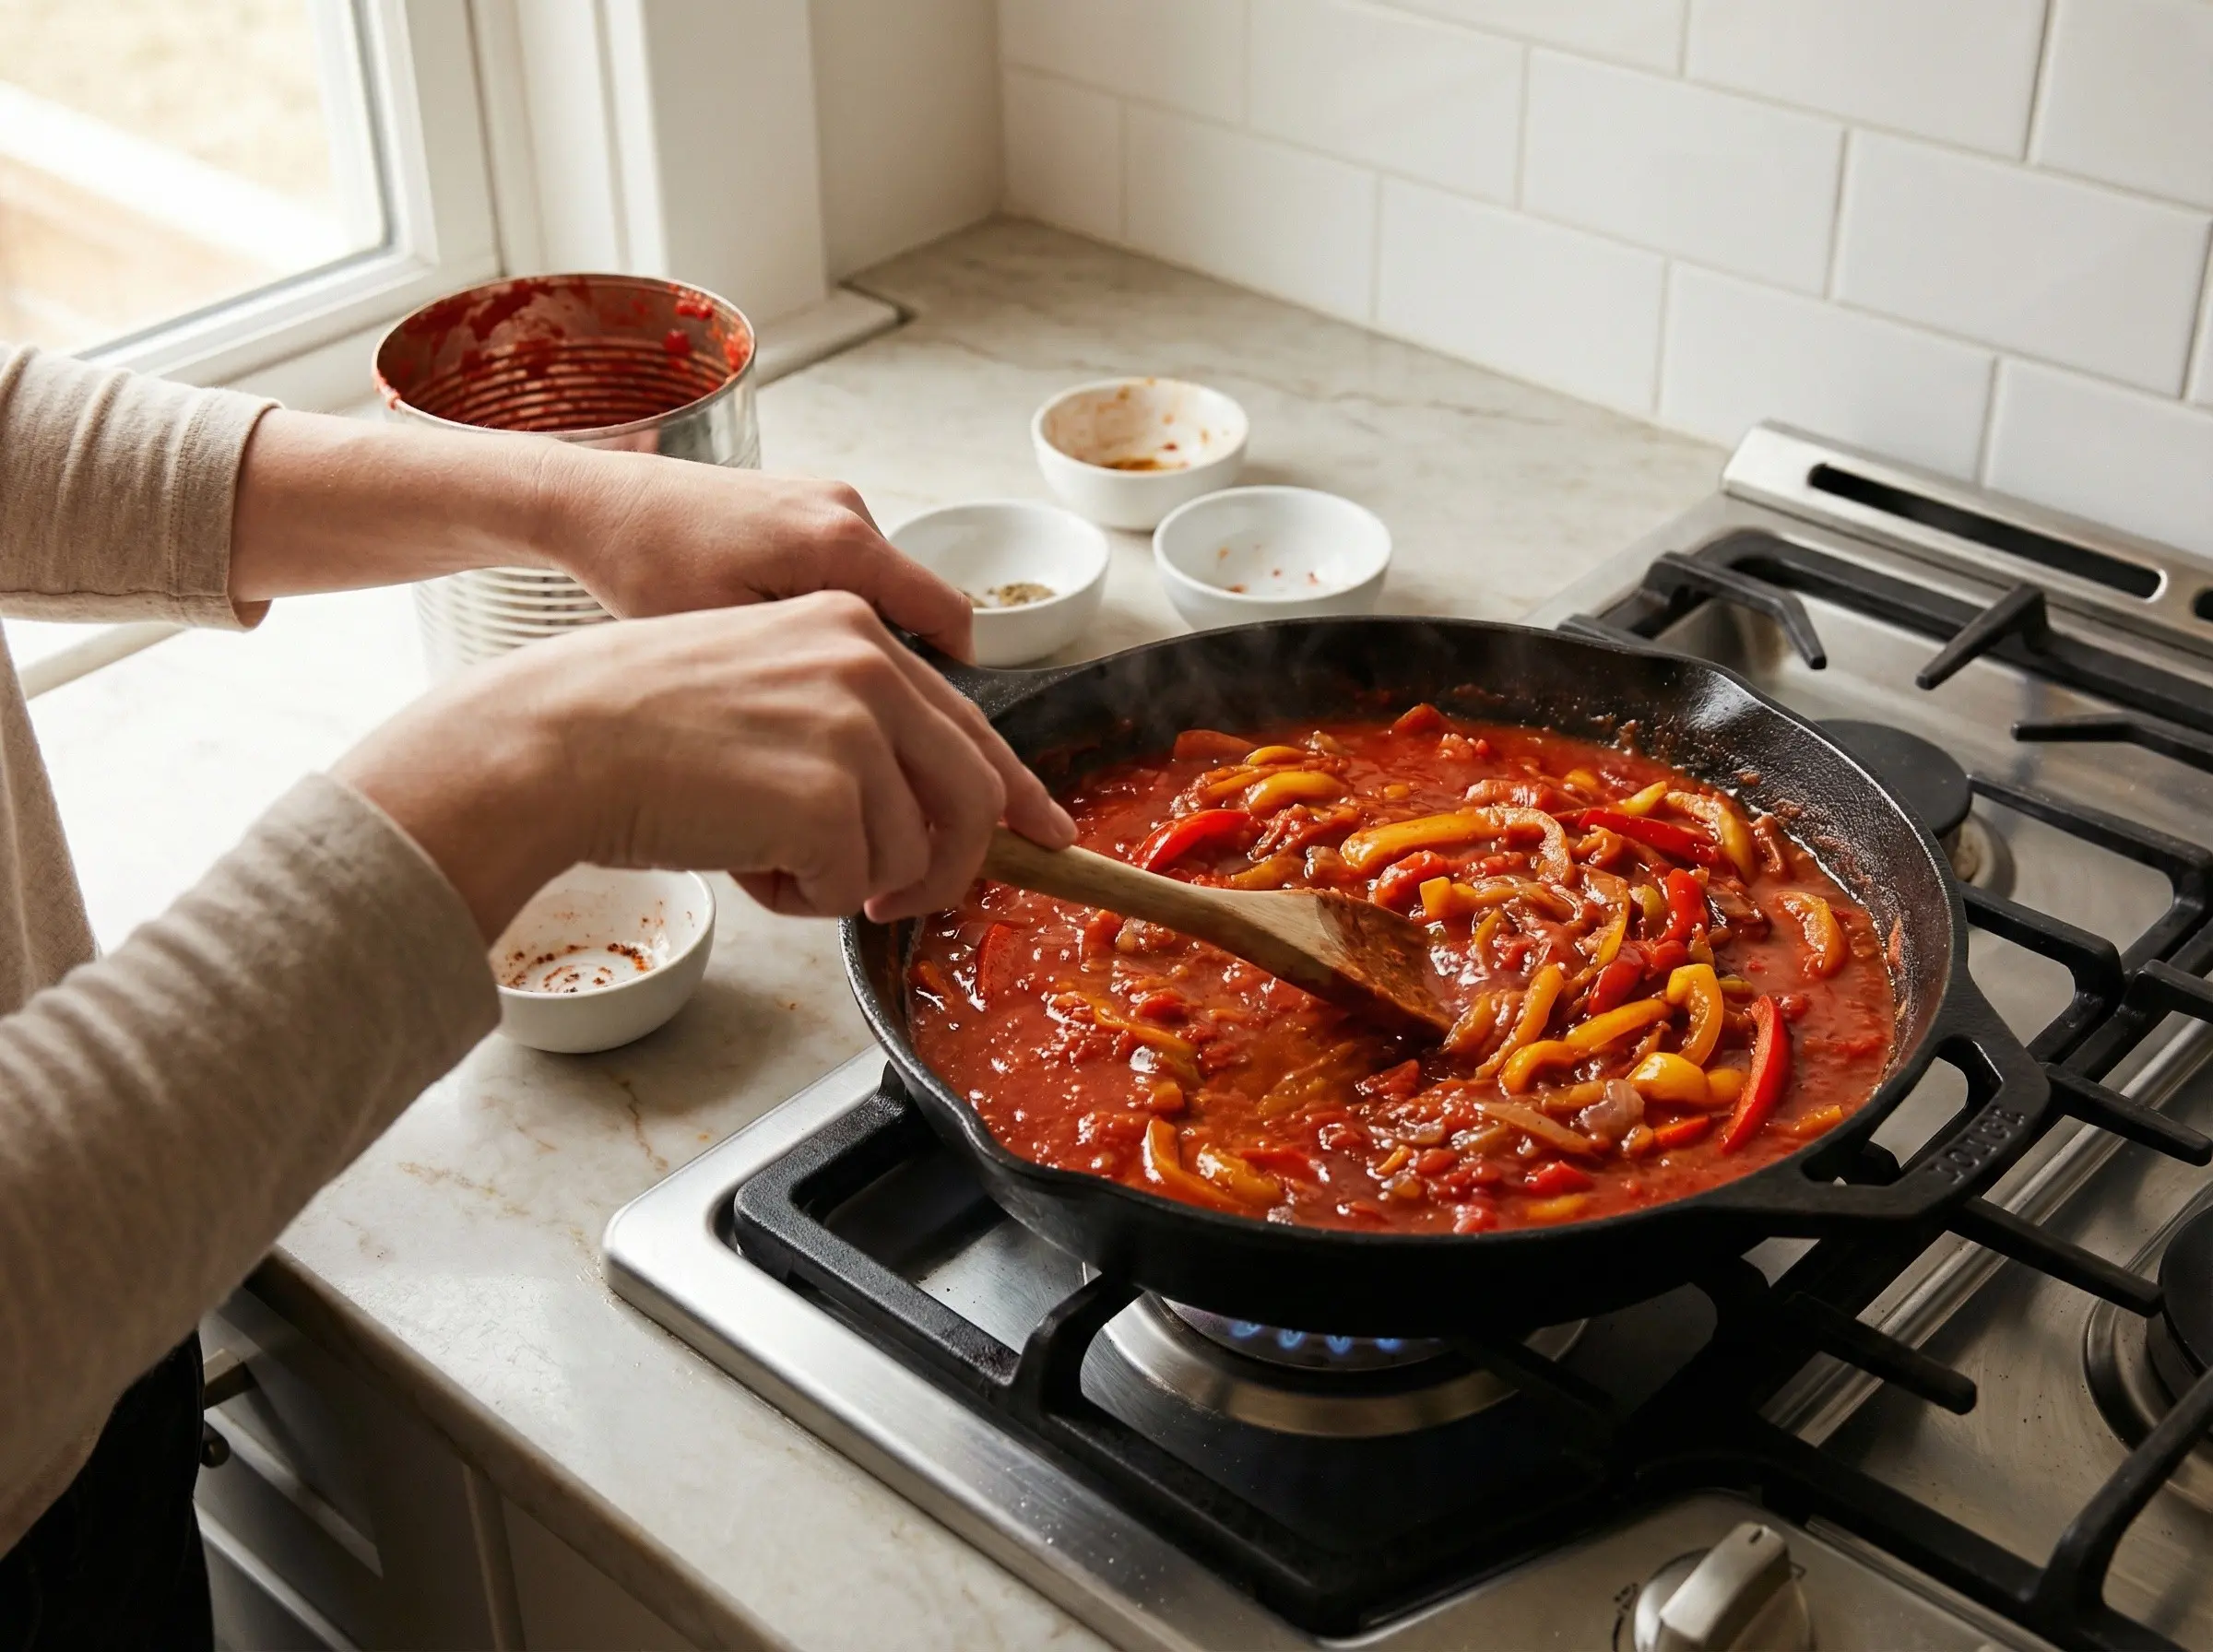
Heat the olive oil in a large, deep skillet or cast iron pan over medium heat. A 12-inch skillet works well for 6 eggs, providing enough room for each egg to have its own space. Add the diced onion and cook for 5-6 minutes, stirring occasionally, until softened and beginning to turn golden. Add the diced red and yellow bell peppers and continue cooking for another 5-6 minutes until the peppers have softened and the onions are caramelized. The peppers should be tender but still have some texture - not completely mushy.
Step 2
Add the minced garlic to the pan and cook for about 1 minute until very fragrant. Add the cumin, sweet paprika, smoked paprika, and cayenne pepper. Stir constantly for about 30 seconds to toast the spices and coat the vegetables - this blooms the spices and releases their aromatic oils. Be careful not to burn the spices or they will become bitter. Add the tomato paste and harissa paste if using, stirring for another 30 seconds until the paste darkens slightly and becomes fragrant.
Step 3
Pour in the crushed tomatoes, using a wooden spoon to scrape up any browned bits from the bottom of the pan. Add the sugar, salt, and black pepper. Stir well to combine everything into a cohesive sauce. The sugar balances the acidity of the tomatoes and is traditional in many shakshuka recipes. Bring the sauce to a simmer, then reduce heat to medium-low. Let the sauce cook uncovered for 10-15 minutes, stirring occasionally, until it thickens slightly and the flavors meld together. The sauce should be thick enough to hold the eggs but still have some moisture.
Step 4
Taste the sauce and adjust seasoning as needed - you may want more salt, more cayenne for heat, or more sugar if the tomatoes are particularly acidic. Using the back of a spoon, create 6 wells or indentations in the sauce, spacing them evenly around the pan. These wells will hold the eggs and keep the yolks intact. Make the wells deep enough that the eggs will be partially submerged in the sauce but not so deep that the eggs disappear completely.
Step 5
Crack one egg into a small bowl first (this prevents broken yolks from ruining the dish), then gently slide it into one of the wells. Repeat with the remaining eggs, placing one in each well. Season the eggs lightly with a pinch of salt and pepper. Cover the pan with a lid and cook over medium-low heat for 6-10 minutes, depending on how runny you like your yolks. For runny yolks with fully set whites (the ideal), cook for about 6-7 minutes. Check the eggs periodically by gently jiggling the pan - the whites should be set but the yolks should still wobble.

Step 6
Remove the pan from heat and immediately garnish with fresh chopped cilantro, parsley, and crumbled feta cheese. The residual heat will gently warm the feta without melting it completely. Serve the shakshuka immediately, directly from the skillet - this is traditional and keeps the dish hot. Place the skillet in the center of the table with plenty of warm crusty bread, pita, or challah for scooping. Each person should scoop out an egg along with plenty of sauce using the bread. In Israel, shakshuka is often served with a side of Israeli salad (diced cucumbers and tomatoes) and tahini. Shakshuka is best eaten right away while the yolks are still runny and the bread is perfect for dipping.

You Might Also Like