Pico de Gallo
Learn how to make authentic pico de gallo with ripe tomatoes, onion, cilantro, jalapeno, and fresh lime juice. This vibrant Mexican salsa is fresh, bright, and ready in just 15 minutes!
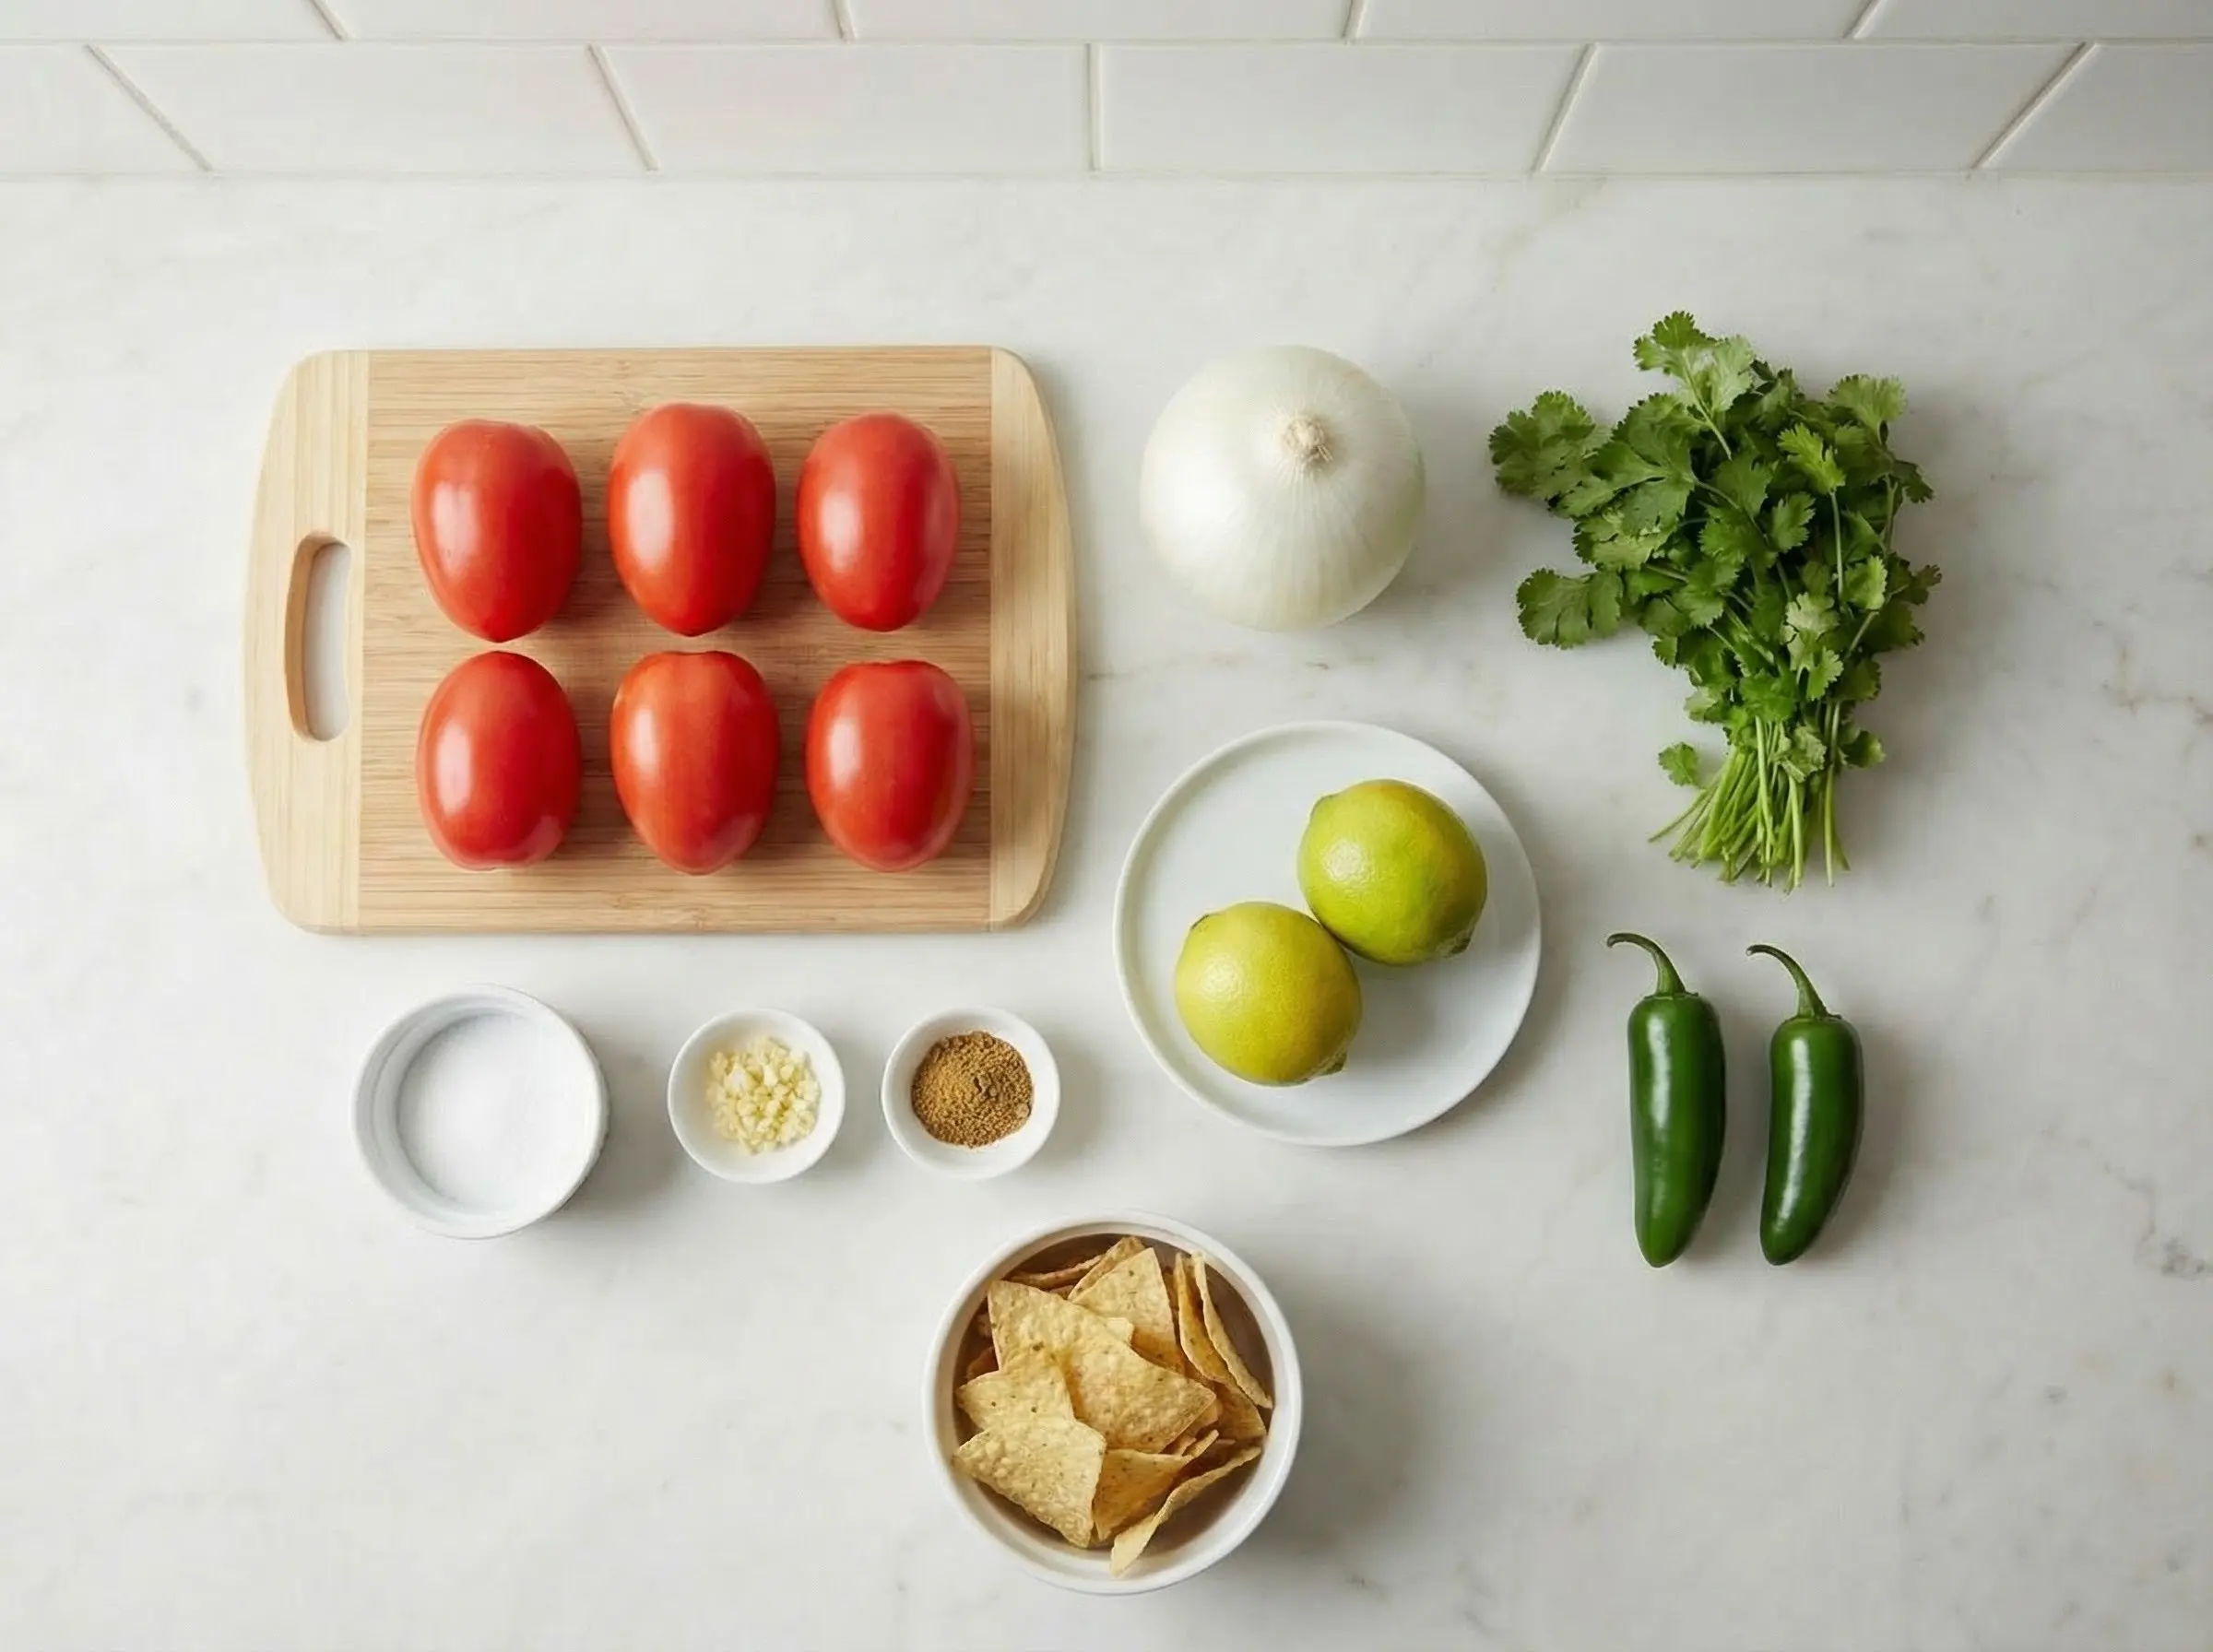
Ingredients
The Story
Pico de gallo, also known as salsa fresca or salsa cruda, is one of the foundational preparations in Mexican cuisine - a fresh, uncooked salsa of chopped tomatoes, onion, cilantro, and chili peppers dressed with lime juice and salt. The name "pico de gallo" literally translates to "rooster's beak" in Spanish, though the exact reason for this peculiar name is debated. One popular theory suggests it refers to the way people originally ate it - pinching pieces between thumb and finger in a motion resembling a pecking rooster. Another theory connects it to the sharp, pecking heat of the chili peppers. Whatever the etymology, pico de gallo has been a staple of Mexican tables for centuries, predating the arrival of the Spanish with its indigenous roots in Aztec cuisine. Unlike cooked salsas that are blended and simmered, pico de gallo celebrates the pure, unadulterated flavors of fresh vegetables at their peak. This distinction is important: pico de gallo is always raw, always chunky, and always made with fresh ingredients - never canned or jarred. The tomatoes should be ripe but firm, providing the sweet-acidic base. White onion adds sharp bite that mellows slightly with the lime juice. Fresh cilantro contributes its distinctive bright, citrusy herbaceousness. Serrano or jalapeno peppers bring heat that can be adjusted to taste. And fresh lime juice ties everything together while adding brightness and helping to slightly "cook" the onion. The result is a salsa that tastes vibrantly alive - a celebration of summer produce in every bite. What makes pico de gallo so essential to Mexican cooking is its versatility and the way it brightens and completes other dishes. It is the perfect accompaniment to tacos, adding freshness to rich, fatty meats. It transforms simple grilled fish or chicken into a complete meal. Scooped up with tortilla chips, it becomes an addictive appetizer. Spooned over huevos rancheros, it provides the essential finishing touch. Pico de gallo appears on Mexican tables at virtually every meal, prepared fresh daily because its beauty lies in its immediacy - unlike cooked salsas that keep for days, pico de gallo is meant to be made and eaten within hours when the vegetables are at their crunchiest and most vibrant. It is Mexican cuisine stripped to its purest essence: excellent ingredients, minimally manipulated, bursting with flavor.
Instructions
Step 1
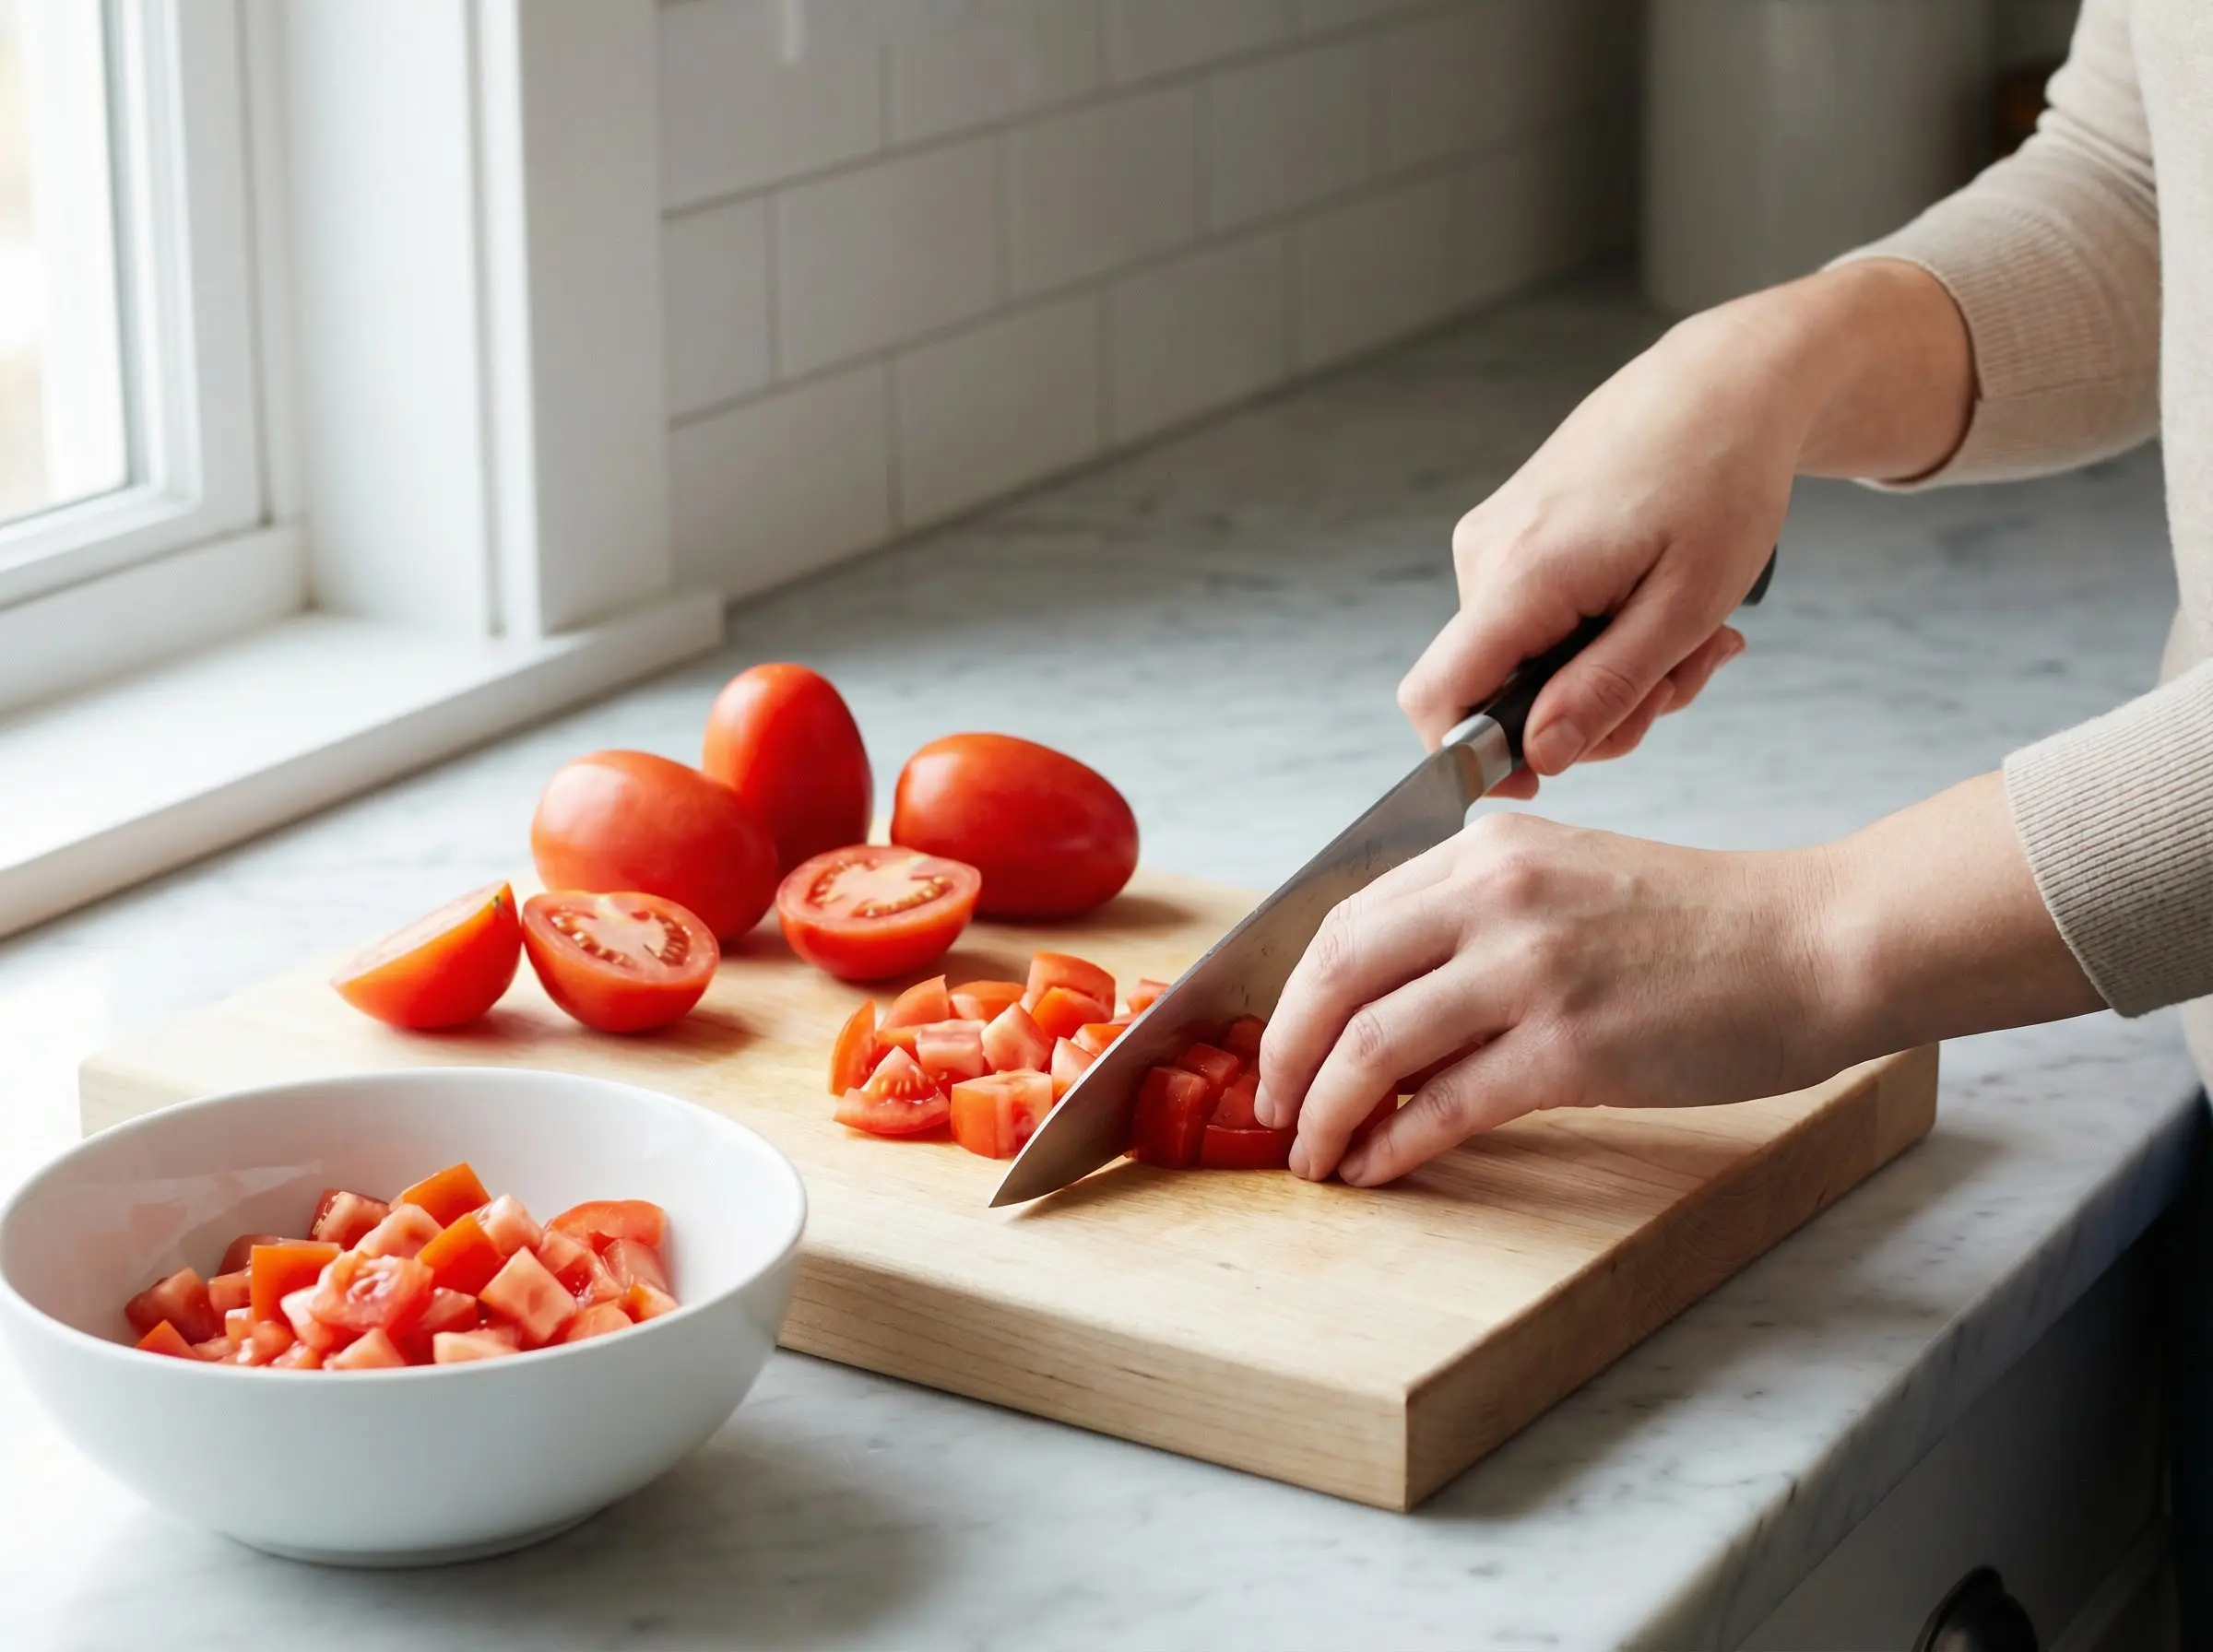
Select the right tomatoes - this is the most important step. Choose ripe but firm tomatoes that smell fragrant at the stem end and give slightly when pressed. Roma (plum) tomatoes are ideal because they are meaty with fewer seeds and less juice, resulting in a pico that holds its texture rather than becoming watery. If using regular tomatoes, you may want to seed them. Dice the tomatoes into 1/4-inch pieces - not too fine or they will become mushy, not too large or they will be difficult to scoop with chips. Place the diced tomatoes in a medium bowl.
Step 2
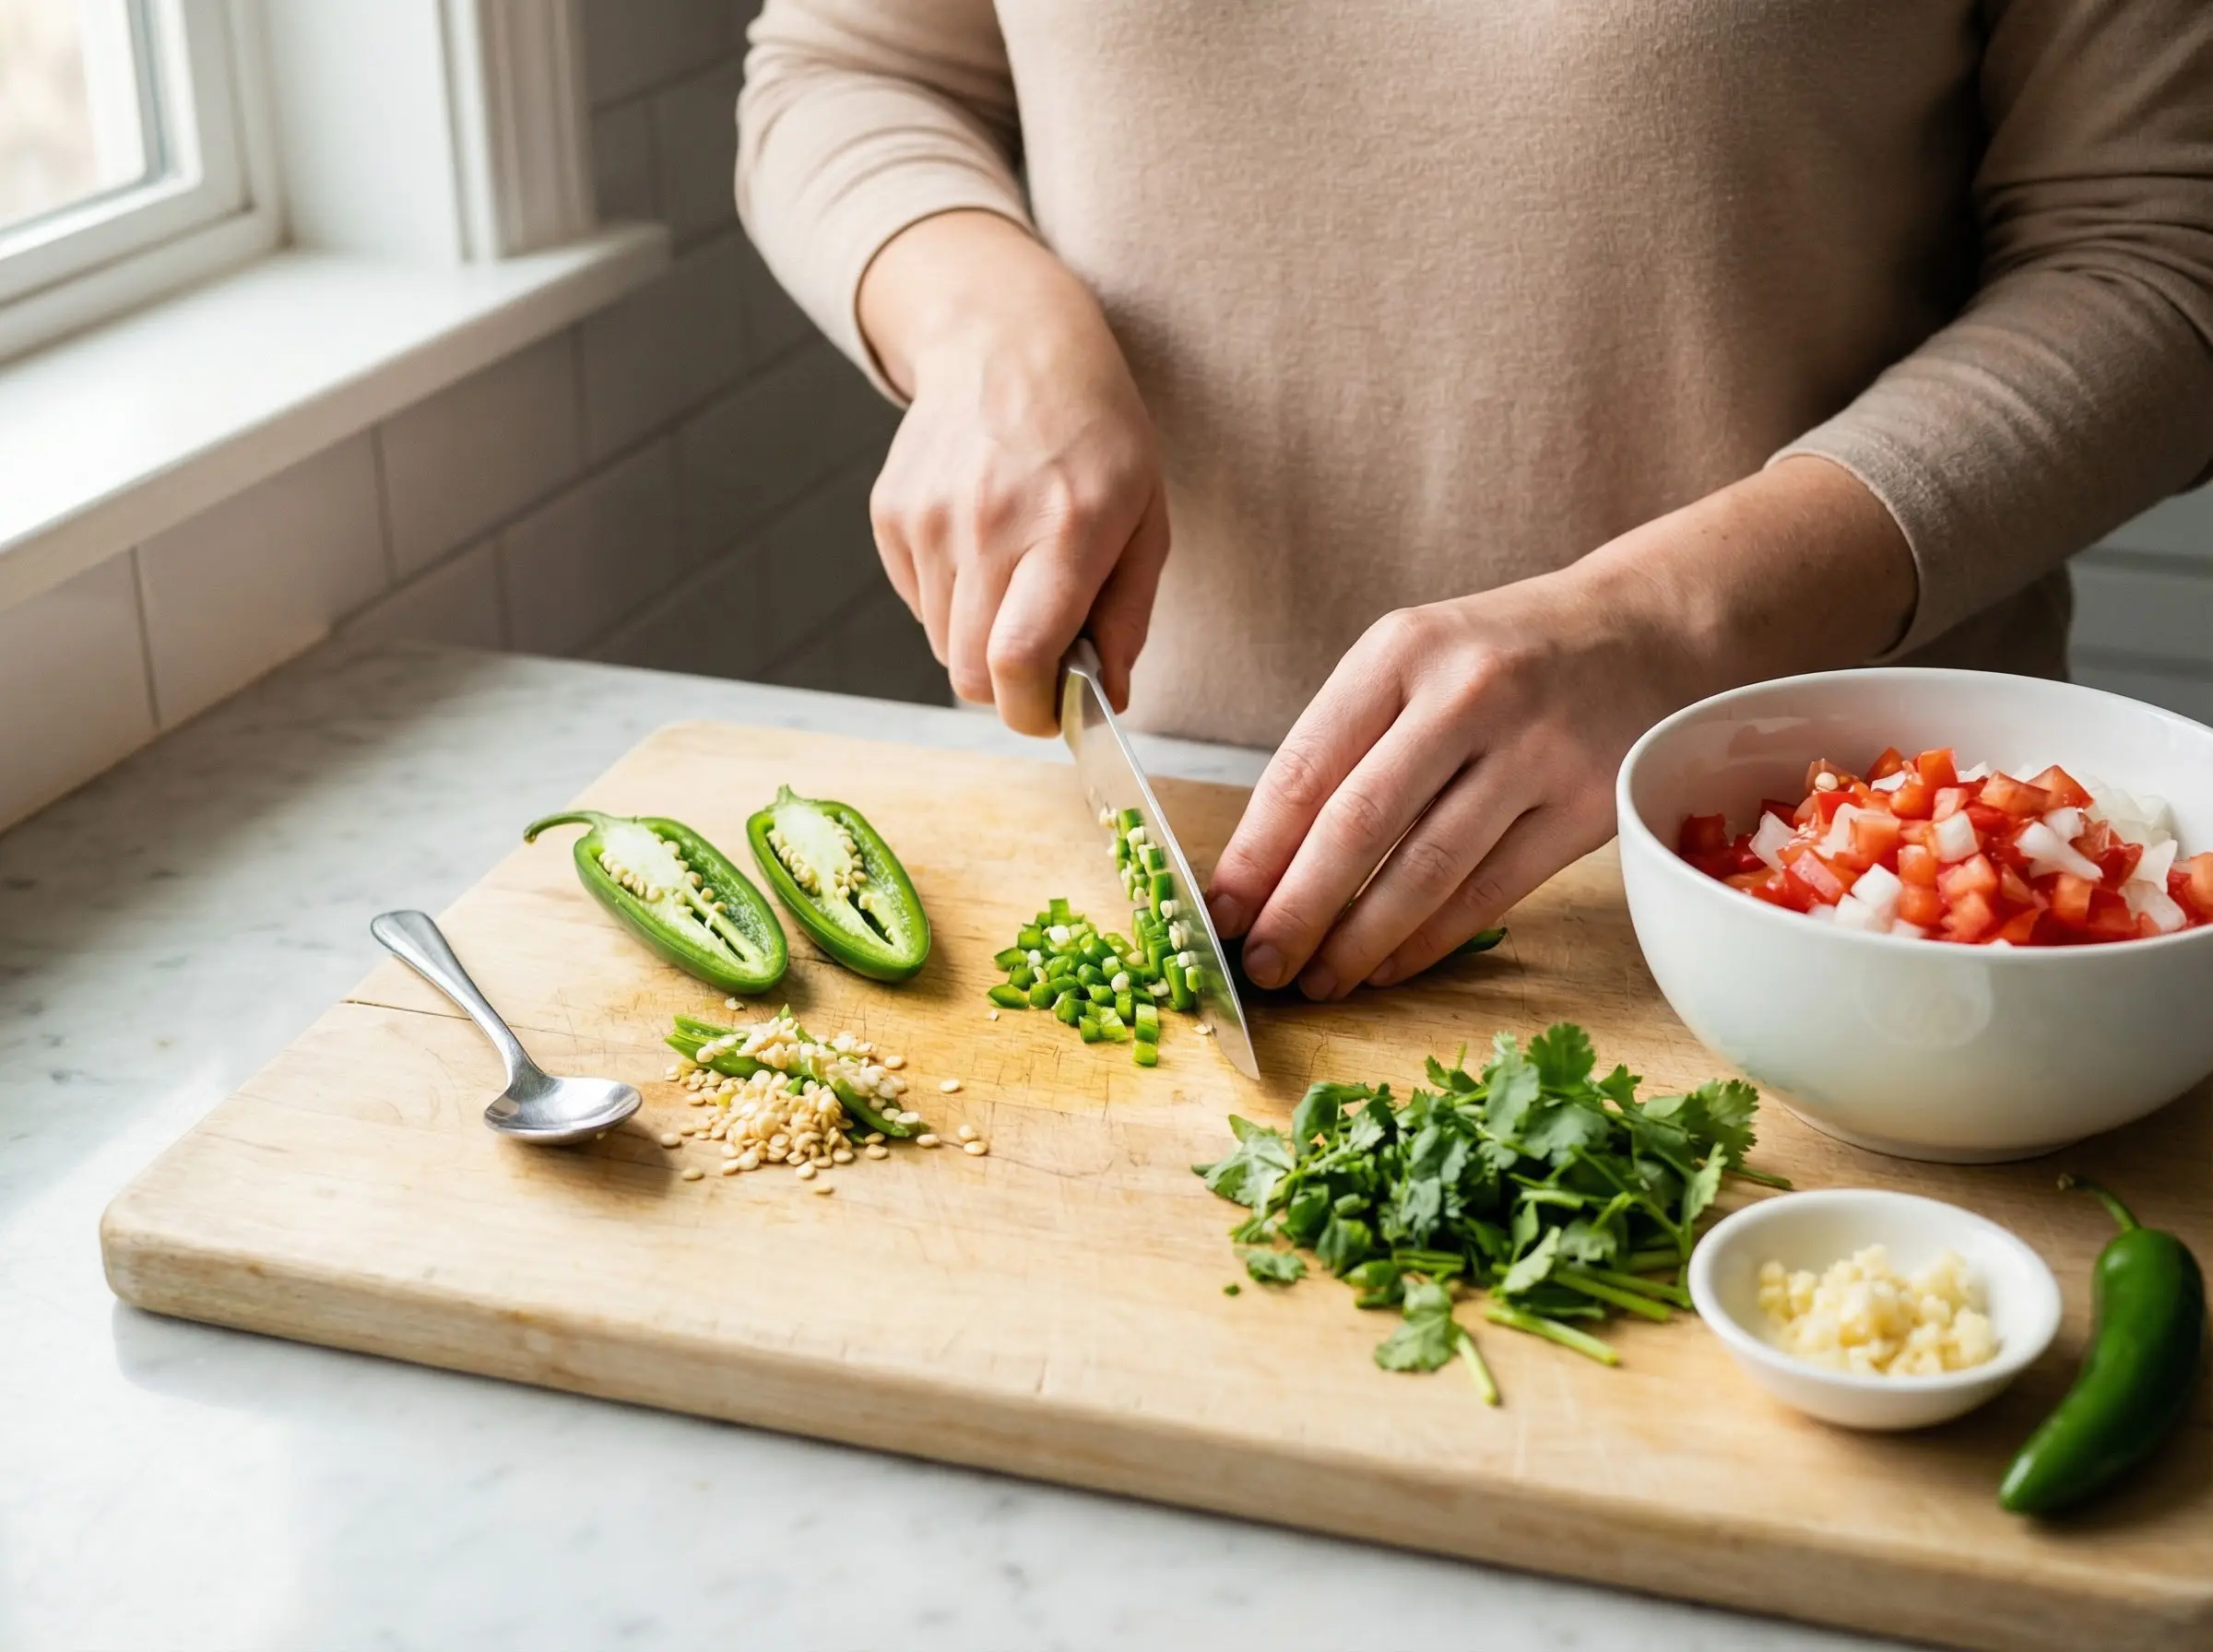
Prepare the onion. White onion is traditional and provides the sharpest, cleanest bite that is characteristic of authentic pico de gallo. Finely dice the onion into pieces slightly smaller than the tomatoes - about 1/8 inch. If you find raw onion too pungent, you can rinse the diced onion under cold water and drain well, or soak in ice water for 5 minutes - this mellows the bite while preserving the crunch. Add the onion to the bowl with the tomatoes.
Step 3
Prepare the peppers and cilantro. Cut the jalapenos or serranos in half lengthwise and scrape out the seeds and white membranes with a spoon - this is where most of the heat resides. For milder pico, remove all seeds and membranes; for spicier, leave some or all. Mince the peppers very finely. Wash and dry the cilantro, then chop it roughly - both leaves and tender stems can be used. The stems actually have more concentrated flavor. Add the peppers and cilantro to the bowl. If using garlic, mince it finely and add it now.
Step 4
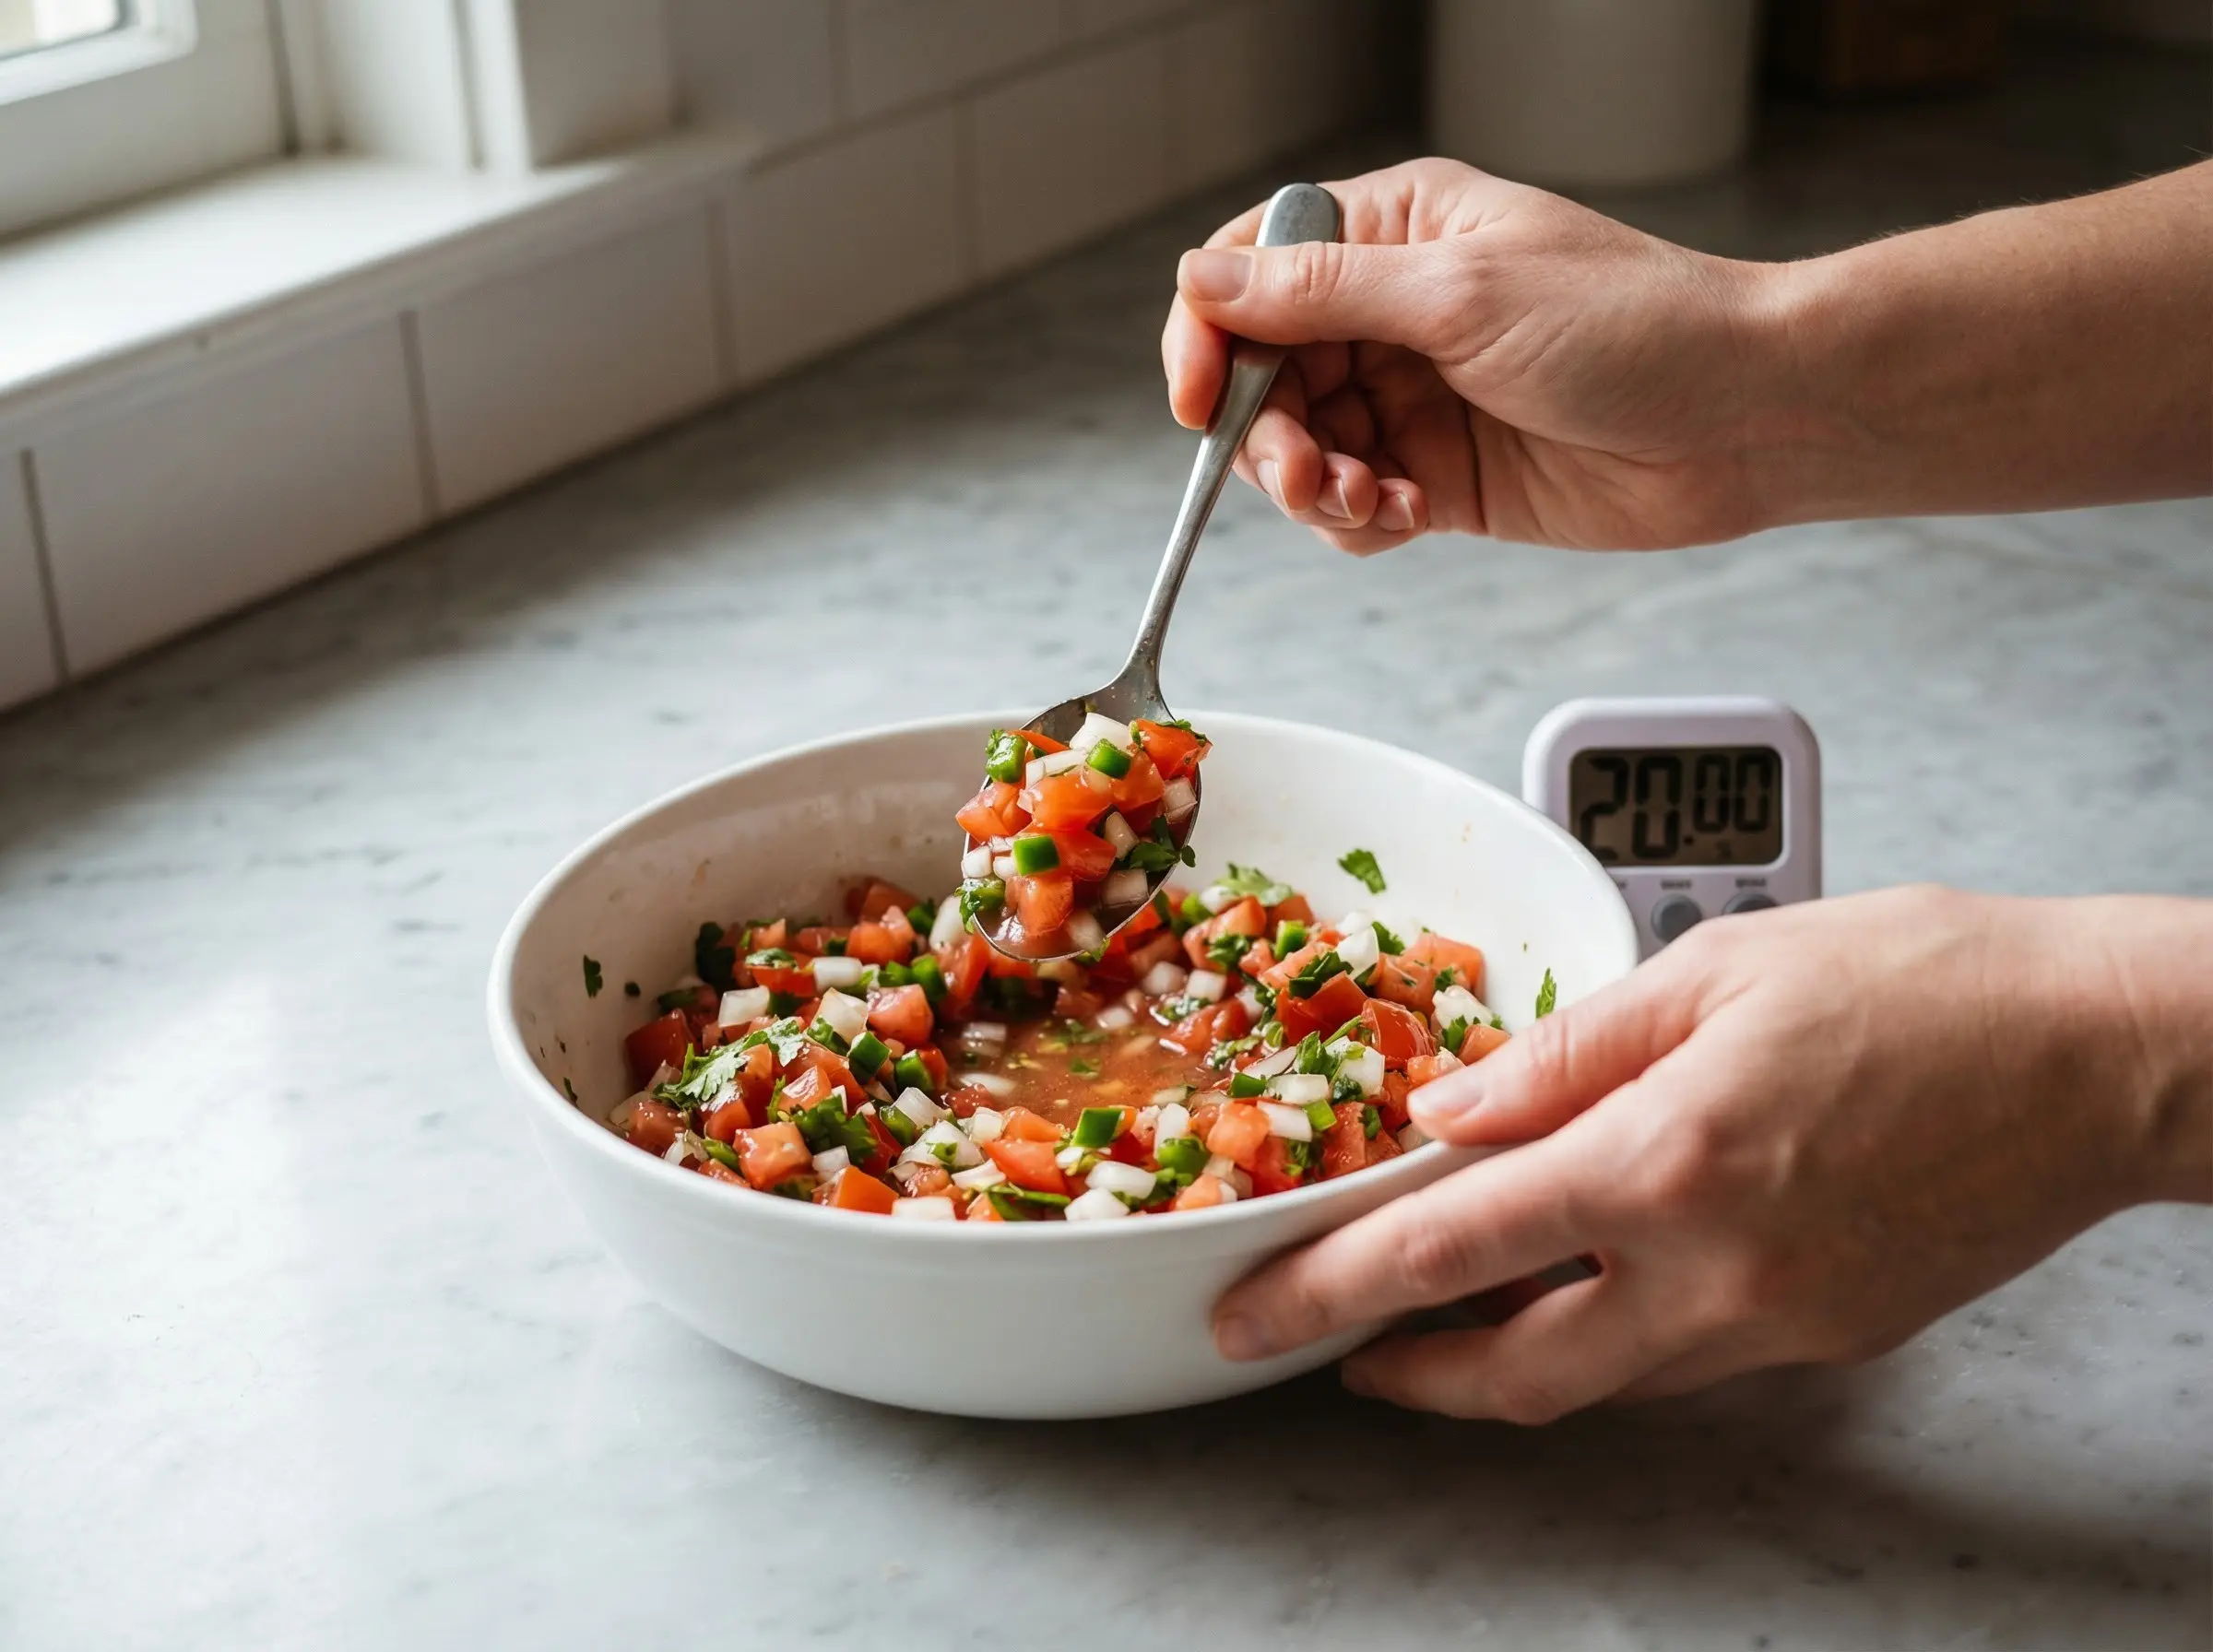
Season and dress the pico de gallo. Squeeze fresh lime juice over the vegetables - bottled lime juice will not provide the same bright, fresh flavor. Add the salt and cumin if using. Gently fold everything together with a spoon or spatula, being careful not to crush the tomatoes. The goal is even distribution while maintaining distinct, chunky pieces. Taste and adjust seasoning: you may want more lime for acidity, more salt to bring out the flavors, or more pepper for heat. The pico should taste bright, fresh, and well-balanced.
Step 5
Let the flavors meld. While pico de gallo can be served immediately, allowing it to rest for 15-30 minutes at room temperature lets the flavors marry beautifully. The salt draws out some tomato juice, the lime juice gently softens the onion''s raw edge, and all the components come together into a harmonious whole. During this time, the pico will release some liquid - this is normal and desirable, as this flavorful juice is perfect for drizzling or scooping.
Step 6
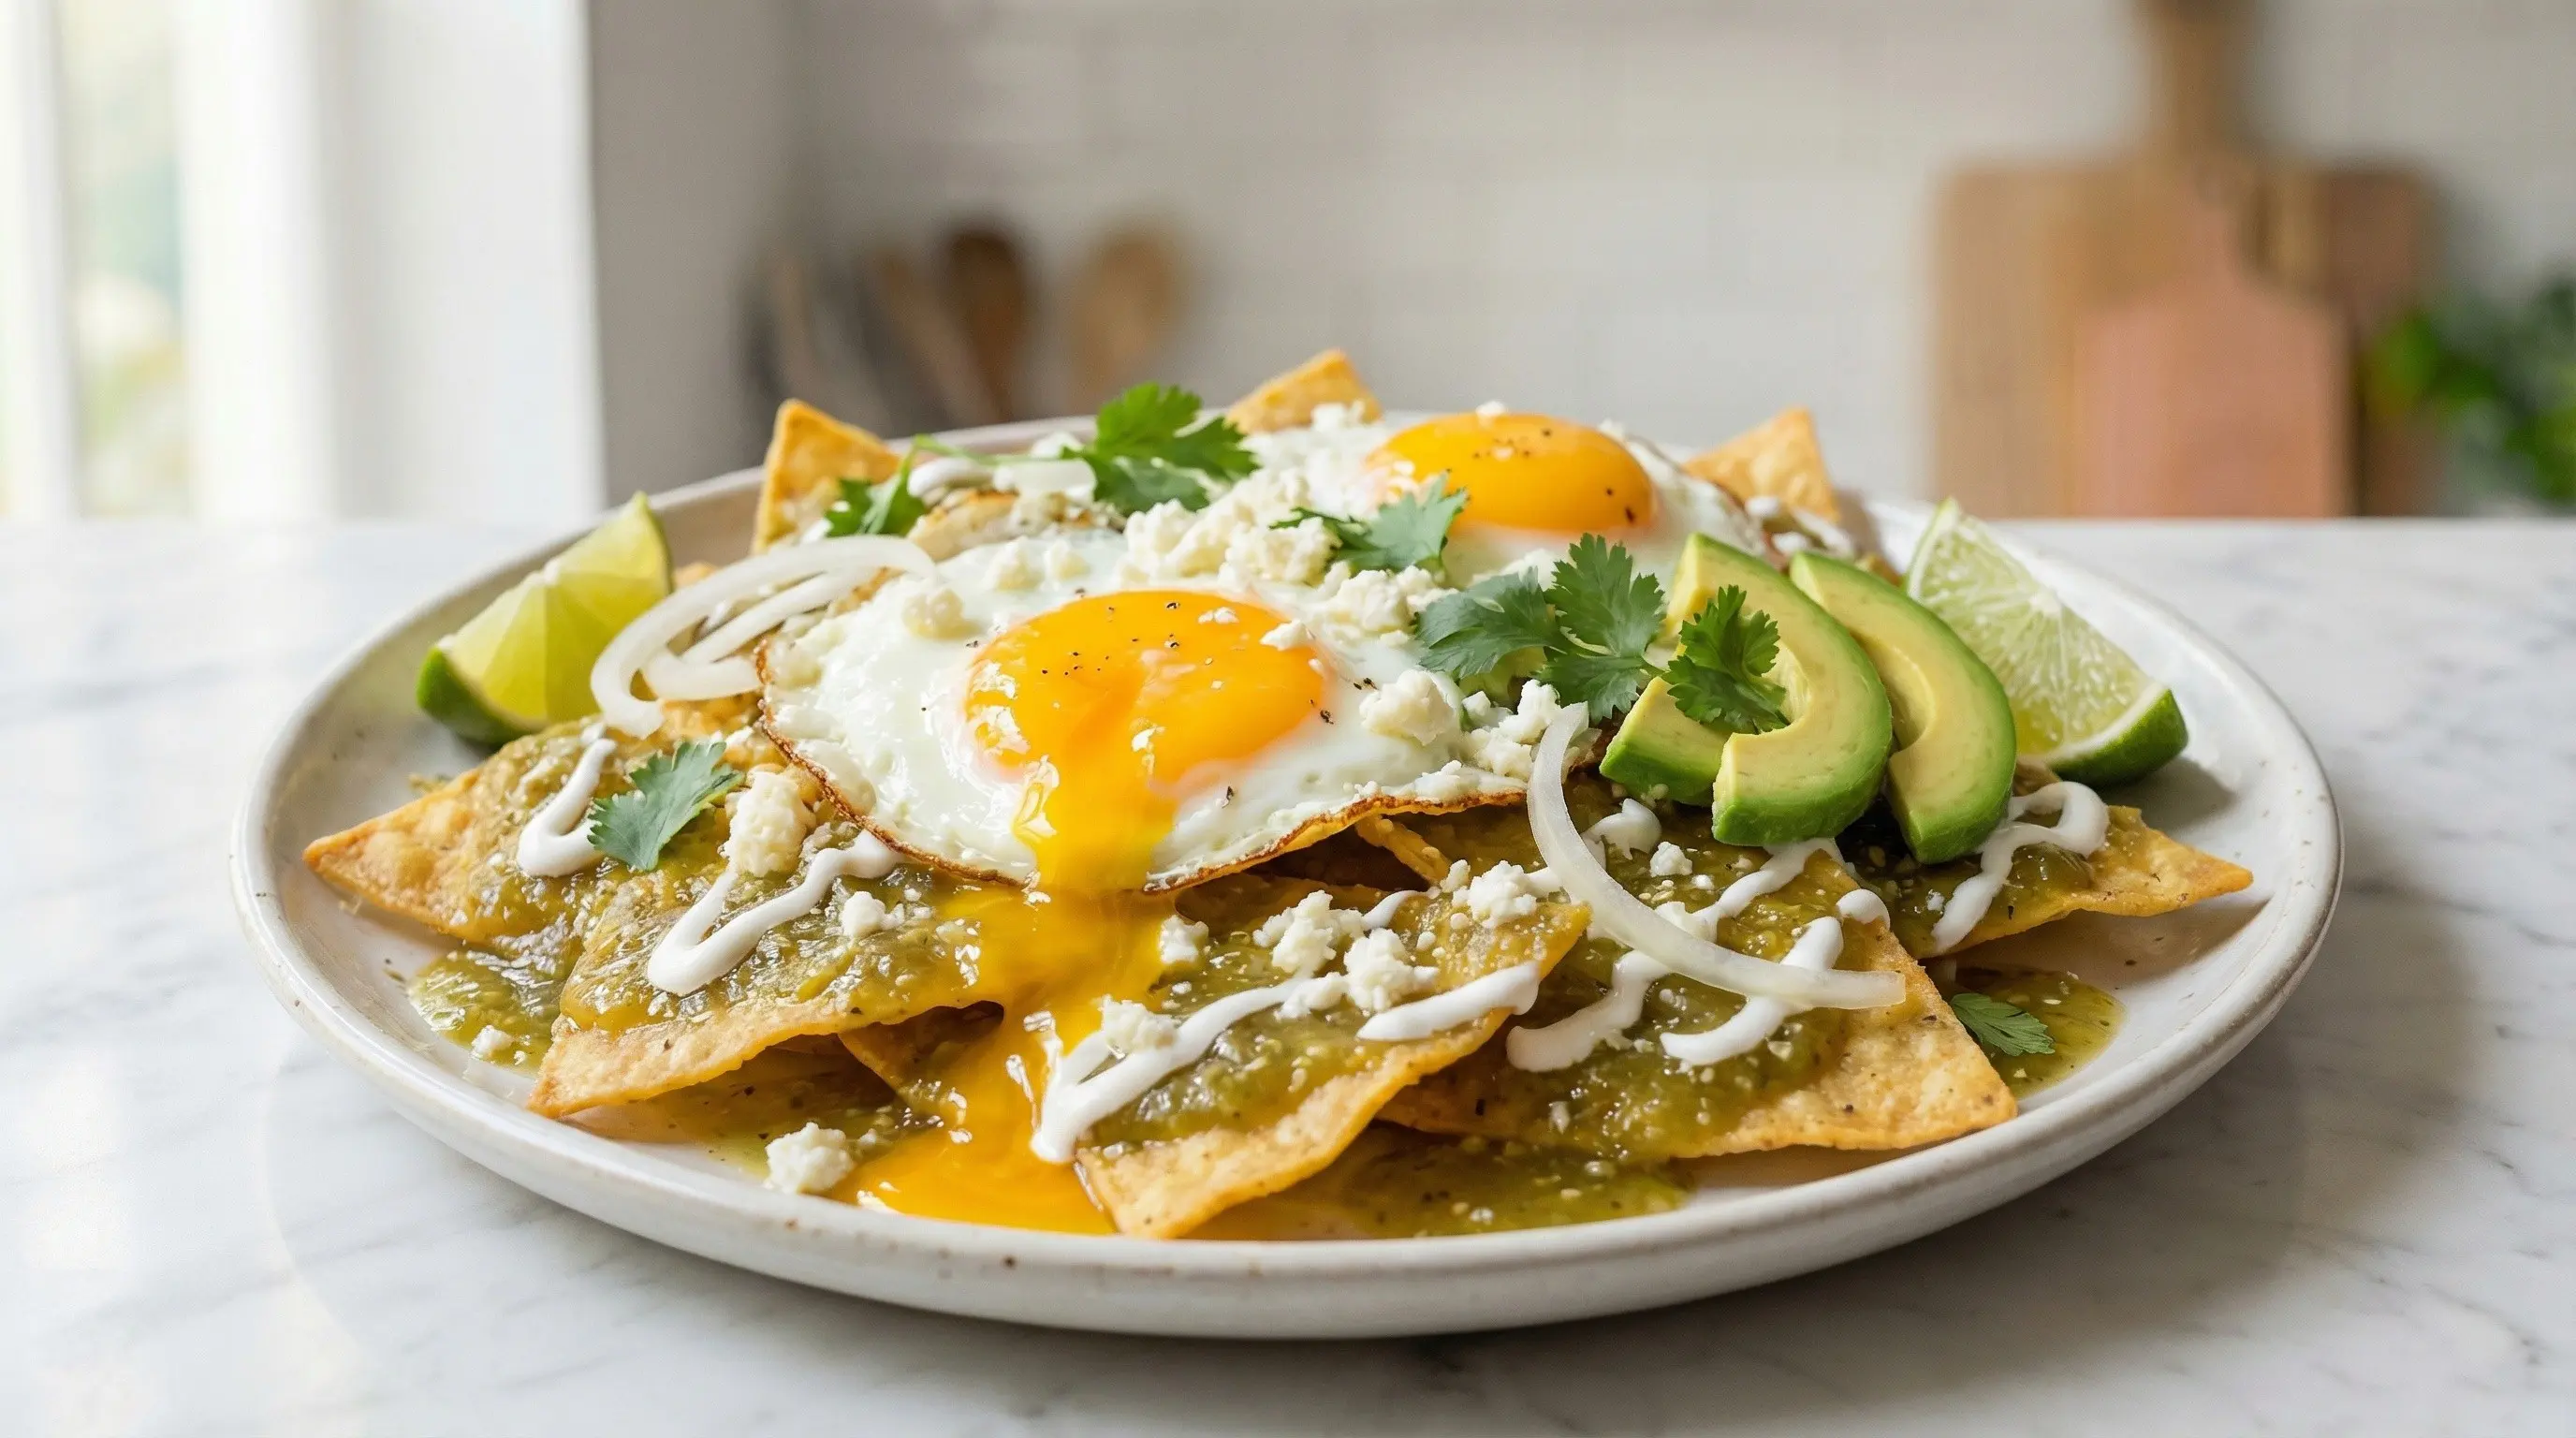
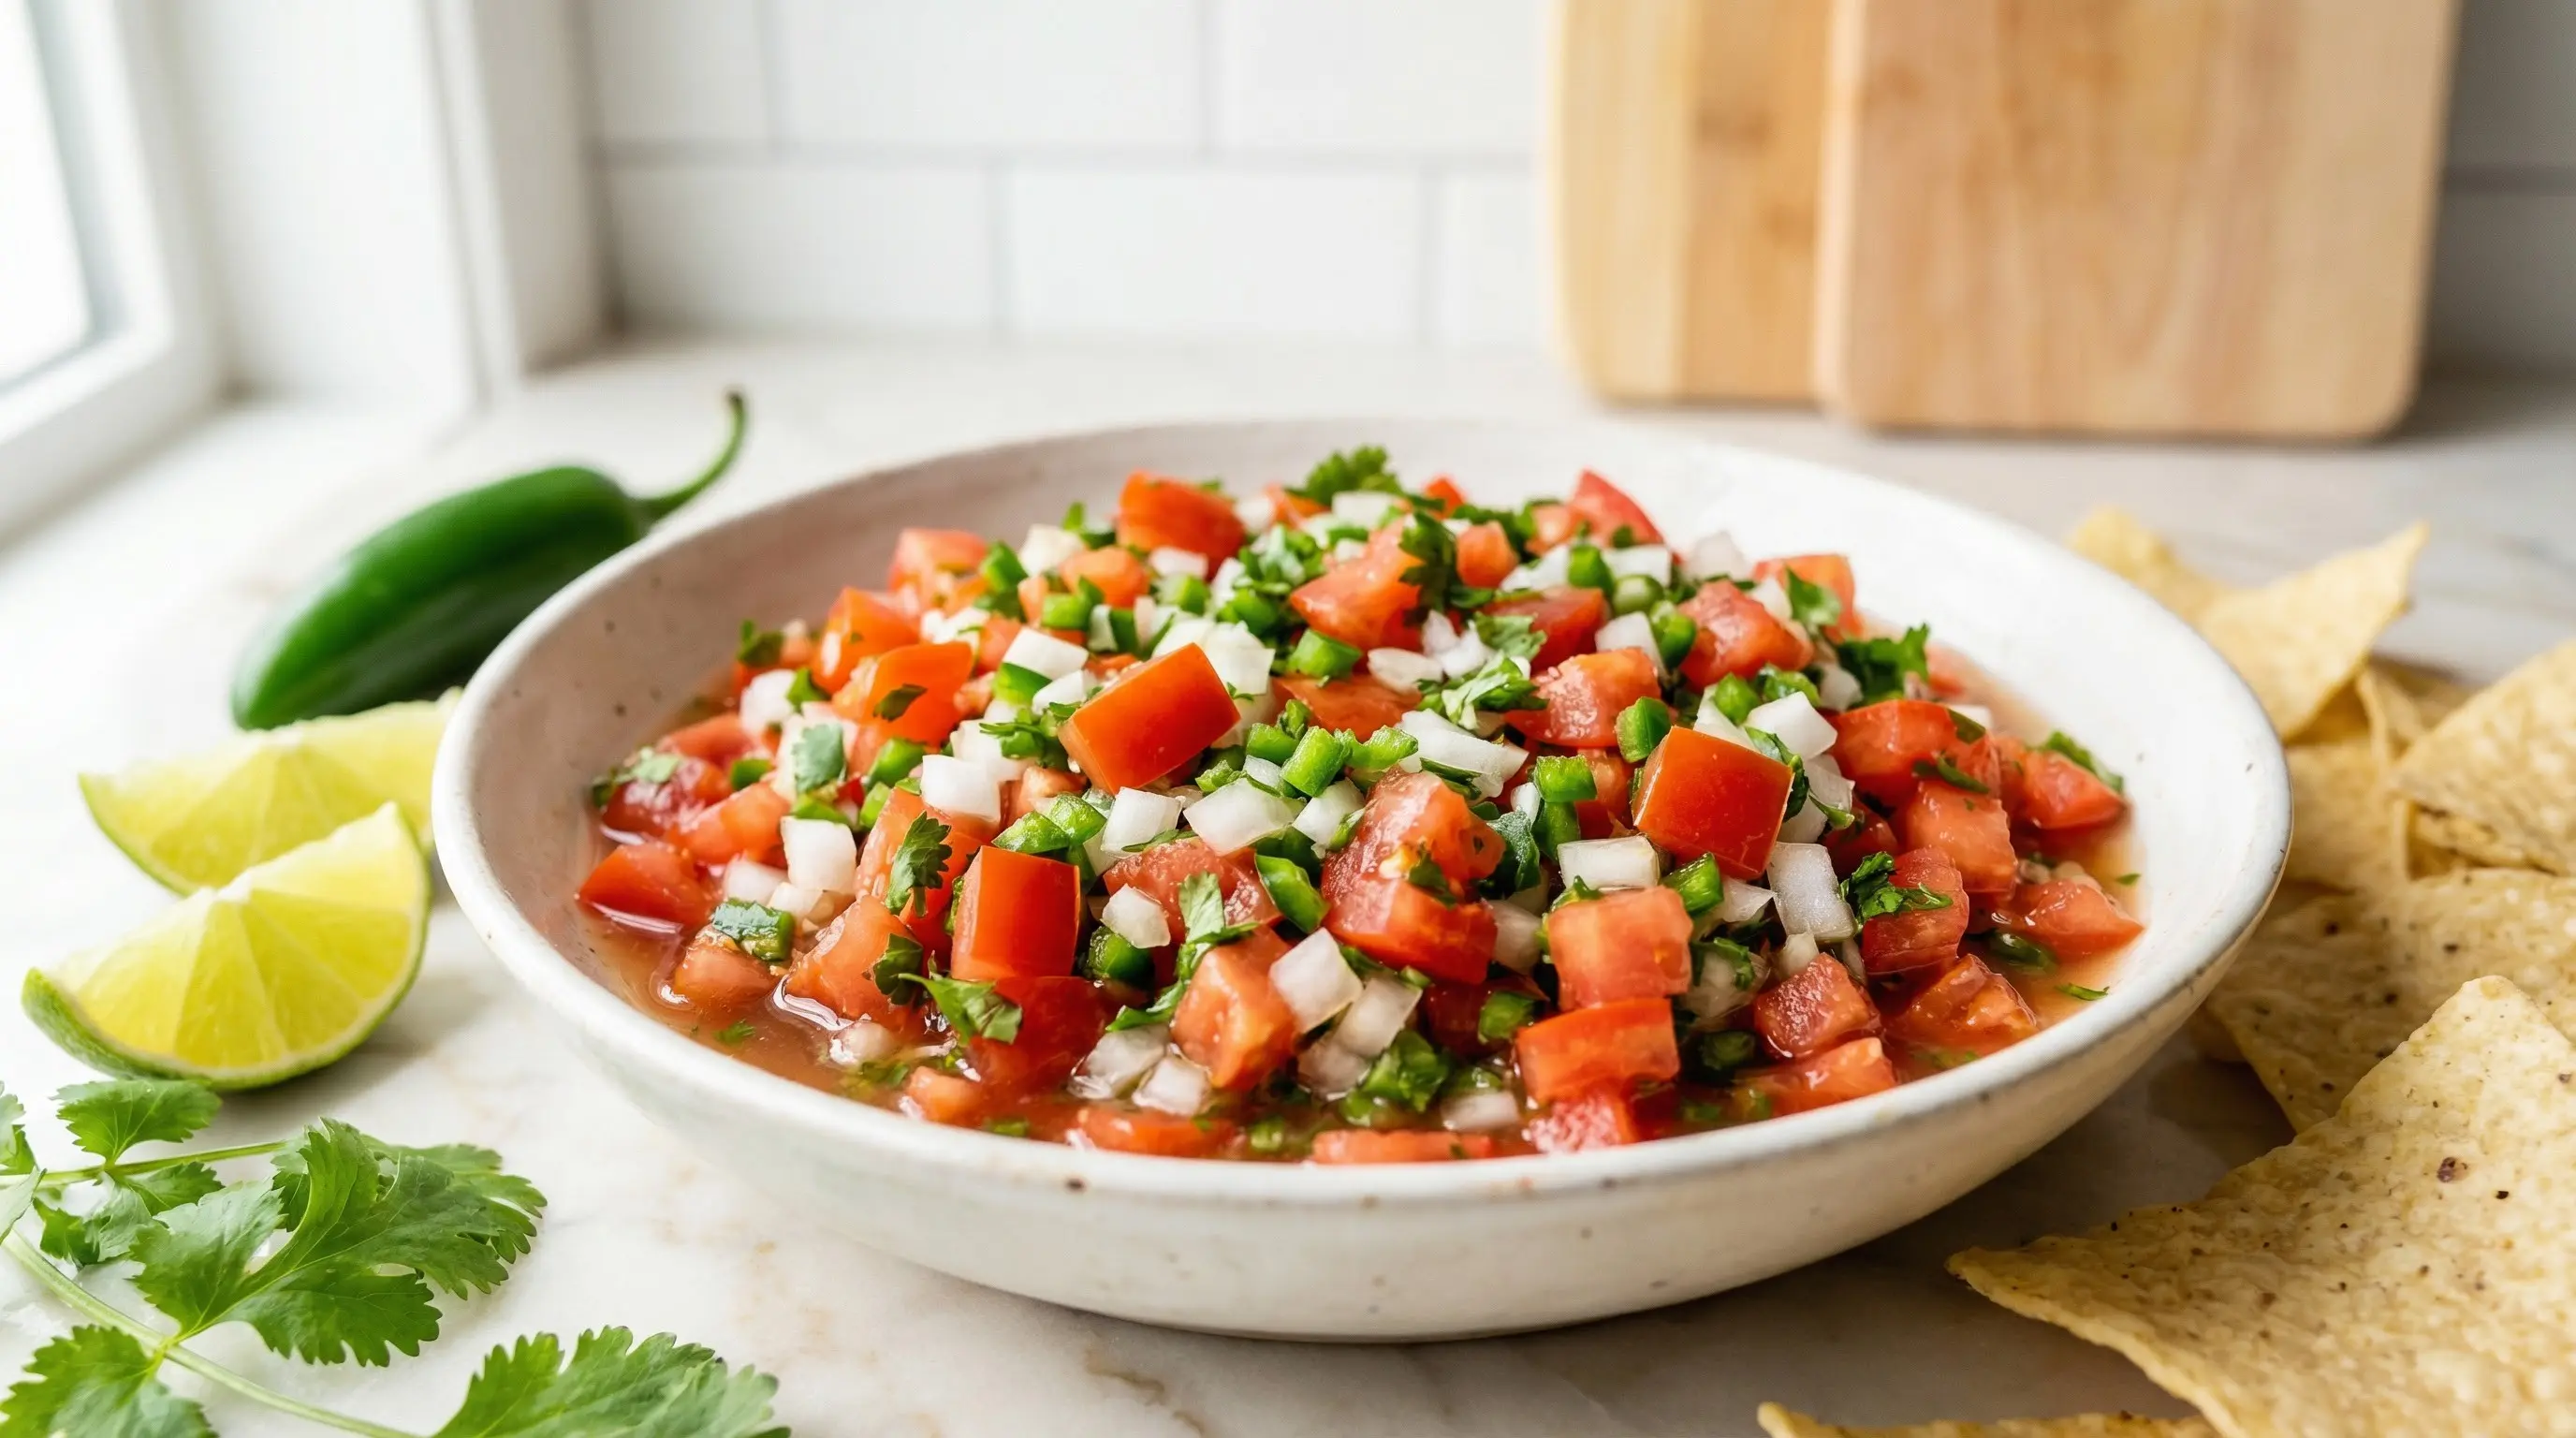
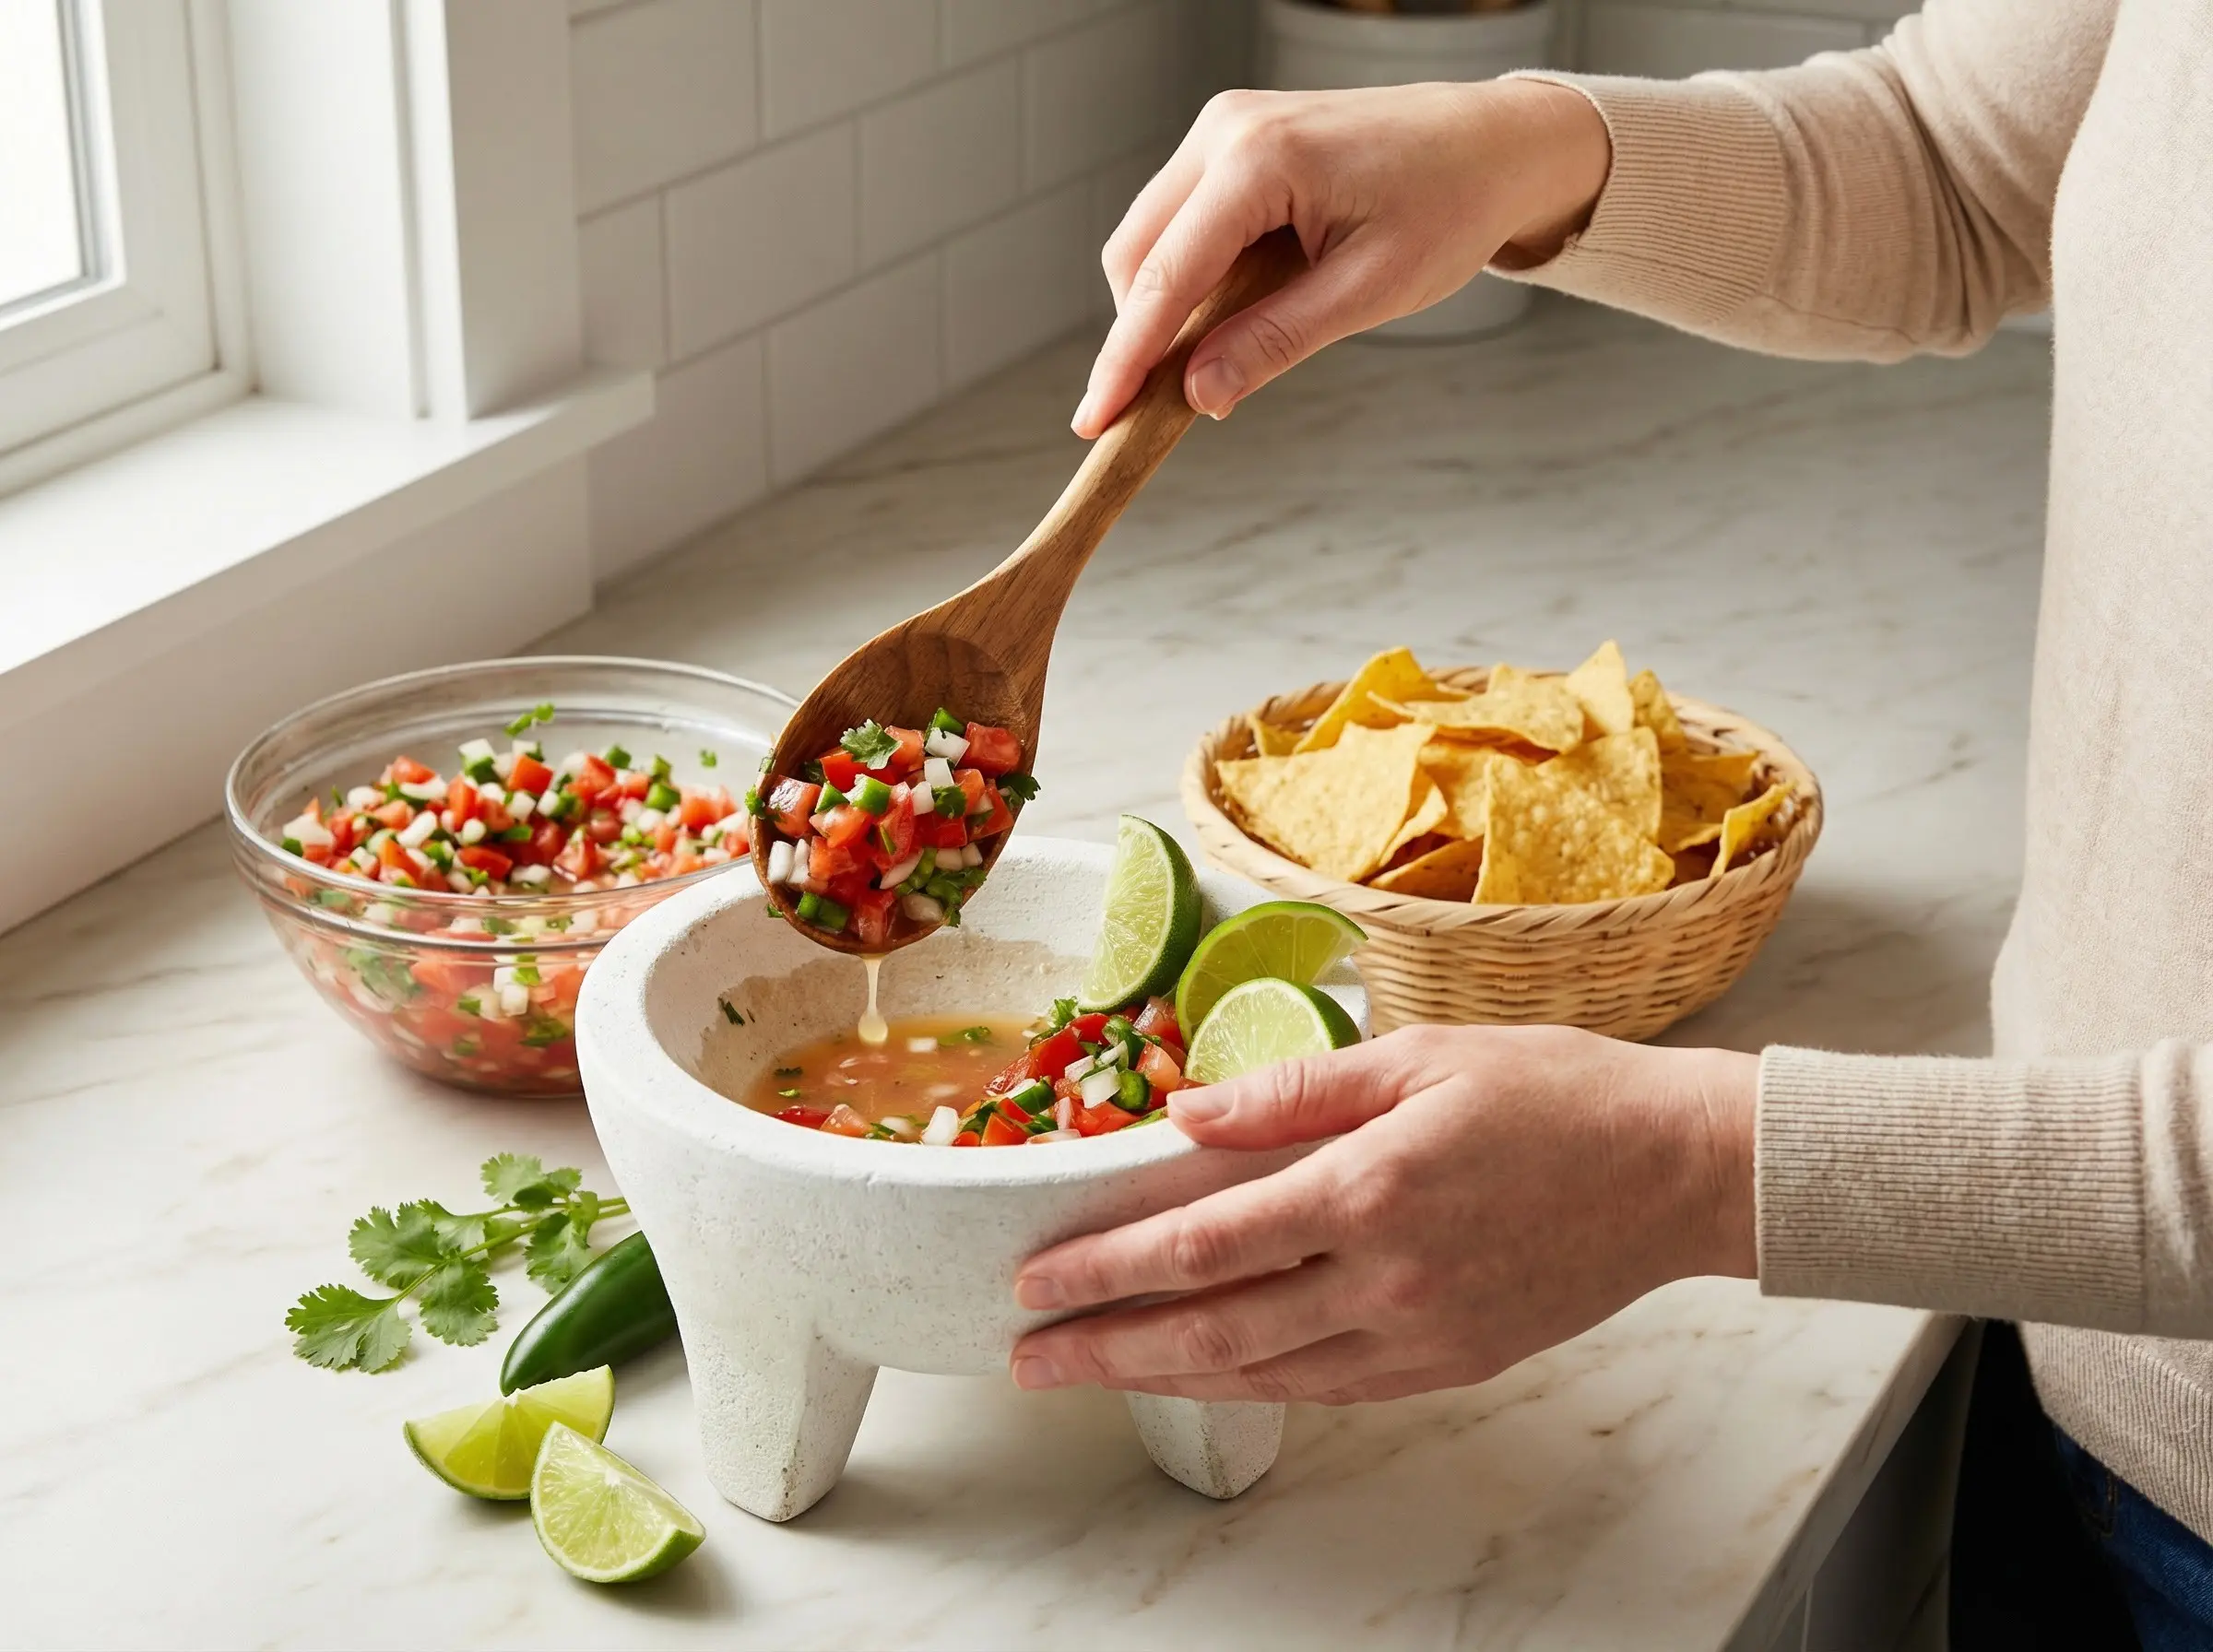
Serve fresh. Transfer the pico de gallo to a serving bowl and present with tortilla chips for scooping. Pico de gallo is also the perfect topping for tacos, burritos, quesadillas, grilled meats, fish, or eggs. It accompanies fajitas, enchiladas, and tostadas beautifully. For best results, serve within a few hours of making - the vegetables will soften and release more liquid over time, losing their fresh crunch. Store any leftovers refrigerated for up to 2 days, but drain excess liquid and know the texture will be softer. Never freeze pico de gallo - the vegetables will become mushy upon thawing. The beauty of this salsa is its freshness, so make it often and enjoy it immediately for the best experience.
You Might Also Like